Create Customer Step 5 Window
Use the Create Customer Step 5 window to assign the services or the service groups the account is using and for which they will be billed. You can assign multiple services to the account, however each service must be set up separately. If you have Service Groups defined, they display to the right of the services within the Data Entry Panel. If most of the options are the same for all the services the customer uses, you can select the appropriate service group to quickly set up the service information. You can make individual changes to a service once the service group is set up for the customer.
Notes:
|
To display the Create Customer Step 5 window:
1. From the Inquiry, click Tools and then, click Wizards.
2. In the Create section, click Customer.
3. To navigate
to the step that you want to maintain click Next
![]() or click Back
or click Back ![]() until
the data that you want to maintain displays in the Data Entry Panel.
until
the data that you want to maintain displays in the Data Entry Panel.
Create Customer Step 5 Data Entry Panel Example:

Data Entry Panel - Create Customer Step 5 Prompts
|
|
|
To determine the service the customer is billed for, click a service Description button. Or, to assign a Service Group that contains the services the customer is billed for, click a service group button.
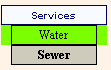
Highlighted
Service Example: |
|
|
|
To Add Location information to the customer after the service information is entered, click Next. Keyboard shortcut: [ALT + n] For directions for the next step, click here. |
|
To complete the Create Customer entries without adding location information,click Finish or press [ENTER]. Keyboard shortcut: [ALT + s] |
|
|
![]()