Click Select New Customer ID in the Steps Panel.
Or, click Next ![]() or click Back
or click Back ![]() until the data that you want to maintain displays in the Data Entry Panel.
until the data that you want to maintain displays in the Data Entry Panel.
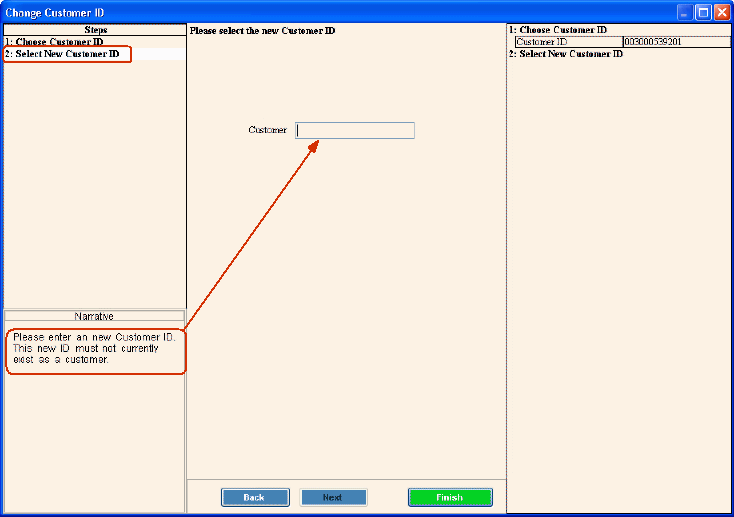
Change Customer ID Wizard - Select New Customer ID Step
This topic last opened by author on August 30, 2012 at 2:36 PM.
Use the Select New Customer ID Step to assign the new Customer ID to the customer account. The table following the panel example describes the data entry for this step in the Change Customer ID Wizard.
Notes:
The new Customer ID you maintain cannot be currently assigned to another customer.
For general information about using wizards, see the Wizard - Introduction.
For more information about working with data in fields, see the Data Entry Guidelines.
To display the Select New Customer ID Step in the Data Entry Panel:
1. Open the Change Customer ID Wizard.
2. To navigate to the step that you want to maintain:
Click Select New Customer ID in the Steps Panel.
Or, click Next ![]() or click Back
or click Back ![]() until the data that you want to maintain displays in the Data Entry Panel.
until the data that you want to maintain displays in the Data Entry Panel.
Data Entry Panel - Select New Customer ID Step Example:
|
Data Entry Panel - Change Customer ID - Select New Customer ID Step Prompts Tip: To see more information about a field, click the hyperlink for that field name. |
|
|
Enter the new Customer ID to be assigned to the customer. (up to 12 characters) Note: The Customer ID you are entering cannot be currently assigned to another customer. |
|
|
|
To display the previous step, click Back. Keyboard shortcut: [ALT + b] Tip: Back is not active for the first step. |
|
|
To display the next step, click Next or press [ENTER]. Keyboard shortcut: [ALT + n] Tip: Next is not active for the last step. |
|
|
To validate and save the data for all of the wizard steps, click Finish. The wizard window closes when the save is complete. Keyboard shortcut: [ALT + s] |
|
|
To close the wizard without validating or saving the data, click Close. |