Opening Account Master Explorer, click More.
To open the Account Master Explorer:
-
Click Daily Work from the Menu Bar.
-
Click Account Master Explorer.
Account Master Explorer Window Example:
Tip:
To see
detailed instructions for each section or field name in the examples below,
the cursor becomes a hand  when you position the cursor
over the field or section. Click
once to display the associated topic.
Viewing an Account Master Balance, click More.
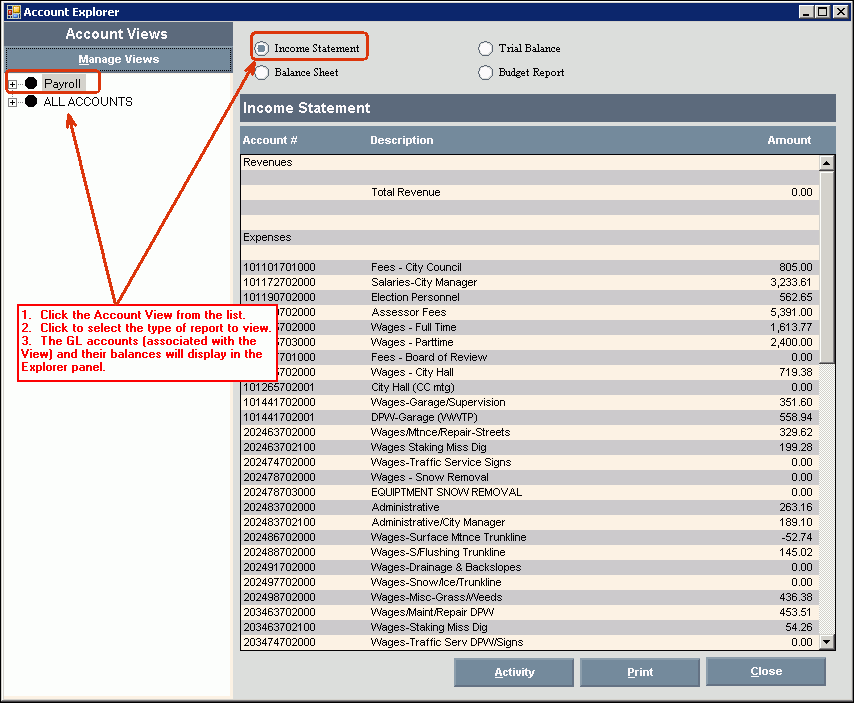
To view General Ledger account balances and the transactions that affect the balances simply do the following:
1. Click to select the Account View from
the Account View list.
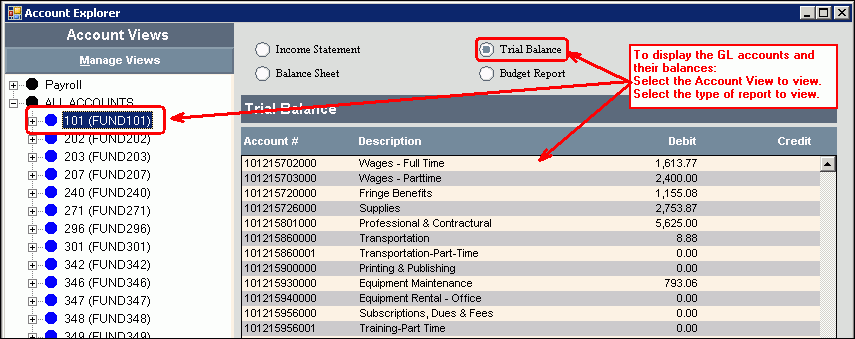
Tip: To
drill-down to a specific department, sub-account, fund or general ledger
account for more specific view, click the plus+ to the left of the view name
or general ledger account.
2. Click to select the type of report to view and the general ledger information displays in the Explorer panel as seen in the example below.
Generating an Account Master Activity Report, click More.
Use the Activity Report feature to view the transactions that affected a particular account so far this year. In addition, you can see the activity from previous years as well.
To view the Activity Report:
1. Click to highlight the specific GL Account to view activity for.
2. Click
Activity and the
following window displays.
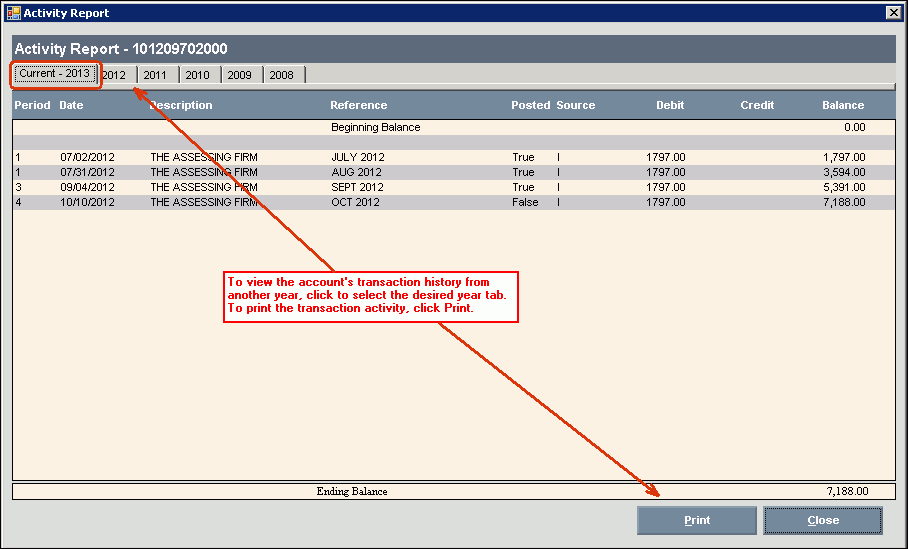
3. To view the GL Account activity for another year, click the desired year tab.
4. To
print the activity report, click Print . For
directions, see Printing an Account Master Explorer Report.
Printing an Account Master Explorer Report, click More.
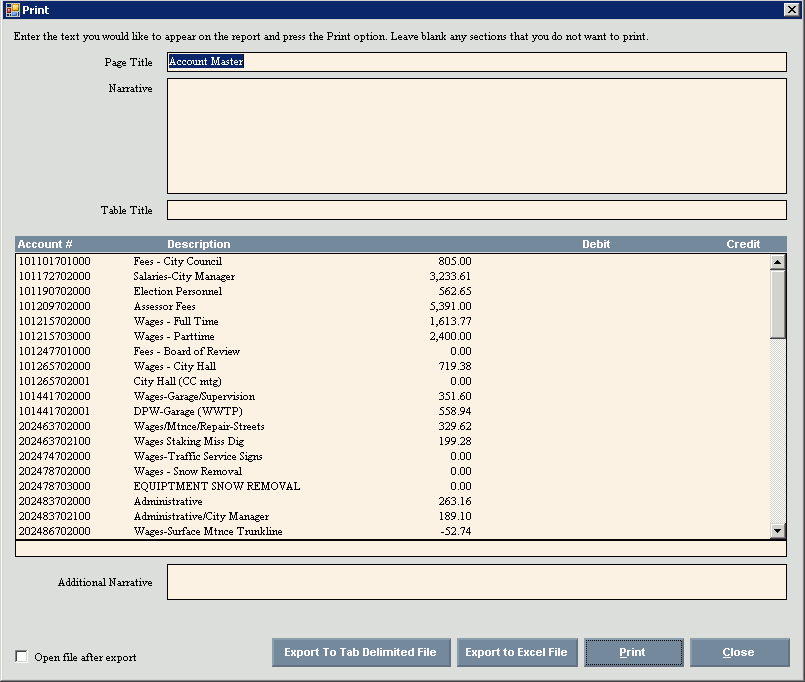
Use the Print command  to print or transfer to Excel the information that has been
generated for the specific Account Master Explorer report or Account Master
Activity report. In
addition, you can save the information as a tab delimited file for use
in another program such as, Microsoft Excel or Notepad.
After clicking Print, the following window displays:
|
Print Prompts Tip: To see more information about a field, click the hyperlink for the field name. | |
|
|
To export the information as a tab delimited file, click Export To Tab Delimited File. For directions, see Export to Tab Delimited File Step below. |
|
|
To export the information in Excel format, click Export to Excel File. For directions, see Export to Excel File Step below. |
|
|
To print the report, click Print. Note: Before you click print, you can add additional text and page formatting, if desired. See Print Step. |
|
|
To return to the report or Explorer window, click Close. |
|
Print Step | |
|
Additional Text |
You can include additional text to the top and/or bottom of the report. Additional Text options:
|
|
Print Landscape |
To print the report in landscape orientation, click Landscape. To print the report with double spaces between lines, click Double Space. |
|
Create Tab Delimited or Excel File Step | |
|
|
To export as a tab delimited file, click Export To Tab Delimited File. To export in Excel format, click Export to Excel File. |
|
Open file after export |
To automatically open the file in the appropriate program after it is exported and saved in the desired format, click to check this box. To omit opening the file after exporting and saving in the desired format, leave this box blank. |
|
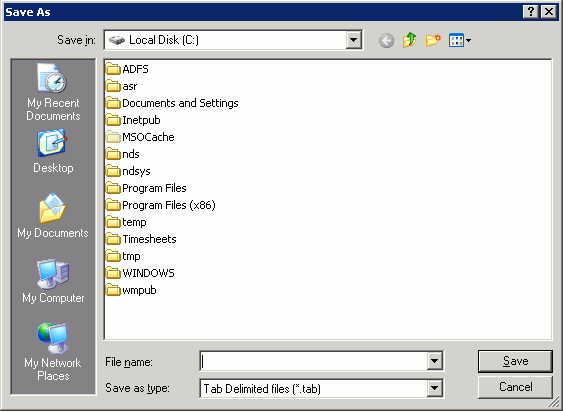
After clicking Export to Tab Delimited File or Export to Excel File, the following window displays:
| |
|
Save In |
Click to select the directory for the destination location to save the file. |
|
File Name |
Enter the file name of the file to be saved. |
|
Save as type |
The default Save as Type is selected for you. To change, click another choice in the drop-down list. |
|
|
To save the file with the path and file name entered, click Save. Note: The file is saved as a tab delimited file or as an Excel format. |
|
|
To return to the report or Explorer window without saving, click Cancel. |
Report Sample, click More.


