Process Payroll A/P Checks
Process Payroll A/P Checks allows you to automatically generate A/P checks for employee withholding amounts and employer fringes and taxes that will be paid through Payroll. Deductions and fringes coded with a vendor payment method of C for checks or CN for non-printing checks will be processed and paid here.
Directions:
To open, click Payroll from the menu. Then click Vendor Invoices and Checks and Process Payroll A/P Checks.
Process Payroll A/P Checks Window Example:
Process Payroll A/P Checks Prompts
|
|
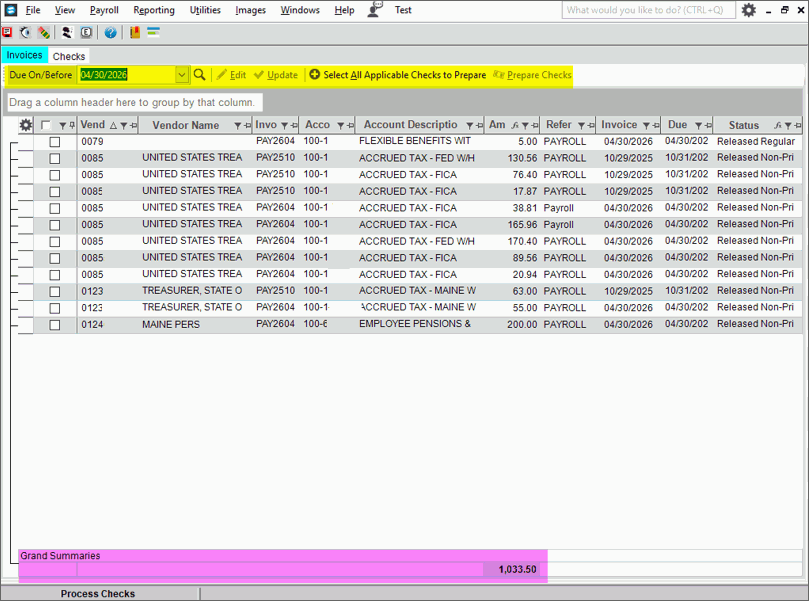
Invoices
Tab |
|
Due on/Before |
Today's
date displays, but this can be changed to another date if desired.
Click Search |
Changing Invoice Due Dates |
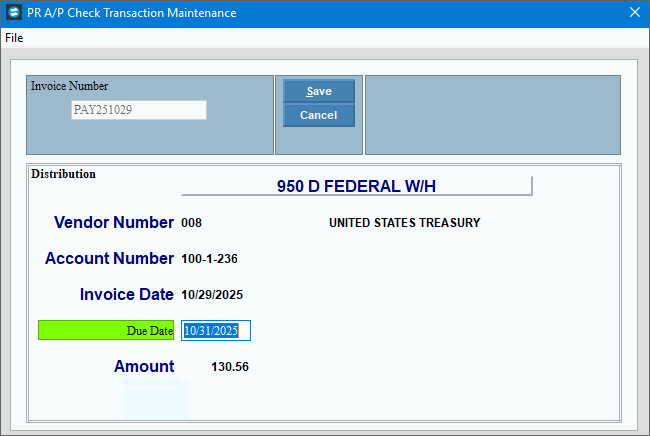
If you need to change the due date for a single invoice, double-click the desired line and PR A/P Check Transaction Maintenance screen opens where the date can be edited. Be sure to click Save to complete the change.
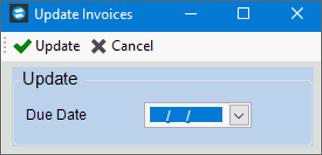
To change the due date for multiple
invoices, click the checkbox on the rows to change and then click
Update
|
Prepare PR A/P ChecksAfter the invoices have been updated to the appropriate due dates, the checks must be prepared for the PR invoices to be paid. Each invoice to be paid must be selected. To select the invoices: You can check the box on each desired row. Or to check
all visible rows, check Select
All Applicable Checks to Prepare Or use the filters on the column headings to hide rows you do not wish to include and then select the check box in the header column to check all the visible rows. After the
invoices are selected, click Prepare
Checks
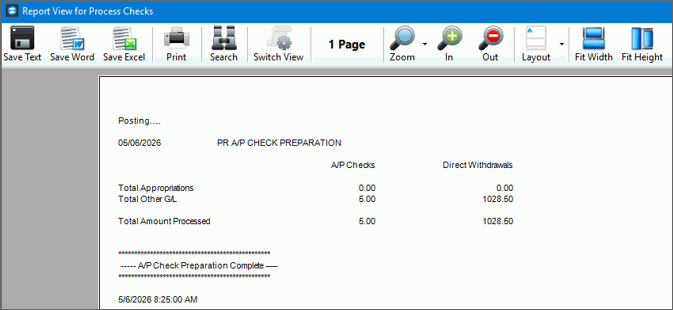
When it is complete, a copy of the Check Preparation report is displayed. A copy of the report is saved to Report History as well.
|
|
Print ChecksAfter the checks are prepared the
Checks tab If all the prepared checks are correct, you are ready to print the checks. Multiple checks for a vendor will be generated if invoices are set to be paid on separate checks and or if invoices have different remittance addresses assigned. Note: If you
discover after the checks are prepared that a check has been included
that should not have been or vice versa, select Clear
Click
Print Checks
|
|
Check Date |
Enter the date to print on the checks. |
Beginning Check Number |
Enter the check number of the first check to print. |
Last Good Check Number (for restart) |
If this is not a restart, leave this box unchecked. If your check run stopped unexpectedly, perhaps during a printer jam, enter the check number of the last check that printed correctly. |
Sort By |
To determine order the checks should sort and print, click a choice in the list. Sort Options:
|
Check Message |
To include an optional message on the checks, enter the text to include. (up to 30 characters). |
|
To generate
the checks, click Print Keyboard shortcut: [ALT + p] Or, to print checks
to the Print View window, click Print View  . .
|
Check Remittance |
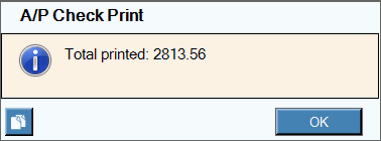
If the A/P Check Remittance Advice is active, and after the A/P Checks have printed, a prompt is displayed to notify you that the A/P Remittance will be printed and the total amount of the check for which the remits will be generated displays. Click Ok to continue.
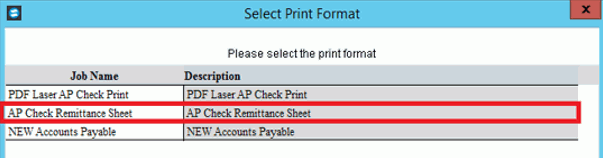
Next, the job format prompt displays where you can select the job for the A/P remittance document and select a printer to which to send the job. Then, the remits will print and should be included with the corresponding A/P check.
|
Print Check RegisterUse the Print Check Register step to generate a listing of the printed PR A/P checks. The register can be run as many times as necessary. Note: A copy of the Check Register is saved in report history for a complete audit trail. To see a sample of the register, click here. From
Process PR A/P Checks, select Print Check Register
|
|
Register Report Writer |
Review the Report Writer prompts and make changes to the sort, if applicable. To
send the report to the screen, click Print Preview Or to
print the report, select Print |
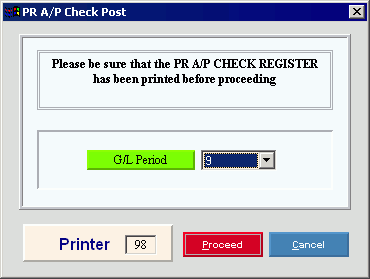
A/P Checks PostUse the Post A/P Checks function to post the payroll A/P checks that have been prepared and printed, to the appropriate files. From
Process PR A/P Checks select Post Checks
|
|
G/L Period |
Select the G/L period for which to create journal entries. |
|
To begin, click Proceed.
A posting Summary is provided at the end of the Post. This is saved to Report History as well. After reviewing the summary, click Close and the Process Checks is ready for the next PR AP Process Checks run. |


 .
.
 .
. .
.
 is opened, showing the checks to be printed and a total dollar
amount of the checks to be printed.
is opened, showing the checks to be printed and a total dollar
amount of the checks to be printed.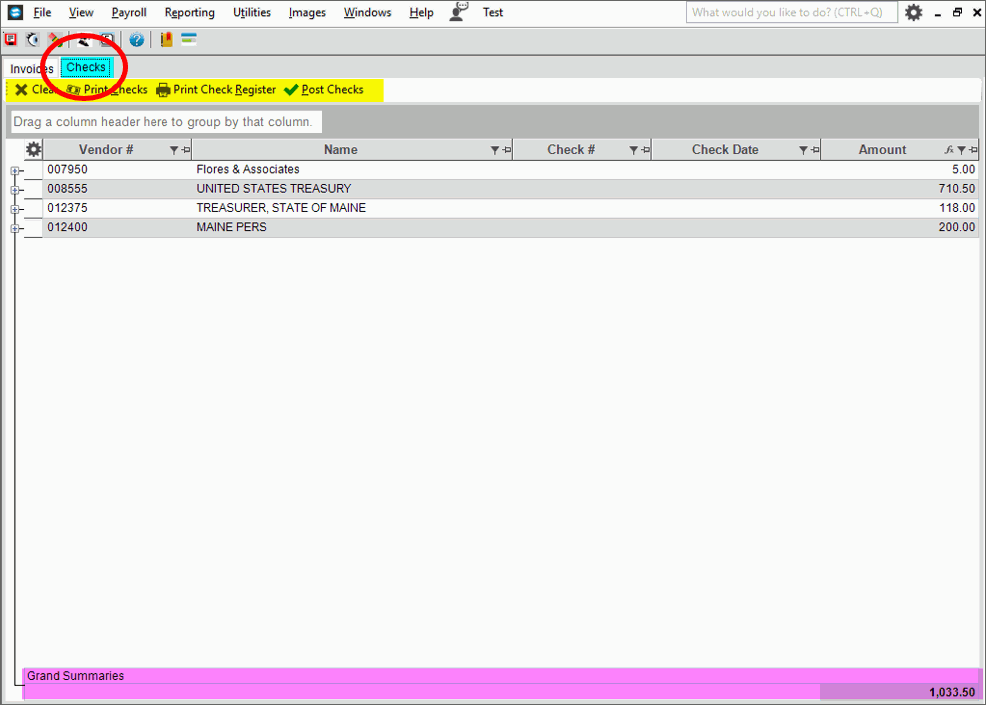


 and the following
screen is displayed.
and the following
screen is displayed.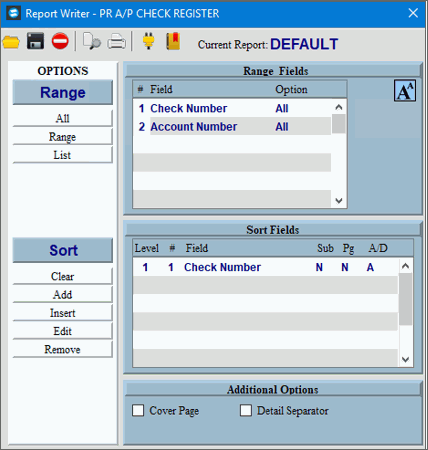
 .
.