Check Explorer
Use the Check Explorer to access individual paychecks or a group of checks from history for an employee or group of employees. Summary totals are available for the selected paychecks. The list of paychecks can be printed and exported to Microsoft Excel or Word.
There is also a Paycheck History in Employee Maintenance that is like the Check Explorer except you can only view one employee at a time.
Directions:
To display the Check Explorer click Payroll from the menu and then click Check Explorer.
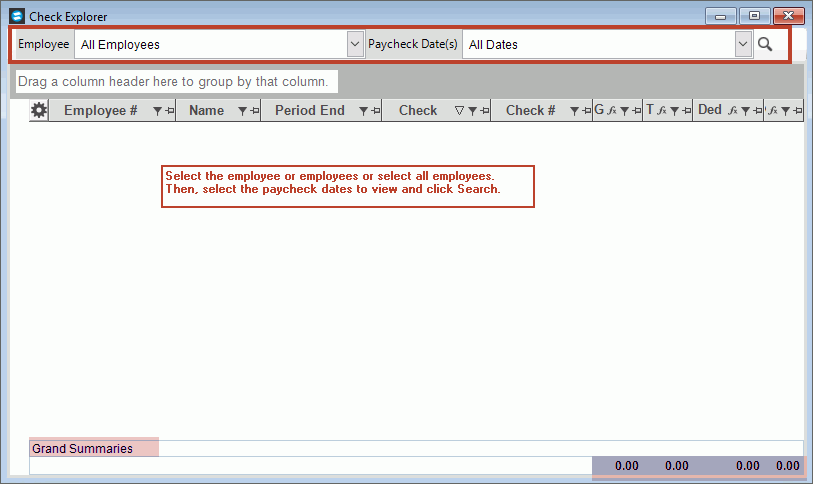
Check Explorer Window Example:
Check Explorer Prompts
|
|
Select the desired employee, or to select several employees check the box next to the desired employees or for all employees select All Employees from the list. |
|
From the
list of dates, select the dates for which to view the paychecks
and then click Search
|
|
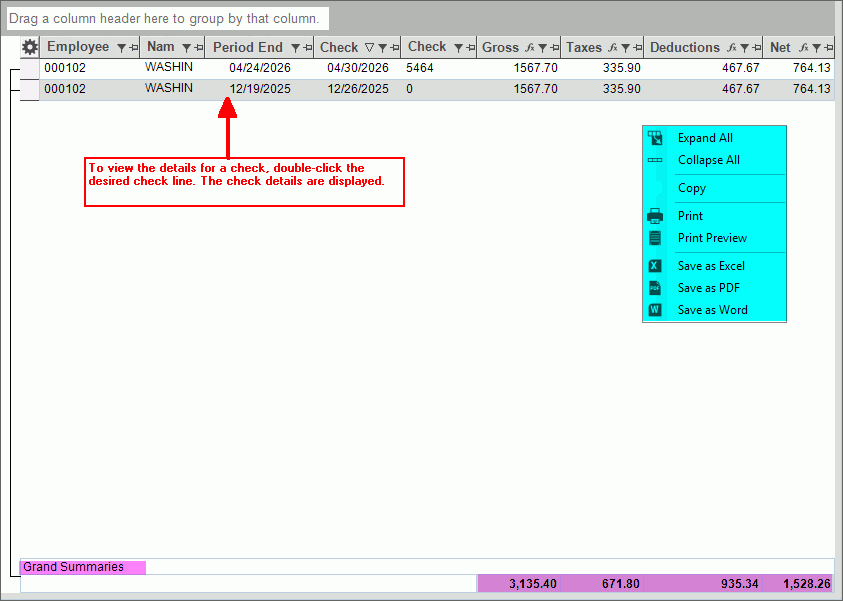
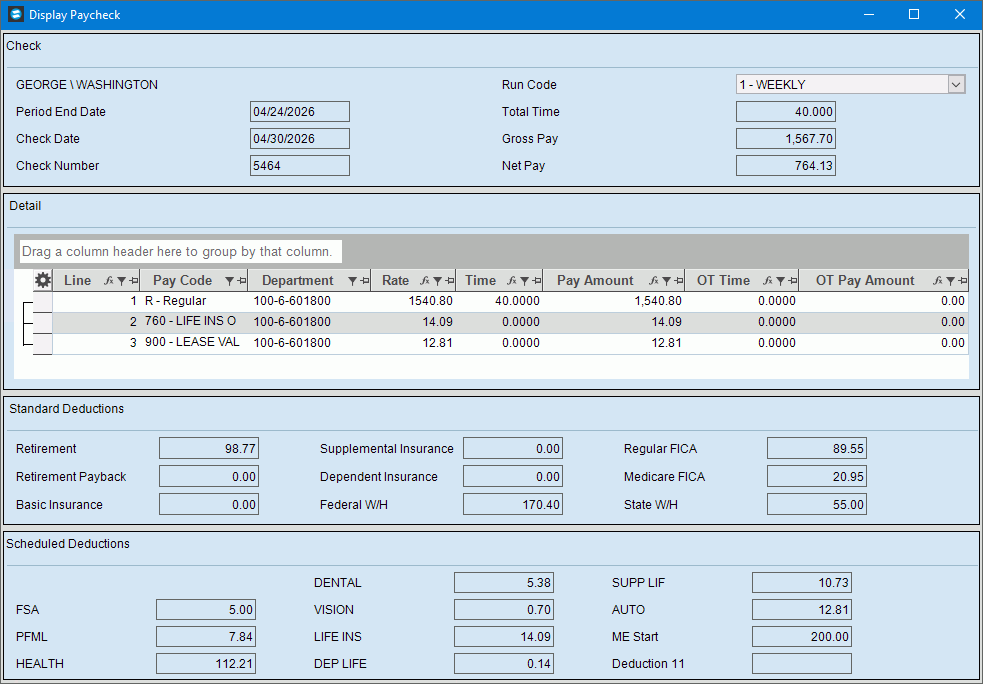
Check ListAfter selecting the dates the paychecks are listed. To view the details of a check, double-click the desired line and all the check details are displayed as shown below the check list. To print the list or export the list to Microsoft Excel or Word, right-click anywhere in the list and select the desired option.
Paycheck DetailsAfter double-clicking a paycheck line, the check details are displayed for your review.
|
|
Right-click Functions |
To see these options, right-click in the grid.
Printing & Exporting functions can be handy for further manipulating or formatting the data or sending copies to coworkers. In addition, Print and Print Preview functions are available.
|
Window Save as |
The Windows Save As steps:
|

 .
.