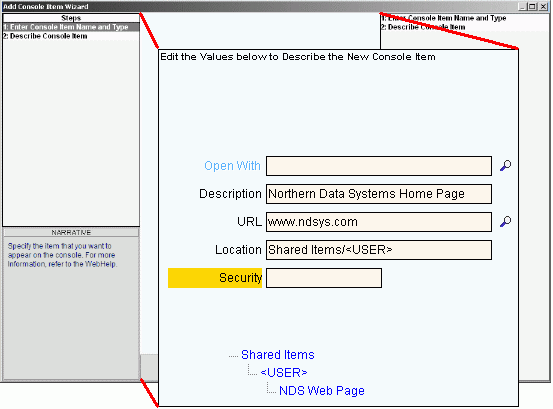
Add Console Item Wizard - Describe Console Item Step
Use the Describe Console Item Step to locate and define the console item that you want to add to the Executive Console and the application's User Console. The table following the window panel example describes the data entry for the Add Console Item Wizard.
For additional information, click More.
Directions:
To display the Describe Console Item Step in the Data Entry Panel:
1. Open the Add Console Item Wizard.
2. Fill in the Enter Console Item Name and Type step.
3. Press [ENTER].
Data Entry Panel - Describe Console Item Step Example:
|
Data Entry Panel - Describe Console Item Step Prompts Tip: To see more information about a field, click the hyperlink for that field name. |
|
|
Enter the path and file name for an executable file (*.exe) that you want to launch from the consoles. (unlimited characters) Example: To specify the Microsoft Calculator, enter... Tips:
|
|
|
Contains a favorite file name that you want to add to the consoles. (unlimited characters) Note: You must use Search Tip: This field is active only when you specify one of the following Console Item Types: Crystal Report Viewer, Crystal Report, Microsoft Access, Microsoft Word, Microsoft Excel, Image, Other, or Text. |
|
|
Enter the Internet address for the web page that you want to add to the consoles. (unlimited characters) Example: www.ndsys.com Tip: This field is active only if you specify "Web" for the Console Item Type. |
|
|
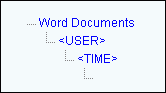
Optionally define how to nest console items within folder levels. (unlimited characters) Tips:
|
|
|
Enter the .jump code, if you want to secure this console item. (up to 8 characters) Note: For information about Security, contact NDS Technical Support. |
|
|
|
To display the previous step, click Back. Keyboard shortcut: [ALT + b] Tip: Back is not active for the first step. |
|
|
To display the next step, click Next or press [ENTER]. Keyboard shortcut: [ALT + n] Tip: Next is not active for the last step. |
|
|
To validate and save the data for all of the wizard steps, click Finish. The wizard window closes when the save is complete. Keyboard shortcut: [ALT + s] |
|
|
To close the wizard without validating or saving the data, click Close. |
![]()