Patient Mailing Labels Procedure
This procedure outlines how to create a Microsoft Word Mail Merge document that is used to print patient mailing labels with up-to-date patient data.
Update the patient data to match the patients who are receiving a patient letter.
1. Open Microsoft Excel.
2. To open a document called Collections Labels:
Tip: You should be able to find this document on your PC under the S directory.
a. From the Menu Bar, click File.
b. Click Open.
c. At the Look in prompt, click My Computer in the drop-down list and then search the S directory for Collections Labels.xls.
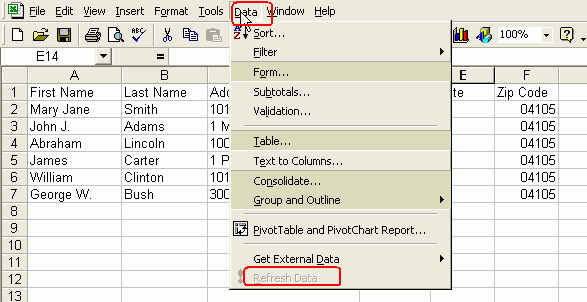
2. From the Excel menu bar, click Data, then click Refresh Data. This will bring the patient accounts from the workfile into Excel to match the patients who will be receiving a letter.
3. Click Save.
4. Click Close to close the Excel worksheet.
Note: The directions below pertain to Microsoft Word version 2003. Older versions work slightly differently. For more information, contact NDS Technical Support.
1. Open Microsoft Word (version 2003). You will use Word to create a mail merge document for printing patient labels.
2. Open the Merge Mail Toolbar by clicking View on the menu bar, click Toolbars and then click Mail Merge.
3. From the Mail Merge Toolbar, click Main Document Setup button.
Tip: To find the button, you can hover the mouse over the buttons to display the button name.
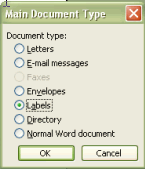
4. From the Main Document Type Dialog window, select Labels.
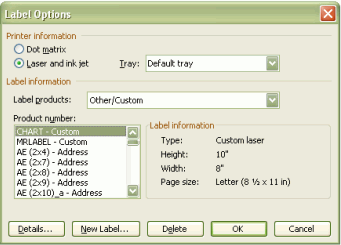
5. From the Labels Options window, select the desired type of label to be printed. See example below.
a. Under Printer Information select the printer to use.
b. Under Label Information select the type of label you are using.
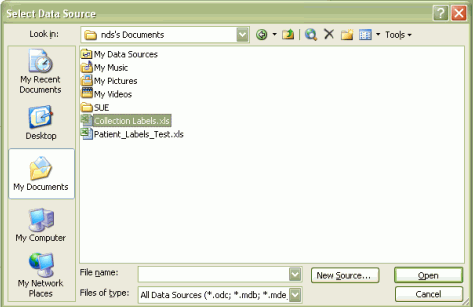
6. Next, click Open Data Source from the Mail Merge Toolbar and search for the Excel database (file) to use called Collection Labels.xls.
a. At the Look In prompt, click My Computer from the drop-down list and then click the S directory to find the file.
b. Then, click Open.
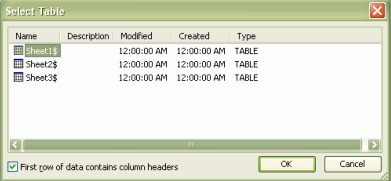
7. From the Select Table window, click to select Sheet 1 and click OK.
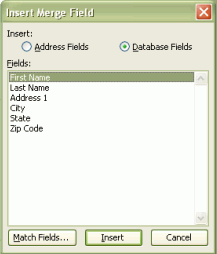
8. Next, click Insert Merge Field button on the Mail Merge Toolbar to begin adding the desired label fields. See example below.
Note: Choose only one field at a time.
a. From the Insert Merge Field window, click the appropriate field name to insert into the label.
b. Click Insert.
c. Click Close to close the Insert Merge Field window between each selection in order to format the label.
d. Add the appropriate formatting such as, spaces, paragraph returns, commas and other formatting to make the fields print correctly on the labels.
For example, you can add a space between First Name and Last Name fields.
e. After each field is entered and formatted, click the View Merged Data button to input data into the field to verify your formatting.

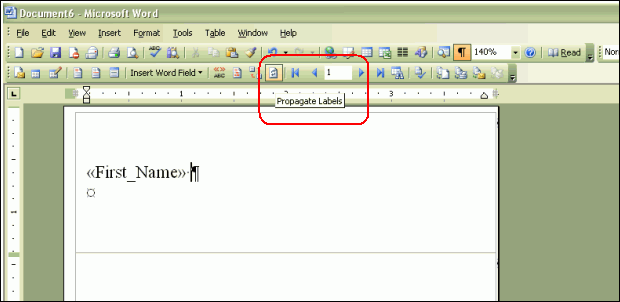
9. When all field names are inserted into the mailing label document, click Propagate Labels to fill the patient data into the appropriate spaces in each mailing label.
10. Print the patient labels.
a. First, click Print Preview before printing to verify the patients who will have mailing labels printed.
b. Click Print to print the labels.
11. Save this mail merge document for future use.
a. Click Save.
b. At the Save in prompt, search for the S directory.
c. For File Name, assign Patient Mailing Labels.doc.
12. To recall the document for subsequent printing:
a. From the Menu Bar, click File.
b. Click Open.
c. At the Look in prompt, click My Computer in the drop-down list and then search the S directory for Patient Mailing Labels.doc.
d. The following window displays:
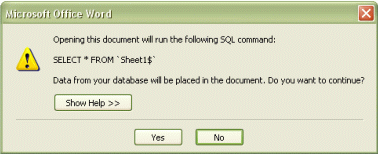
e. If this is the correct document, click Yes.
f. The Patient Mailing Labels document displays for you. Follow the steps in Part 1 to update your patient data and then print the labels.