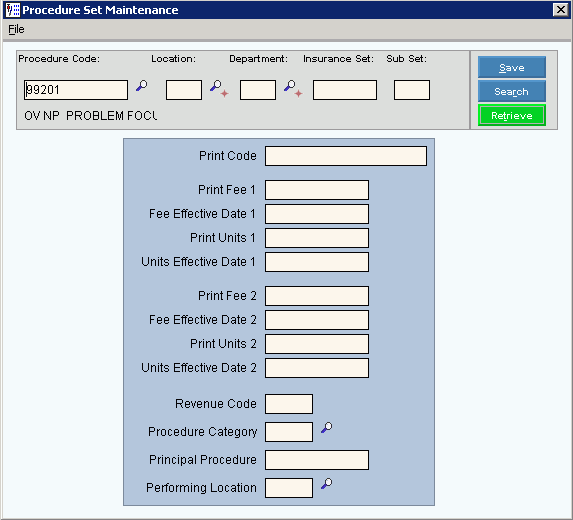
Opening Procedure Set Maintenance, click More.
1. Click File Maintenance from the Menu Bar.
2. Click Standard Maintenance.
3. Click Procedure Maintenance.
4. Click Additional from the Procedure Maintenance Menu Bar.
5. Click Procedure Set.
Procedure Set Maintenance Window Example:

Creating a New Procedure Set, click More.
To create a new record choose one of these methods:
Enter the new Group Code, Location Code, Department Code, Insurance Set, and Sub Set (if applicable), then click Retrieve
 ,
or press [ENTER].
Keyboard shortcut: [ALT + t]Or, enter the new Group Code, Location Code, Department Code, Insurance Set, and Sub Set and click File from the Menu Bar; next click New.
Keyboard shortcut: [ALT] [f] [n]Tip: To indicate that you are building a new Procedure Set, New
 displays near the Procedure Code. Default
entries display and the first field is highlighted
to let you know you can begin entering information.
Procedure Set Maintenance Prompts Tip: To see more information about a field, click the hyperlink for the field name. |
|
Enter the defined Procedure Code for the Procedure Set. (up to 9 characters) Tip: The Procedure Description displays for your reference. |
|
Enter the defined Location Code or press [TAB] to assign this information to all locations. (up to 2 characters) |
|
Enter the defined Department Code or press [TAB] to assign this information to all departments. (up to 2 characters) |
|
Enter the defined Insurance Set or press [TAB] to assign this information to all insurance sets. (up to 5 characters) |
|
Enter the defined Sub Set or press [TAB] to assign this information to all sub sets. (up to 2 characters) |
|
|
To update the new or changed information, click Save or press [ENTER]. Keyboard shortcut: [ALT + s] |
To avoid losing data, you must save new or changed records. |
|
|
To view all of the existing Procedure Sets, click Search. From the Search list you can select the record to change or delete. Keyboard shortcut: [ALT + r] |
|
To display an existing Procedure Set, enter the Procedure Code, Location Code, Department Code, Insurance Set, and Sub Set, then click Retrieve, or press [ENTER]. Keyboard shortcut: [ALT + t] |
Enter the Print Code for the procedure set, if applicable. (up to 15 characters) Note: This can be the procedure code and a procedure modifier that is assigned to a specific location or for a specific insurance set. |
|
Enter the new fee for the procedure, if applicable. (-7.2 numeric) Note: Leave blank, unless specified by NDS. |
|
Enter the date the new procedure fee goes into effect, if applicable. (mm/dd/ccyy, slashes and century optional) Note: Leave blank, unless specified by NDS. |
|
Enter the number of units for the procedure set, if applicable. (4.0 numeric) Note: Leave blank, unless specified by NDS. |
|
Enter the date the new number of units for the procedure set goes into effect, if applicable. (mm/dd/ccyy, slashes and century optional) Note: Leave blank, unless specified by NDS. |
|
Enter the Revenue Code used for institutional billing, if applicable. (4.0 numeric) |
|
Enter the defined Procedure Category for the procedure set, if applicable. (up to 4 characters) Note:
Or, to search for the appropriate Procedure
Category, click Search
|
|
Enter the principal procedure, if applicable. (up to 9 characters) Note: Leave blank, unless specified by NDS. |
|
Performing Location |
Enter the defined location code where the procedure is performed, if applicable. (up to 2 characters) Note:
Or, to search for the appropriate Location,
click Search
|
Editing an Existing Procedure Set, click More.
![]() CAUTION: To
avoid losing data, you must save new or changed records.
CAUTION: To
avoid losing data, you must save new or changed records.
1. To display the record to
be changed, enter the Procedure Code, Location Code, Department Code, Insurance Set, and Sub
Set and click Retrieve
![]() , or
press [ENTER].
, or
press [ENTER].
Keyboard shortcut: [ALT
+ t]
Tip: If you do not know the Procedure
Code, Location
Code, Department
Code, Insurance
Set, and Sub
Set, you can click Search ![]() to see a list
of procedure sets.
to see a list
of procedure sets.
2. To position the pointer to the information that you want to change, press [TAB] or click the field using the mouse.
3. Enter the data changes.
4. To complete the edit process,
click Save ![]() , or press [ENTER].
, or press [ENTER].
Keyboard shortcut: [ALT
+ s]
Deleting an Existing Procedure Set, click More.
1. To display the record to
be deleted, enter the Procedure
Code, Location
Code, Department
Code, Insurance
Set, and Sub Set and click
Retrieve ![]() ,
or press [ENTER].
,
or press [ENTER].
Keyboard shortcut: [ALT
+ t]
Tip: If you do not know the Procedure
Code, Location
Code, Department
Code, Insurance
Set, and Sub Set, you
can click Search ![]() to see a list
of procedure sets.
to see a list
of procedure sets.
2. Click File
from the Menu Bar,
and next click Delete.
Keyboard shortcut: [ALT]
[f] [d]
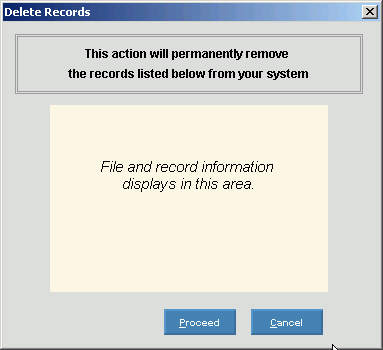
3. At the Delete Records prompt, click Proceed to delete the record, or click Cancel to escape from the delete routine.
Example:

Note: After you
click Proceed, you will
see the following message on the Status
Bar.
![]()