Opening Relationship Maintenance, click More.
Click File Maintenance from the Menu Bar, click Standard Maintenance and then click Relationship.
Or, use the keyboard shortcut: [ALT] [m] [t] [n].
Creating a new Relationship, click More.
Enter the new Relationship
ID and click Retrieve
![]() or press [ENTER] if the button
is in focus.
or press [ENTER] if the button
is in focus.
Tip: To indicate
that you are building a new Relationship, ![]() displays next to the Relationship ID. Default entries display
and the first field is highlighted to let you know you can begin
entering information.
displays next to the Relationship ID. Default entries display
and the first field is highlighted to let you know you can begin
entering information.
Relationship Maintenance Prompts Tip: To see more information about a field, click the hyperlink for that field name. |
|
Enter the ID assigned to this relationship. (up to 6 characters) Note: To see NDS recommendations for assigning the ID, click the Relationship ID hyperlink. |
|
|
To update the new or changed information click Save or press [ENTER] if the button is in focus. Keyboard shortcut: [ALT + s] |
CAUTION: If you forget to click Save, you may lose your changes. |
|
|
You can use Search to view all of the existing Relationship IDs. From the Search list you can select a Relationship to change or delete. Keyboard shortcut: [ALT + r] |
|
To display an existing Relationship, enter the Relationship ID and click Retrieve or press [ENTER] if the button is in focus. Keyboard shortcut: [ALT + t] |
Enter the description of the relationship between the patient and the guarantor to print on the patients' private statements. (20 characters) Note: NDS recommends entering the relationship description for the Private Statement because the Private Statement displays during Patient Entry when the Relationship ID is entered as well as printing on patient statements. |
|
Note: Because you can tailor the labels of the nine Form Type fields, the field labels in your software may not match the field names listed below. |
|
Enter the Relationship Code to print on a claim form for this Form Type. (20 characters) |
|
Enter the Relationship Code to print on a claim form for this Form Type. (20 characters) |
|
Enter the Relationship Code to print on a claim form for this Form Type. (20 characters) |
|
Enter the Relationship Code to print on a claim form for this Form Type. (20 characters) |
|
Enter the Relationship Code to print on a claim form for this Form Type. (20 characters) |
|
Enter the Relationship Code to print on a claim form for this Form Type. (20 characters) |
|
Enter the Relationship Code to print on a claim form for this Form Type. (20 characters) |
|
Enter the Relationship Code to print on a claim form for this Form Type.(20 characters) |
|
Enter the Relationship Code to print on a claim form for this Form Type. (20 characters) |
|
Editing an existing Relationship, click More.
![]() CAUTION!
If you forget to click Save, you may lose your changes.
CAUTION!
If you forget to click Save, you may lose your changes.
1. To display the record to
be changed, enter the Relationship
ID and click Retrieve
![]() or press [ENTER] if the button is in
focus.
or press [ENTER] if the button is in
focus.
Keyboard shortcut: [ALT
+ t]
Tip: If you do not know the Relationship ID, you can
click Search
![]() to see a list
of Relationship IDs.
to see a list
of Relationship IDs.
2. To position the pointer to the information that you want to change, press [TAB] or click the field using the mouse.
3. Enter the data changes.
4. To complete the edit process,
click Save
![]() or press [ENTER]
or press [ENTER]
Keyboard shortcut: [ALT
+ s]
Deleting a Relationship, click More.
1. To display the record to
be deleted, enter the Relationship
ID and click Retrieve
![]() or press [ENTER]
or press [ENTER]
Keyboard shortcut: [ALT
+ t]
Tip: If you do not know the Relationship ID, you can
click Search ![]() to see a list of Relationship IDs.
to see a list of Relationship IDs.
2. Click File
from the Menu Bar,
and then click Delete.
Keyboard shortcut: [ALT]
[f] [d]
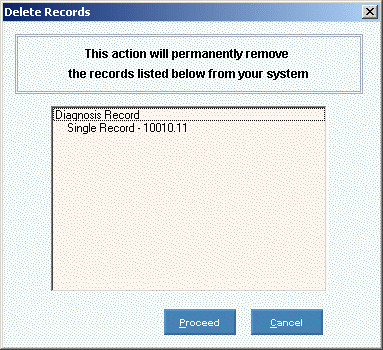
3. At the Delete Records prompt,
click the Proceed button
to delete the record
or, click the Cancel button
to escape from the delete routine.
Example:

Note: After you click Proceed,
you will see the following message on the Status
Bar.
![]()