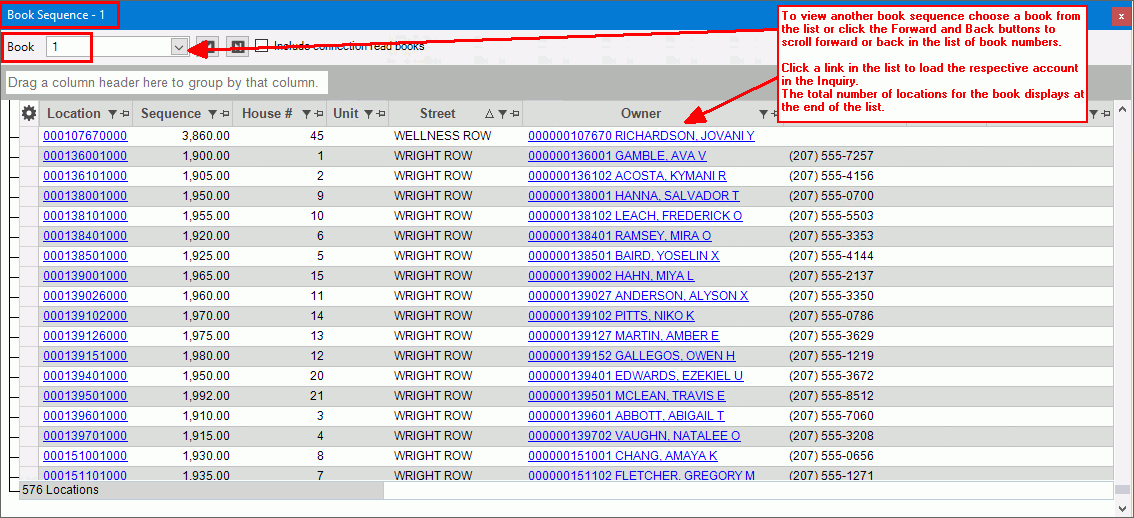
Enhanced Inquiry - Book Sequence View
Use the Book Sequence view to see the locations in your books. You can use the drop-down menu to select the book to view. A total count of the number of locations for the book displays at the end of the location list. There are links in the book list that are for location, owner and tenant. You can click the links to load the desired account in the Inquiry. There are right-click functions to generate a list of locations for the book as well as to export the information to Microsoft Excel.
From the Inquiry, click Tools and then click Book Sequence.
Inquiry - Book Sequence View Example:

EDIFICE Inquiry - Book Sequence View Prompts
|
|
Create a List of locations for the book
To start, select the desired book from the drop-down list. Or, to move to the next book in the
list, click Forward Tip:
If you want to include books for individual connections
in the drop-down list, check the Include
Connection Read Books box |
|
View and Organize LocationsThe locations for the book display in a list. The list of locations can be sorted and filtered so that you only see the desired ones.
Tip: You can use settings
|
|
Sort List |
To sort, simply click the desired column heading. To sort in descending order, click the column heading a second time. |
Filters |
To
limit the transactions to those that meet certain criteria, click
Filter
To select the choices to use as criteria, click to check the desired box or boxes and then, click OK. Note: Advanced filtering options are available by clicking Text Filters. |
Book Sequence View Right-click FunctionsTo see additional options, right-click. Below is an example.
|
|
|
These functions can be handy for further manipulating or formatting the data or sending copies to coworkers. In addition, Print and Print Preview functions are available.
|