Opening Backflow Inventory Maintenance, click More.
1. Click Daily Work from the Menu Bar.
2. Click File Maintenance.
3. Click Code Maintenance.
4. Click Backflow File Maintenance.
5. Click
Backflow Inventory Maintenance
Tip: Or, use the keyboard shortcut: [ALT]
[y] [m] [c] [f] [b].
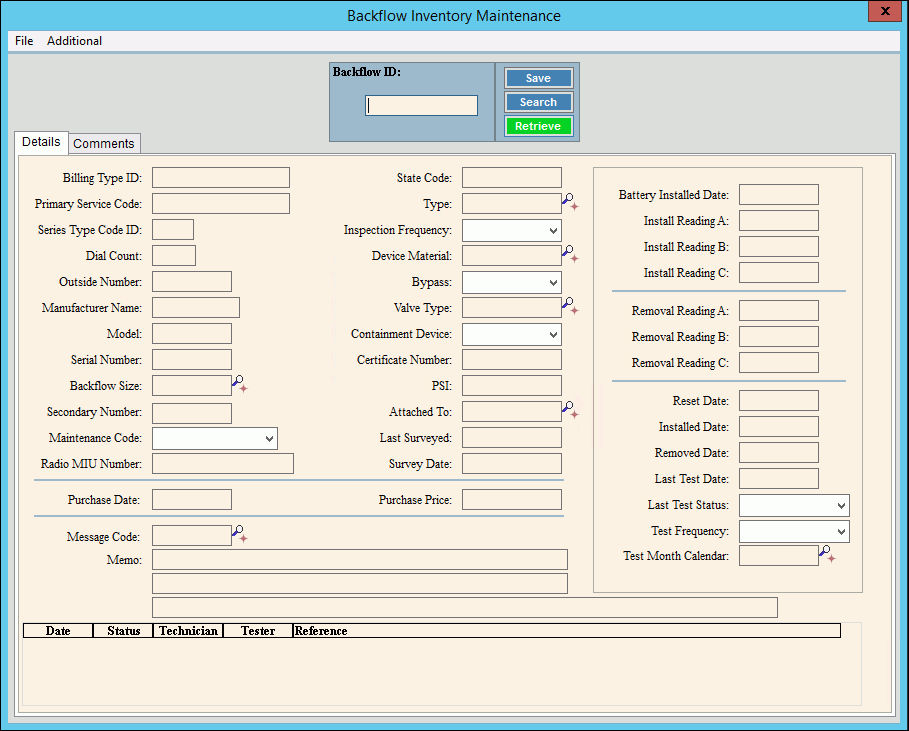
Backflow Inventory Maintenance Window Example:

Creating a New Backflow Inventory Item, click More.
1. Enter the new Backflow ID
and click Retrieve ![]() ,
or press [ENTER].
,
or press [ENTER].
Keyboard shortcut: [ALT
+ t]
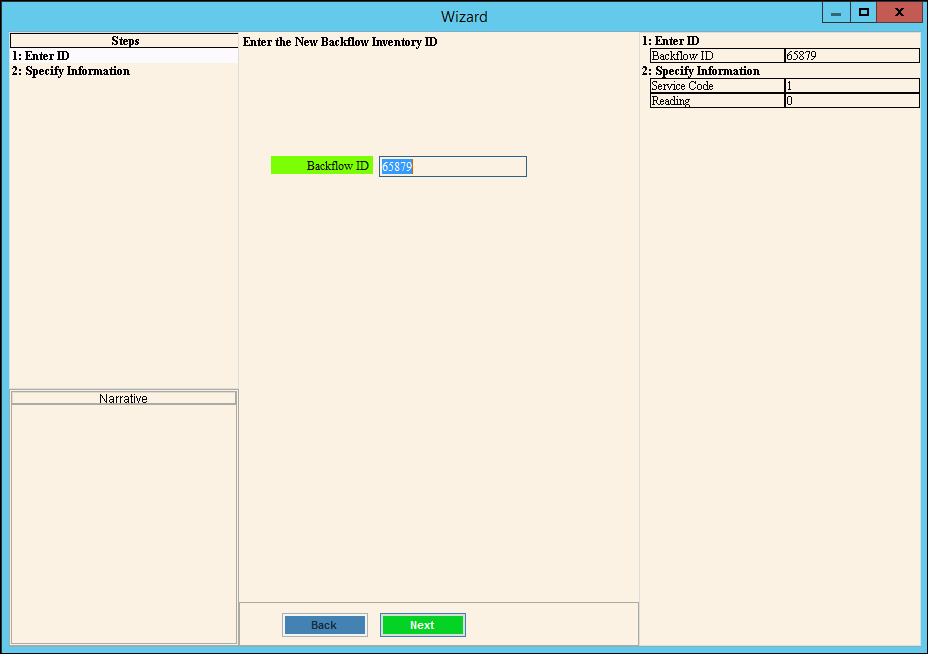
2. The new Backflow Wizard
displays.
For general information about the Wizard menu, window layout and
navigation, see the Wizard - Introduction.

3. To confirm the Backflow
ID, click Next ![]() and the next window of the Backflow Wizard displays.
and the next window of the Backflow Wizard displays.
4. Enter the following fields in the Wizard:
Backflow Inventory Wizard Prompts Tip: To see more information about a field, click the hyperlink for the field name. |
|
Primary Service Code |
To select the primary service code for the Backflow device, click a choice in the drop-down list. (2.0 numeric) |
Enter the present reading for the Backflow device, if applicable. (10.0 numeric) |
|
|
To update the new or changed information, click Finish or press [ENTER]. Keyboard shortcut: [ALT + s] |
To avoid losing data, you must click Finish. |
|
|
To close the Wizard without validating or saving the data, click Close. |
After you click Finish, the Backflow Wizard closes and the Backflow Inventory Maintenance window displays for entry of the remaining fields.
Backflow Inventory Maintenance Prompts Tip: To see more information about a field, click the hyperlink for the field name. |
|
Displays the unique identifier for the Backflow device. (up to 17 characters) Required |
|
|
To update the new or changed information, click Save or press [ENTER]. Keyboard shortcut: [ALT + s] |
To avoid losing data, you must save new or changed records. |
|
|
To view all of the existing Backflow devices, click Search. From the Search list you can select the record to change or delete. Keyboard shortcut: [ALT + r] |
|
To display an existing Backflow device, enter the Backflow ID and click Retrieve, or press [ENTER]. Keyboard shortcut: [ALT + t] |
Displays the Billing Type ID assigned to the Backflow device, if additional billing information is needed. (up to 10 characters) |
|
Primary Service Code |
Displays the primary Service Code for the Backflow device. (2.0 numeric) |
Series Type Code ID |
Note: This field is reserved for future use. Please leave blank. |
Note: This field is reserved for future use. Please leave blank. |
|
Note: This field is reserved for future use. Please leave blank. |
|
Enter the name of the Backflow device manufacturer. (up to 12 characters) |
|
Enter the model number of the Backflow device. (up to 10 characters) |
|
Enter the serial number of the Backflow device. (up to 10 characters) |
|
Enter the Size ID to identify the Backflow size. (up to 10 characters) Tips:
|
|
Note: This field is reserved for future use. Please leave blank. |
|
To assign a Maintenance Code, click a choice in the drop-down list. Note: The Maintenance Code is informational only. |
|
Note: This field is reserved for future use. Please leave blank. |
|
Enter the date the Backflow device was purchased. (mmddccyy - slashes and century optional) |
|
Enter the Backflow device purchase price. (-6.2 numeric) |
|
Enter a Message Code to assign to the Backflow device, if applicable. (up to 5 characters) Tips:
|
|
Enter a memo pertaining to the Backflow device, if applicable. (up to 40 characters lines 1 & 2, line 3 is 100 characters) Note: Up to 3 lines are available for a memo. Use as many lines as are needed. |
|
Note: This field is reserved for future use. Please leave blank. |
|
Note: These fields are reserved for future use. Please leave blank. |
|
Note: These fields are reserved for future use. Please leave blank. |
|
Enter the date the Backflow device was reset, if applicable. (mmddccyy - slashes and century optional) |
|
Enter the date the Backflow device was installed at the service connection. (mmddccyy - slashes and century optional) |
|
Enter the date the Backflow device was removed. (mmddccyy - slashes and century optional) |
|
Enter the date the Backflow device was last tested. (mmddccyy - slashes and century optional) Tip: Generally, the Last Test Date is maintained during the Backflow Testing routines. |
|
To select the status of the last Backflow test, click a choice in the drop-down list. Test Statuses: Not Tested, Unknown, Good, Failed, Removed Tip: Generally, the Last Test Status is maintained during the Backflow Testing routines. |
|
Enter the number of times the Backflow device will be tested in a year, if backflow testing is determined by Test Frequency. (2.0 numeric) Entry Options:
|
|
Enter the Month Calendar ID that specifies the time period for testing the Backflow device, if Backflow testing is determined by Test Month Calendar. (up to 20 characters) Tips:
Note: Leave Test Month Calendar blank, if using Test Frequency to determine when the Backflow device should be tested. |
|
Enter the user-defined State code for the Backflow. (up to 5 characters) |
|
Enter the defined type that describes the category for the Backflow device. (up to 5 characters) Tips:
|
|
To assign the Frequency that the Backflow should be inspected, click a choice in the drop-down list. Inspection Frequency:
|
|
Enter the defined Material ID that specifies the type of material that the Backflow is made of. (up to 5 characters) Tips:
|
|
To specify the bypass for the Backflow, click a choice in the drop-down list. Bypass choices: Unknown, Yes, No |
|
Enter the defined Valve Type for the Backflow. (up to 5 characters) Tips:
|
|
To specify if there is a containment device for the Backflow, click a choice in the drop-down list. Containment Device Choices: Unknown, No, Yes |
|
Enter the Certificate Number associated with the Backflow, if applicable. (up to 20 characters) |
|
Enter the PSI for the Backflow device. (3.2 numeric) |
|
Enter the Attached To ID to specify the part of the water system to which the Backflow is attached. (up to 5 characters) Tips:
|
|
Enter the date of the last survey of the Backflow device. (mmddccyy, slashes and century optional) |
|
Enter the date of the next survey of the Backflow device. (mmddccyy, slashes and century optional) |
|
Comments
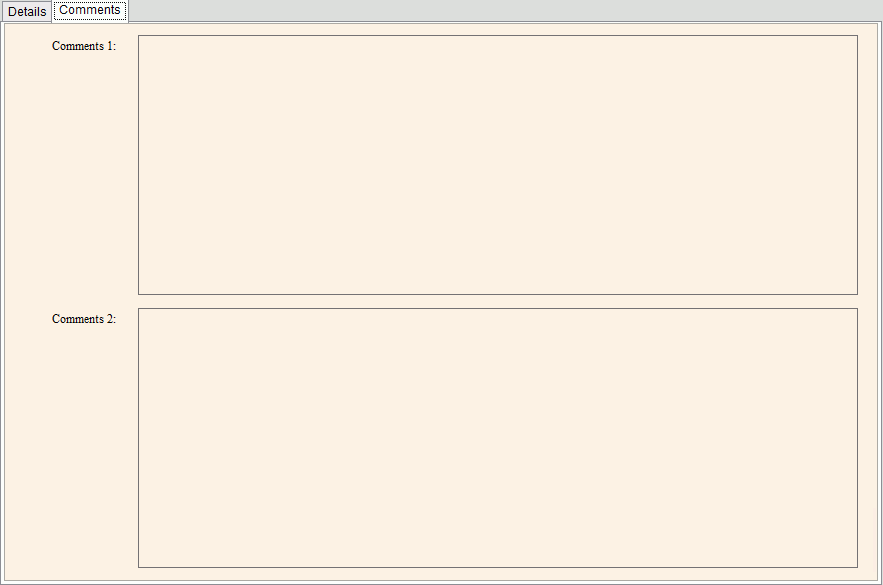
To open the Comments, click Comments tab. The following window displays:
|
|
Enter informational comments pertaining to the Backflow device, if applicable. (up to 65,535 characters per comment field) Note: There are 2 comment fields available. |
|
Backflow Testing History Inquiry Panel Note: The following fields are maintained by EDIFICE. They are display-only and can not be edited. |
|
Displays the date the Backflow device was last tested. |
|
Displays the status of the test on the Backflow device. |
|
Displays the ID of the technician who performed the Backflow test. |
|
Displays a tester number associated with the Backflow device testing, if applicable. |
|
Displays a reference pertaining to the Backflow test. |
|
Editing an Existing Backflow Inventory Item, click More.
![]() CAUTION: To
avoid losing data, you must save new or changed records.
CAUTION: To
avoid losing data, you must save new or changed records.
1. To display the record
to be changed, enter the Backflow ID and click Retrieve
![]() , or press
[ENTER].
, or press
[ENTER].
Keyboard shortcut: [ALT
+ t]
Tip: If you do not know the Backflow ID, you can click
Search ![]() to see a list of Backflow
Inventory records.
to see a list of Backflow
Inventory records.
2. To position the pointer to the information that you want to change, press [TAB] or click the field using the mouse.
3. Enter the data changes.
4. To complete the edit
process, click Save ![]() , or
press [ENTER].
, or
press [ENTER].
Keyboard shortcut: [ALT
+ s]
Deleting an Existing Backflow Inventory Item, click More.
1. To display the record
to be deleted, enter the Backflow ID and click Retrieve
![]() , or press
[ENTER].
, or press
[ENTER].
Keyboard shortcut: [ALT
+ t]
Tip: If you do not know the Backflow ID, you can click
Search ![]() to see a list of Backflow
Inventory records.
to see a list of Backflow
Inventory records.
2. Click File
from the Menu Bar,
and next click Delete.
Keyboard shortcut: [ALT]
[f] [d]
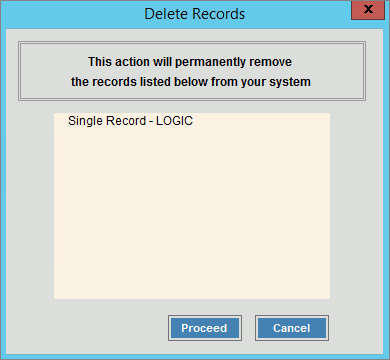
3. At the Delete Records prompt, click Proceed to delete the record, or click Cancel to escape from the delete routine.
Example:

Note: After you
click Proceed, you will
see the following message on the Status
Bar.
![]()

