Opening Check Register - Warrant Statement Maintenance, click More.
-
Click Utilities from the Menu Bar.
-
Click Misc Utilities.
-
Click Check Register Warrant Statement.
Tip: Or, use the keyboard shortcut: [ALT] [t] [u] [s].
Check Register Warrant Statement Maintenance Window Example:
Creating a Warrant Statement, click More.
Note: Because there is only one Warrant Statement, you can not create a new Warrant Statement. To maintain the Warrant Statement, see the instructions for editing later in this topic.
Editing the Warrant Statement, click More.
![]() CAUTION: To
avoid losing data, you must save changed records.
CAUTION: To
avoid losing data, you must save changed records.
-
To display the record to be changed, simply open Warrant Statement Maintenance. The record automatically displays.
-
To position the pointer to the information that you want to change, press [TAB] or click the field using the mouse.
-
Enter the data changes.
-
To complete the edit process, click Save
 , or press [ENTER].
Keyboard shortcut: [ALT + s]
|
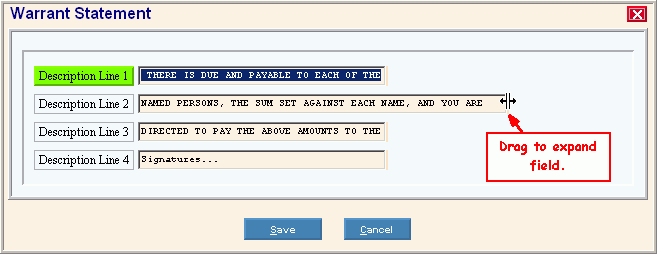
Warrant Statement Maintenance Prompts Tips: To see more information about a field, click the hyperlink for the field name. To
expand the size of a field, point to the right field border. When the
pointer changes into a horizontal double-headed arrow | |
|
Enter the text to appear in Lines 1 through 3 on the Treasurer's Warrant Statement. (up to 75 characters) Tips:
| |
|
Enter the text to appear in Line 4 on the Treasurer's Warrant Statement. (up to 25 characters) Tips:
| |
|
|
To update the changed information, click Save or press [ENTER]. Keyboard shortcut: [ALT + s] |
|
To avoid losing data, you must save changed records. | |
|
|
To close the window without updating the data, click Cancel. Keyboard shortcut: [ALT + c] |
 ,
drag the border to the right.
,
drag the border to the right.
Deleting the Warrant Statement, click More.
Note:
You can
not delete the Warrant Statement. However,
to remove the Warrant Statement text you can simply blank out each description
line, and then click Save .