![]() IMPORTANT:
IMPORTANT:
If you make changes to System Parameters
you should back up the settings. For more information refer
to the instructions for Backing
Up Preferences and Settings.
System Parameters
Use System Parameters to change module settings such as the colors of the module windows, how the Search is built, whether or not to ask for a printer with each print job and programmable function keys.
Tip: Some of the parameters may not apply to this module. Contact NDS Technical Support for more information.
If you make changes to System Parameters
you should back up the settings. For more information refer
to the instructions for Backing
Up Preferences and Settings. |
Directions:
To see information about...
Opening System Parameters, click More.
Basic Method:
To open System Parameters from the Menu Bar, click File.
Click Settings.
Click Client Options.
Click System.
Advanced Method:
Use the Keyboard shortcut: [ALT] [f] [e] [o] [s]
System Parameters Tabs Example:

Using the Styles Tab, click More.
Use the Styles Tab to change the palette of window colors for this module at this PC and to adjust the font size. The window color schemes are maintained in Style Sheets.
System Parameters Styles Tab Window Example:
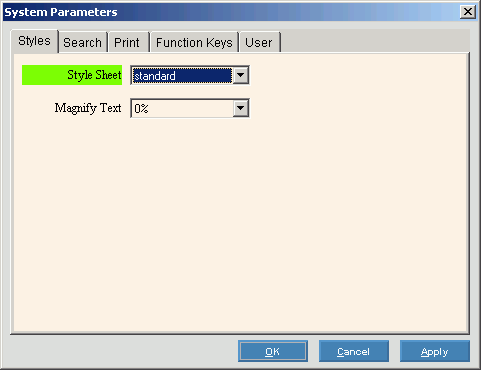
Styles Tab Prompts |
|
|
To change the appearance the module's windows, click the Styles Tab. |
Style Sheet |
To choose a color scheme, click one of the options in the drop-down list. Tips:
|
Magnify Text |
To increase the size of the text displayed in the windows, select a percent in the drop-down list. Tips:
|
|
To apply the changed settings and close the window, click OK or press [ENTER]. Keyboard shortcut: [ALT + o] |
|
To exit without changing the settings, click Cancel. Keyboard shortcut: [ALT + c] |
|
To apply the changed settings without closing the window, click Apply. Keyboard shortcut: [ALT + a] |
Using the Search Tab, click More.
Use the Search Tab to change the Search Build Type and to set the parameters for the Semantic and Classic Searches.
System Parameters Search Tab Example:
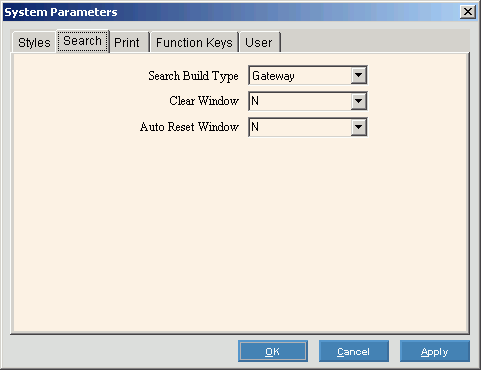
Search Tab Prompts |
|
|
To change the Search parameters, click the Search Tab. |
Search Build Type |
Changing the Search Build Type can speed up the search build process. To change the Search Build Type, click an option in the drop-down list. Caution: NDS Technical Support must direct you on choosing the build type. |
Clear Window |
To specify if a Semantic Search clears the search list results from the previous Search when re-opened, select one of the following options:
|
Auto Reset Window |
To specify if you want to see the confirmation prompt when a Classic Search determines that a Refresh is required to rebuild the Search List, select one of the following options:
|
|
To apply the changed settings and close the window, click OK or press [ENTER]. Keyboard shortcut: [ALT + o] |
|
To exit without changing the settings, click Cancel. Keyboard shortcut: [ALT + c] |
|
To apply the changed settings without closing the window, click Apply. Keyboard shortcut: [ALT + a] |
Using the Print Tab, click More.
Use the Print Tab to control the printer selection when launching any print job within the module. For more information about printing and setting up your printer, refer to Printing Options and Printer Setup.
Note: Any printer number, other than the Print View printer number, overrides the Windows® printer prompt when you click the Print button.
System Parameters Print Tab Example:
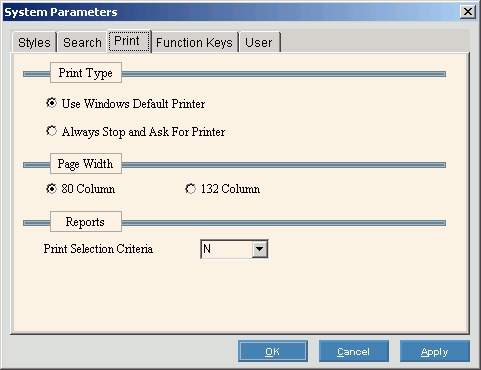
Printer Tab Prompts |
|
|
To change the print settings, click the Print Tab. |
Print Type |
To control the printer prompt, click the appropriate button:
|
Page Width |
To control the report print area based on the paper size, click the appropriate button:
|
Reports |
To specify if you want to print the selection criteria on reports, click one of the following options in the drop-down list:
|
|
To apply the changed settings and close the window, click OK or press [ENTER]. Keyboard shortcut: [ALT + o] |
|
To exit without changing the settings, click Cancel. Keyboard shortcut: [ALT + c] |
|
To apply the changed settings without closing the window, click Apply. Keyboard shortcut: [ALT + a] |
Using the Function Keys Tab, click More.
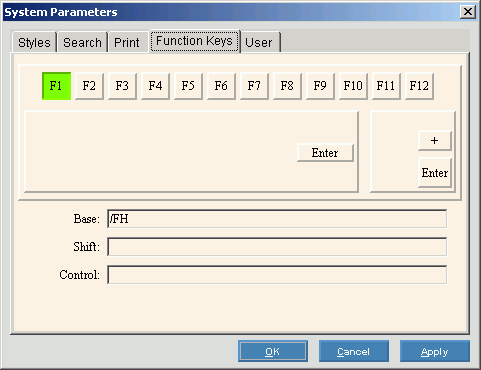
Use the Function Keys tab for programming the function keys [F1] through [F12] to quickly perform commands according to your personal needs. In addition to [F1] through [F12] you can combine a function key with [CTRL] or [SHIFT] allowing you to program up to 36 function keys. Function Keys are different than keyboard shortcuts. A Function Key can be assigned to perform many operations or commands in addition to menu selections. Function keys are assigned at the PC level.
Notes:
Function key programming is not available in some module releases.
You can not combine a function key with both [CTRL] and [SHIFT] together.
To see details about defining function keys, refer to the Programmable Function Keys directions.
System Parameters Function Keys Tab Example:
Using the User Tab, click More.
Use the settings in the User Tab to specify the module's interfaces with third-party software applications and to specify settings for handling account actions and images.
System Parameters User Tab Example:
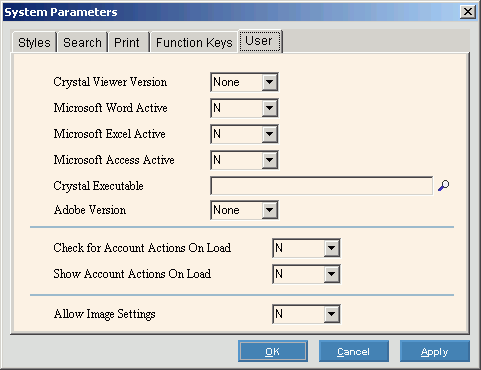
User Tab Prompts |
|
|
To change the user settings, click the User Tab. |
Crystal Viewer Version |
To specify if this module interfaces with the Crystal Viewer™, click one of the following options in the drop-down list.
|
Microsoft Word Active |
To specify if the module interfaces with Microsoft® Word, click one of the following options in the drop-down list.
|
Microsoft Excel Active |
To specify if this module interfaces with Microsoft Excel, click one of the following options in the drop-down list.
|
Microsoft Access Active |
To specify if this module interfaces with Microsoft Access, click one of the following options in the drop-down list.
|
Crystal Executable |
Specify the path for the Crystal executable file (.exe), if applicable. Tip:
To search for the executable file on your system,
click Search |
Adobe Version |
To specify if this module interfaces with Adobe™, click one of the following options in the drop-down list.
|
Check for Account Actions On Load |
To check if an action is specified for an account in the Action Console, click one of the following options in the drop-down list.
|
Show Account Actions on Load |
To show account actions from the Action Console when loading an account, click one of the following options in the drop-down list.
|
Allow Image Setting |
To activate the image shortcut menu, which allows you to set image options and magnify the image, click one of the following options in the drop-down list.
|
|
To apply the changed settings and close the window, click OK or press [ENTER]. Keyboard shortcut: [ALT + o] |
|
To exit without changing the settings, click Cancel. Keyboard shortcut: [ALT + c] |
|
To apply the changed settings without closing the window, click Apply. Keyboard shortcut: [ALT + a] |