Fixed Assets Initial Asset Depreciation
Use Fixed Assets Initial Asset Depreciation to bring assets up-to-date with the assets' previously manually accrued depreciation. After the assets are set up in the Fixed Assets module, you can run this to update the asset history. It's important to note that it does not update General Ledger because generally it should have already been done. This routine is useful if you have been manually tracking asset depreciation for assets that you purchased previously. This can be run for an individual asset, group of assets or all assets. After assets' previous depreciation is updated, the schedule in Fixed Asset Maintenance will include the entered previous depreciation and the date it was posted.
Important:
This routine should only be run as part of the initial set up of the Fixed Assets module and only if you have assets that have previous manually accrued depreciation. It's important to run this before running the first Current Period Depreciation so that asset depreciation is calculated correctly moving forward.
If an asset already has had depreciation history added using Initial Asset Depreciation, the system will not allow it to be updated again through Initial Asset Depreciation.
Directions:
1. Click Fixed Assets from the Menu.
2. Click Maintenance.
3. Click Fixed Assets Initial Asset Depreciation.
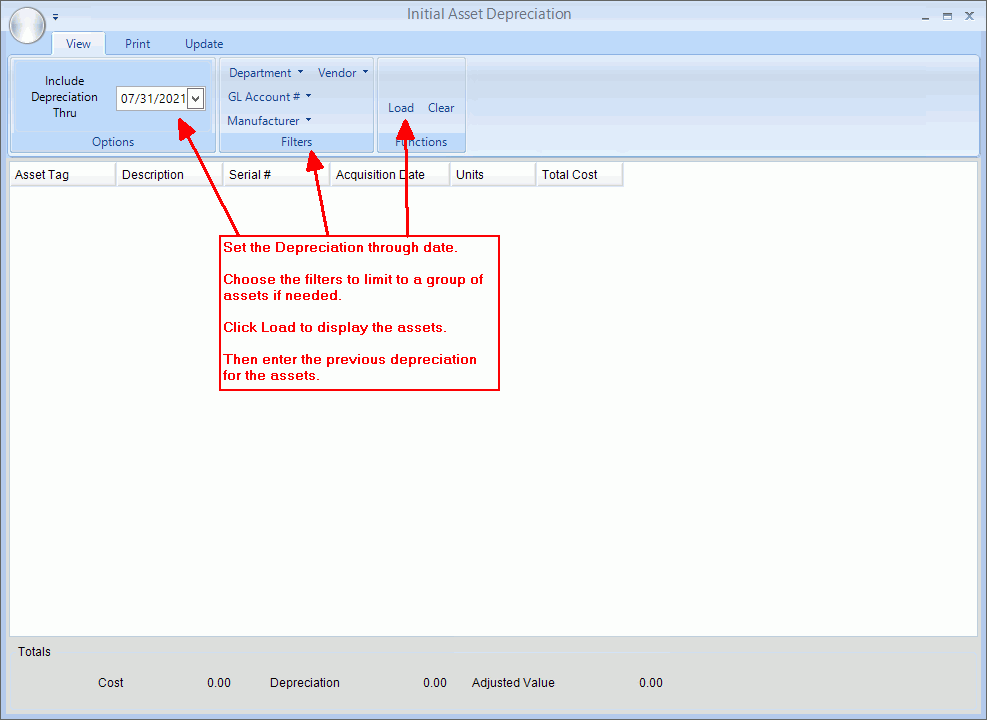
Fixed Assets Initial Asset Depreciation Window Example:

Fixed Assets Initial Asset Depreciation Prompts
|
|
View
Tab To start click View. From here you can load the assets to update with prior depreciation and enter their previous depreciation amounts. |
|
Include Depreciation Thru |
Use the calendar to choose the date for which the depreciation has been taken for the assets. |
Filters
|
To
limit the assets to those that meet selected criteria, click the
down-arrow
To select the choices to use as criteria, click to check the desired box or boxes. Or, to quickly select all choices, click Select. Then, close the window. |
|
To load the assets, click Load. The assets and their schedule display in the grid. Or, to clear the report choices, click
Clear |
Enter Prior Depreciation |
To enter previous depreciation for an asset: 1. To display the monthly
depreciation detail for the asset, click Plus
2. Go to the appropriate row and enter the amount of depreciation for the selected time period for the asset. You can enter the depreciation amount for each month or the amount for each year, or the total amount of all prior depreciation for the asset. 3. Continue in this manner until all prior depreciation amounts for assets are entered. 4. To print the depreciation history, from the Print tab click Print. See Print Step below for more details. 5. To complete the previous depreciation process, from the Update tab click Update History. See Update Step below for more details. |
Print
Tab The Print tab allows you to print a list of the assets and their previous depreciation that was entered. Click Print and the print screen displays.
|
|
Include Entries with Depreciation Include All Months |
To only include on the printout the entries with depreciation, click to check this option. To include all months regardless if there is depreciation, click to check this option. |
|
To print the Initial Depreciation report, click Print. The report writer screen displays.
|
Report Writer Steps |
1.
If you want to use existing report settings, click Open 2. If you want to save
the current report settings, click Save
3. To generate the report:
Tip: For more information, refer to the Report Writer - Overview. |
Update
History Tab The Update tab allows you to update the assets' history with the entered depreciation. Click Update and the update screen displays.
|
|
|
To update the asset history with the entered depreciation amounts, click Update history. When complete, Done displays. Click Ok. After previous depreciation updates the asset, the schedule in Fixed Asset Maintenance will include the entered previous depreciation and the date it was posted. |