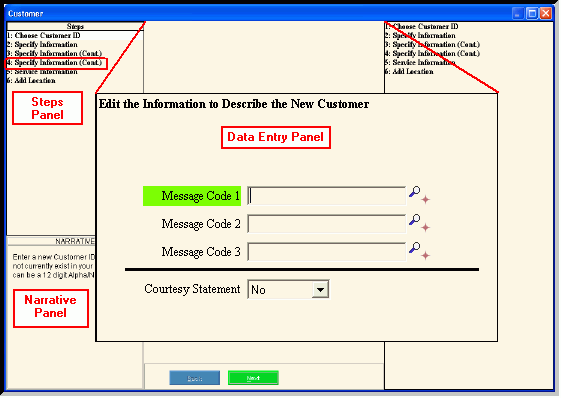
Create Customer Step 4 Window
Use the Create Customer Step 4 to assign message codes that are applicable to the customer and to specify if courtesy statements are allowed. The table following the panel example describes the data entry for this step in the Create Customer Wizard.
Tip: For general information about using wizards, see the Wizard - Introduction.
To display the Create Customer Step 4:
1. From the Inquiry, click Tools and then, click Wizards.
2. In the Create section, click Customer.
3. To navigate
to the step that you want to maintain click Next
![]() or click Back
or click Back ![]() until
the data that you want to maintain displays in the Data Entry Panel.
until
the data that you want to maintain displays in the Data Entry Panel.
Create Customer Step 4 Data Entry Panel Example:
Data Entry Panel - Create Customer Step 4 Prompts
|
|
Message Code 1 - 3 |
Enter the first Message Code to assign to the customer. (up to 5 characters) You can assign up to 3 messages for a customer. Tips:
|
To allow courtesy statements to print for the customer, click Yes. To prevent courtesy statements from printing for the customer, click No. |
|
|
To display the next step for setting up the customer, click Next or press [ENTER]. Keyboard shortcut: [ALT + n] To direction to the next window, click here. |
|
To display the previous step, click Back. Keyboard shortcut: [ALT + b] |
|
To save the data for all of the wizard steps, click Finish. The wizard window closes when the save is complete. Keyboard shortcut: [ALT + s] |