EDIFICE Inquiry - Asset Management View
Use the Asset Management view to manage company owned assets and the work to be done for the assets. Assets can be any type of item your organization owns like hydrants, poles, pipes, substations, vehicles and equipment including office equipment such as desks, computer systems, photocopiers, etc. You can maintain information for the assets and attach them to a location or non-billable location (site). You can create new assets, update asset information, track assets due for maintenance, report on your assets and create work orders. For example, work orders can be issued for assets like fire hydrants or poles that are installed on a particular street, but are not owned by a customer. Asset materials can also be tracked here as well.
Notes:
To begin using Asset Management set up the following:
Build Asset Types - Descriptions for the types of assets your utility has
Build Manufacturers - Information about the manufacturers of assets owned by your utility
Build Sites - Information about non-billable locations that have infrastructure to track
Build Assets - Information about the items owned by your utility
From the EDIFICE Inquiry, click Tools and then click Asset Management.
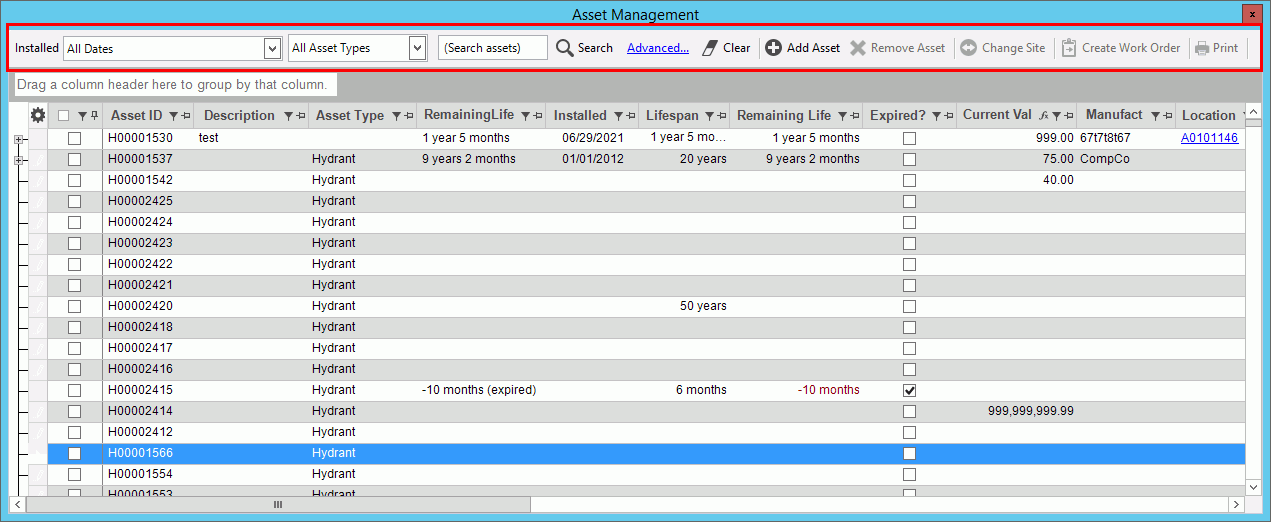
EDIFICE Inquiry - Asset Management View Example:
EDIFICE Inquiry - Asset Management View Prompts |
|
Create a list of AssetsTo start, select the desired parameters for creating a list of assets. Note: To build assets, go to the Add an Asset step.
|
|
Parameters |
Choose the options for determining the assets to display.
|
|
To
create the list, click Search
Other ways to Search:
Enter the desired text in the field. The results will display in the grid. |
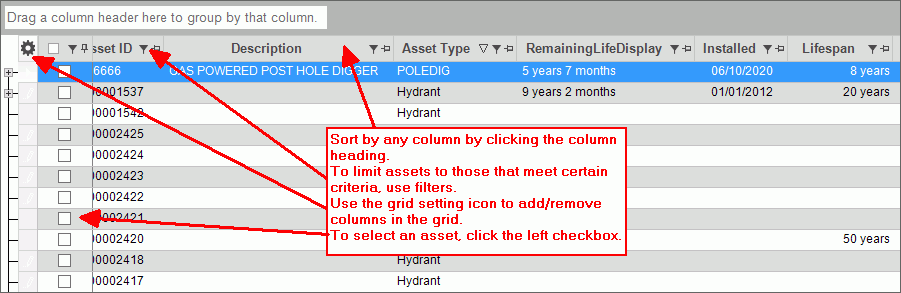
Organize Asset ListThe Asset list shows eligible assets for you to review and take action on. The list can be sorted and filtered so that you only see the desired assets. Tip:
Use the grid setting
|
|
Sort List |
To sort the list, click the desired column heading. To sort in reverse order, click the column heading a second time. For example, you can sort the list by expired or remaining life. |
Filters |
To
limit the assets to those that meet certain criteria, click Filter Note: Advanced filtering options are available by clicking Text Filters.
|
Grouping |
To organize items by a specific column heading such as remaining life or asset type, drag the desired column heading to the box above the grid. Grouping Box:
|
Asset Management ToolsThere are several tools in the Asset Management view that you can use for managing your assets. Assets can be added, edited and removed using these tools and work orders can be created for them.
|
|
Adding an AssetTo add an
asset, click Add Asset
For details on maintaining asset information, see Asset Maintenance.
|
|
Removing an Asset |
To
remove an asset, click to highlight the asset and then, click
Remove Asset |
Change Site |
An asset needs to be associated with a site or a location in order for work orders to be created. To easily add, change or remove a site
associated with an asset, click Change
Site
1. At the site ID field,
enter the ID. Or, to search for the ID, click Search
2. Or, to create a site,
click Add |
Asset Work Orders
|
|
Viewing Work Orders |
If
there are work orders for an asset, a plus
sign
|
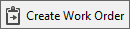
Creating a Work Order |
To create a work order for an asset: Notes:
1. Click to highlight
the asset displayed in the list and then, click Create
Work Order 2. If the site has a location ID, you are asked if you want to use the location instead of the site ID to create the work order. 3. The Work Order Entry screen opens with the location or Site ID selected. If there is a customer associated with the asset, the customer ID field fills in as well. For details on creating the work order, click here. |
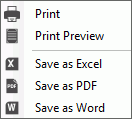
Print Asset Report
|
To print the asset details, click the checkbox in the left most column for the desired rows and then, click Print. A single asset or multiple assets can be selected to print. Note: The format for the asset printing is similar to the screen display and is generally setup during the installation. If formatting changes are needed, please contact NDS Support at 800-649-7754. |
Asset Management View Right-click FunctionsTo see these options, right-click in the grid.
|
|
|
|
Printing & Exporting FunctionsThese functions can be handy for further manipulating or formatting the data or sending copies to coworkers. In addition, Print and Print Preview functions are available.
|
|
|
|
Window Save As |
The Windows Save As steps:
|

 Search
 displays as the list is being built.
 .
.
 . The
following search options display.
. The
following search options display.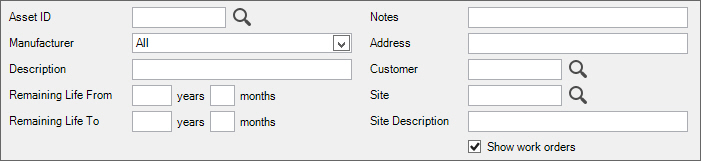

 next to the desired column heading. Any column can be filtered.
The available filter choices display. Here is an example
of remaining life filters. Click to check the desired box
or boxes to use as filters and then, click
next to the desired column heading. Any column can be filtered.
The available filter choices display. Here is an example
of remaining life filters. Click to check the desired box
or boxes to use as filters and then, click 


 and the following
screen displays.
and the following
screen displays.
 .
.  .
. 
 . Then, enter
the site information. For directions, see
. Then, enter
the site information. For directions, see  displays in the left most column.
To view the work order details, click
displays in the left most column.
To view the work order details, click 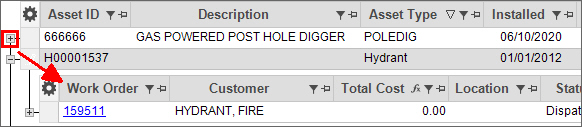
 .
.


 .
.