EDIFICE Inquiry - Images View
Use the Images View to view and manage the images for an account. Here you can add images, make copies of images and print images. You can add notes and get information about the images. An image can be attached to a work order or multiple work orders. A map from the Map view can be saved as an image and displayed here. The map image can be attached to a work order.
Images can be added from the Images view or from Work Order Entry, and images can come back from mobile work orders. Images added from Work Order Entry or that come back from mobile work orders are automatically attached to the work order and location.
From the EDIFICE Inquiry, click View and then click Images View.
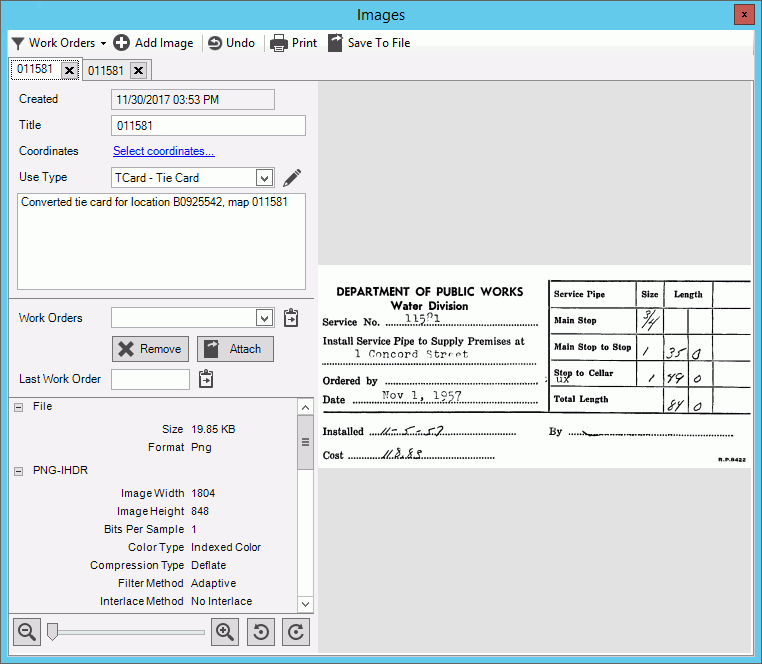
EDIFICE Inquiry - Images View Example:

EDIFICE Inquiry - Images View
|
|
Images Tools A list of the images for the location displays below the tools. You can right-click on an image to print, copy or save the image.
|
|
Add an Image To add an image to the account, click Add Image. This screen displays.
1. Navigate to the location of the saved image and select the file to attach. 2. Enter an optional name or description for the item. 3. Click Open to add the image to the account. |
|
Title |
Enter a name for the image if desired. The name will display in the image tab. |
Coordinates |
To create an image from map longitude and latitude coordinates, click Select Coordinates and then enter or select the coordinates.
|
Use Type |
To
assign a user-defined use type, click a choice in the drop-down
list or click Edit Note: Mobile work orders can be configured to send signature images back with the completed work order information. Signature images use a specific use type. |
Notes |
Enter notes for the image if desired. |
Work Orders Last Work Order |
Use the work order functions to attach the highlighted image to a work order, linking them together. If you are using mobile work orders and want to attach an image to the work order, use this step. To add the image to a work order: 1. Load a work order in Work Order Entry. 2. Click the work order listed in the drop-down list. The work order list displays the work order that is currently open in Work Order Entry. 3. Then click Attach
To remove the image from a work order,
click the work order in the list and then click Remove
Note: The Last Work Order shows the work order that was last associated with the image. |
File |
Details of the image file display. To change the size of the image display or to rotate the image, use these tools.
|
Copy Image |
To make a copy of the image, click Copy. You can then paste the image in an email, document or editing tool. |
Print Image |
To print a copy of the displayed image, click Print. |
Save to File |
To save the image to a file, click Save to File. The following screen displays:
1. Navigate to the location where the image will be saved. 2. Enter a name for the image. 3. Choose a save file as type. 4. Click Save to save the image to the location. |