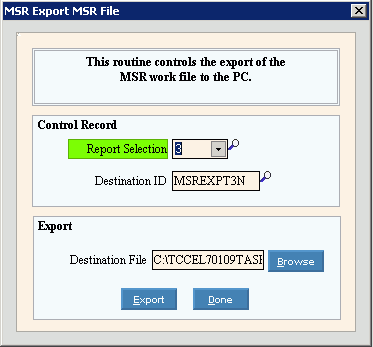
Opening the MSR Export MSR File routine, click More.
-
Click Payroll from the Menu Bar.
-
Click Government Reports.
-
Click MSR Magnetic Filing.
-
Click Export MSR File.
Tip: Or, use the keyboard shortcut: [ALT] [e] [g] [m] [x].
MSR Export MSR File Window Example:

Choosing the selections at the prompt window, click More.
|
MSR Export MSR File Prompt Options Tip: To see more information about a field, click the hyperlink for the field name. | |
|
Report Selection |
To specify the which Build Monthly Work File should supply the data for the export, click the appropriate report selection in the drop-down list. (1-9) |
|
Destination ID |
Enter the Destination ID that you defined during MSR Export Destination Maintenance. (up to 20 characters) |
|
Destination File |
Displays the transmission file path and file name that you defined during MSR Export Destination Maintenance. You can change the file path and name here, if necessary. (up to 80 characters) Example: c:\klhtemp\TCPOR09.06A Notes: The path and file name use the following format:
|
|
|
To search for a new file path (or file name), click Browse. Keyboard shortcut: [ALT + p] |
|
|
To run the routine and generate the report, click Export, or press [ENTER]. Keyboard shortcut: [ALT + e] |
|
|
To escape from the routine:
|
|
|
To print the status messages, click Print. Keyboard shortcut: [ALT + p] |
Report Sample(s), click More.


