Call Center - Call Entry Clerk Entry Panel
Use the Call Entry Clerk Panel to maintain the clerk for the customer calls being processed. This information will be the same for all the calls entered until the clerk information is changed. Setting the clerk information is the first step in entering customer calls. The table following the window example describes the Clerk Entry Panel for Call Center - Call Entry.
Tip: For additional information about working with data in fields, see Data Entry Guidelines.
To display the Call Center Call Entry - Clerk Entry Panel, click Call Center ![]() on the Toolbar.
on the Toolbar.
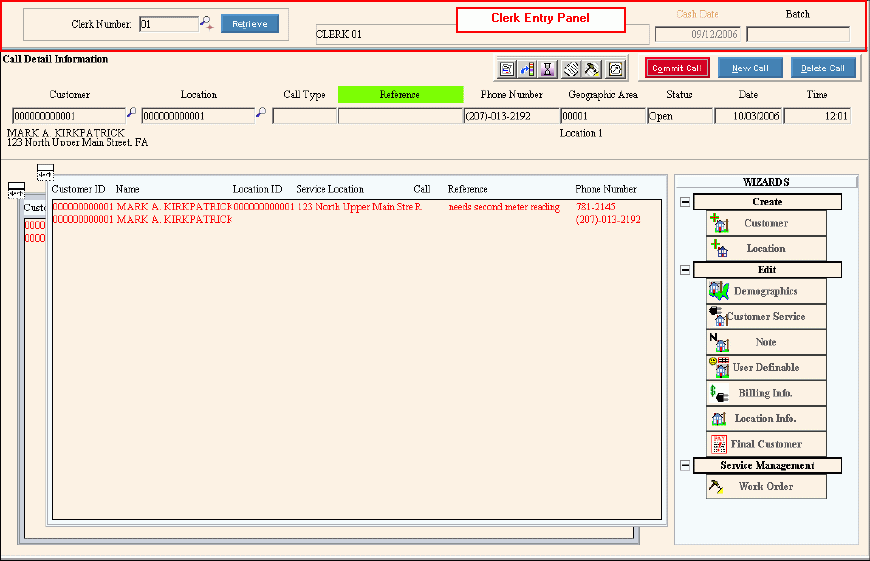
Call Center Call Entry - Clerk Entry Panel Example:
|
Call Center Call Entry - Clerk Entry Panel Prompts Tip: To see more information about a field, click the hyperlink for the field name. |
|
|
Enter a defined Clerk ID to identify the clerk information assigned to the person entering the calls. (2.0 numeric) Notes:
|
|
|
|
To display the clerk information, enter the Clerk ID and click Retrieve, or press [ENTER]. Keyboard shortcut: [ALT + t] Note: After you click Retrieve, the cursor stops at the Customer field and you are ready to call up the first account. For directions to load customers, click here. |
|
Displays for your reference the Clerk Name assigned to the Clerk ID. Note: This field is display-only and can not be edited. |
|
|
Displays the Cash Date assigned to the Clerk ID. Note: This field is display-only and can not be edited. |
|
|
Displays for your reference the Batch associated with the Clerk ID, if applicable. Note: This field is display-only and can not be edited at this time. |
|
|
|
To close the Call Center Call Entry window, click Close. Keyboard shortcut: [CTRL + x] |