Printer Number Maintenance
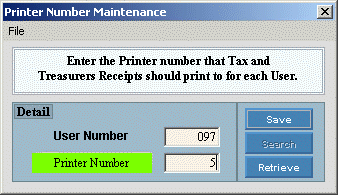
Use Printer Number Maintenance to assign a Printer Number to a specific User Number for printing tax receipts during the following cash receipts programs: Tax Receipt Entry, Treasurer's Receipt Entry, and Group Mortgage Payment Entry.
Notes:
Printer Number Maintenance overrides the Windows™ default printer assigned during Printer Setup.
You can override the Printer Number assigned here before printing a receipt during any of the cash receipts programs.
Example:

To see directions for...
Opening Printer Number Maintenance, click More.
Click File Maintenance from the Menu Bar, and next click Printer Number Maintenance.
Or, use the keyboard shortcut: [ALT] [m] [p].
Creating a new Printer Number assignment, click More.
To create a new printer assignment:
Enter a new User Number.
Click
Retrieve or press
[ENTER] if the button is in focus.
 Caution: To
create a new record, you must click Retrieve before
you click Save.
Tip: To
indicate that you are building a new printer assignment,
 displays above the User Number. Default
entries display and the first field is highlighted to let you know you
can begin entering information.
|
Printer Number Maintenance Prompts Tip: To see more information about a field, click the hyperlink for the field name. | |
|
Enter a valid User Number. (3 digits) Required. | |
|
Printer Number |
Enter a valid Printer Number. (4.0) |
|
|
To update the new or changed information click Save or press [ENTER] if the button is in focus. |
|
To avoid losing data, you must save new or changed printer assignments. | |
|
|
The Search button is not active. |
|
|
To create a new printer assignment or to display an existing printer assignment, enter the User Number and click Retrieve or press [ENTER] if the button is in focus. |
Viewing or Editing an existing Printer Number assignment, click More.
 CAUTION: To
avoid losing data, you must save new or changed printer assignments.
To
display the printer assignment to be changed, enter the User Number
and click Retrieve or press [ENTER]
if the button is in focus.
To position the pointer to the information that you want to change, press [TAB] or click the field using the mouse.
Enter the data changes.
To
complete the edit process, click Save or press [ENTER]
if the button is in focus.
Deleting a Printer Number assignment, click More.
To
display the printer assignment to be changed, enter the User
Number and click Retrieve or press [ENTER]
if the button is in focus.
Click
File from the Menu
Bar, and next click Delete.
Keyboard shortcut: [ALT]
[f] [d].
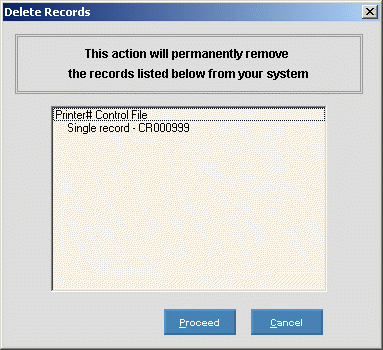
At
the Delete Records prompt, click Proceed
to delete the record, or click Cancel
to escape from the delete routine.
Example:
Note: After
you click Proceed, you will see
the following message on the Status
Bar.