Opening a blank Print View window (usually for retrieving a report from a saved a file), click More.
-
Click File from the Menu Bar.
-
Click Settings.
-
Click Print View.
Keyboard shortcut: [ALT] [f] [e] [v]
Opening the Print View window for a specific report, click More.
-
Run a report.
Tip: For a list of specific report instructions see the Reports Overview. -
Enter the Printer Number for Print View (usually 5) at the printing options window.
-
Click the Print button.
Using basic Print View report functions, click More.
The following table describes the basic Print View Report functions.
|
Basic Print View Report Functions | |
|
To send a displayed report to a printer, use one of the following methods:
You will then see the Windows™ Print dialog window for your default printer.
Tips:
| |
|
You can temporarily change the size of the font for the displayed report by dragging the button on the slide bar at the top of the window. Tip: This feature is useful for improving readability, fitting a report into the window, and capturing snapshots of the report with the [PRINT] key. Note: This function does not change the font on a report sent to a printer. | |
|
To close the Print View window, use one of the following methods:
Tips:
| |
Controlling the report generation process, click More.
Note: Short reports often generate so quickly, there is no need for the report generation functions.
The following table describes the functions that are active while Print View is generating the report:
|
Report Generation Functions | |
|
Monitor Report Status |
While Print View is generating a lengthy report, you can monitor its progress and see the number of lines created.
|
|
|
To cancel a report while it is generating, click the Cancel Gateway button. Note: You will see only the completed portion of the report. |
|
|
To view the completed portion of the report (while allowing it to finish generating), click the View Report button. |
Using advanced Print View report functions, click More.
The following table describes the advanced Print View Report functions.
|
Advanced Print View Report Functions | |
|
You can freeze the data on a report by saving it to a file. This function is useful to archive important data or to export the data to another program. Directions:
Tip: To display the saved report at a later time, follow the procedure for Recall a Saved Report.
See also: Save a Report to Memory | |
|
To display a report that was previously saved to a file:
See also: Save a Report to a File | |
|
You can save a report to memory so that you can quickly view it again at a later time. It is especially useful for lengthy reports that can take a long time to generate in Print View. To save a report to memory, use one of the following options:
Tips:
See also: View a Report in Memory, Save a Report to a File | |
|
To view a report that was previously saved to memory:
Tips:
See also: Save a Report to Memory | |
|
To email a copy of a report directly to NDS Technical Support, click the e-Mail menu, and then click e-Mail Support. Keyboard shortcut: [ALT] [m] [s]
Caution: You will not see any email options when you use this function. Tip: To enter changes or notes to a report before sending it, see Make Notations. | |
|
To email a copy of a report to your manager or a coworker, use one of the following options:
Tip: To enter changes or notes to a report before sending it, see Make Notations. | |
|
You can enter notations and modify the data in a report that is currently displayed in the Print View window. Then you can email the report with the notations to NDS Technical Support or to a coworker. Caution: For security reasons and to preserve data integrity, you can not print the notations or save them to a file. Tips:
See also: Email a Report to Support, Email a Report to a Coworker | |
|
To erase all notations made to a report, click the View menu, and then click Refresh Text View. Keyboard shortcut: [ALT] [v] [r] | |
Navigating within a displayed report, click More.
The following table describes the instructions for navigating within a report.
|
Navigating in a Report | |
|
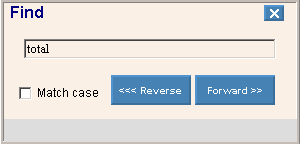
You can use the Find function to locate and highlight specific data in a report. To locate data in the report:
Example:
Tip: The Find feature is useful for reprinting data stored in archived reports (reports saved to a file). For example, you can search for a name in some archived laser bills. Then you can highlight the bill in the file and reprint your selection. | |
|
To quickly move the pointer to the bottom of the report, press [CTRL + END]. | |
|
To quickly move the pointer to the top of the report, press [CTRL + HOME]. | |
|
To move around within a report, you can use the Scroll bars. Tip: You can also move vertically by pressing [PAGE UP] and [PAGE DOWN]. | |
 , if configured.
 .
.

 , if configured.
 , if configured.