Opening the Create Recurring Entries routine, click More.
-
Basic Method (from the G/L Module):
-
Click Daily Work from the Menu Bar.
-
Click Create Recurring Entries.
Tip: Or, use the keyboard shortcut: [ALT] [a] [r].
-
Advanced Method (from another NDS Module):
-
Click General Ledger from the Menu Bar.
-
Click Daily Work.
-
Click Create Recurring Entries.
Tip: Or, use the keyboard shortcut: [ALT] [g] [a] [r].
Note: To activate the General Ledger menu in another module, the G/L Application Control must be set up for the module during installation.
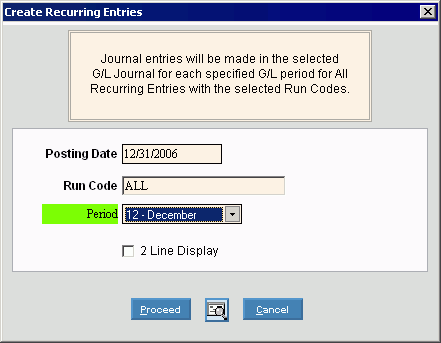
Create Recurring Entries Window Example:

Choosing the selections at the prompt window, click More.
|
Create Recurring Entries Prompt Options Tip: To see more information about a field, click the hyperlink for the field name. | |
|
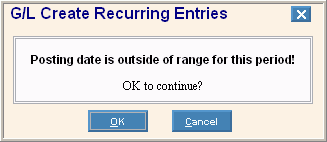
To accept the system date as the Posting Date, click [TAB]. Or, you can enter a different Posting Date. (mmddccyy - century and slashes optional) Required Note: If the Posting Date falls outside the Period Closing Date, you will see the following warning.
Click Cancel and correct the date, or click OK to accept the entered date. | |
|
To select a group of journal entry templates to be processed, you can enter a Run Code. (2.0 numeric) Tip: To select templates for all Run Codes, enter ALL. | |
|
Click a Period in the drop-down list. (predefined) Note: If you specify a Period that is already closed, you will see the following message:
You can correct the Period. Or, if you are certain that you want to post to a closed Period, you can open it using Period Descriptions Maintenance. | |
|
2 Line Display |
To specify if you want to print two lines for each transaction: |
|
|
To run the routine and begin printing to the Windows® default printer, click Proceed, or press [ENTER]. Keyboard shortcut: [ALT + p] |
|
|
To run the routine and print to the Print View screen, click here. |
|
|
To escape from the routine and close the window:
|
Report Sample(s), click More.


