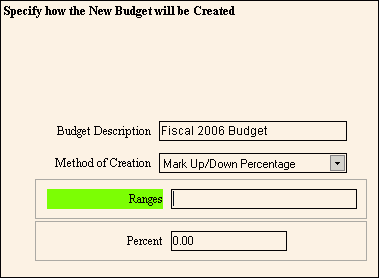
Wizard - Data Entry Area
The Wizard Data Entry Area contains the fields to be entered for the current step.
Tips:
For general information about Wizards, see the Wizard - Introduction.
There are four major areas in a Wizard window:
Steps Area (left pane): Lists each area that you can maintain. Each step corresponds to a separate set of fields in the Data Entry Area, which is displayed in the center pane.
Narrative Area (left pane): Provides tips and notes for entering the data.
Data Entry Area (center pane): Displays the fields for you to maintain. The current Data Entry Area is indicated by the highlighted step on the left.
Inquiry Area (right pane): Displays the data you have entered for each step.
Directions:
To display the Data Entry Area:
Open a Wizard window, such as the Create New Budget wizard.
To navigate to the step you want to work with:
Click the name of the step in the Steps Area.
Or, click a navigation button in the Data Entry Area (Back or Next).
Tip: For information about moving around within a wizard, see Wizard - Navigation.
Example:

|
Wizard Steps Area Prompts |
|
|
Fields |
The fields vary according to the step you are working in. |
|
|
To navigate to the previous step, click Back. Keyboard shortcut: [ALT + b] |
|
|
To navigate to the next step, click Next or press [ENTER]. Keyboard shortcut: [ALT + b] |
|
|
To update the new or changed information, click Finish or press [ENTER]. The Wizard displays messages as it validates each step before closing the Wizard window. Keyboard shortcut: [ALT + s] |
|
To avoid losing data, you must save new or changed records by clicking Finish. | |
|
|
To exit the Wizard without saving any changes, click Close. The following warning displays:
To close the Wizard, click OK or press [ENTER]. Keyboard shortcut: [ALT + o]
Or, to resume data entry in the Wizard, click Cancel. Keyboard shortcut: [ALT + c] |