Opening the Chart of Accounts Report, click More.
-
Basic Method (from the G/L Module):
-
Click Reporting from the Menu Bar.
-
Click Chart of Accounts.
Tip: Or, use the keyboard shortcut: [ALT] [r] [c].
-
Advanced Methods (from the G/L Module):
-
Click Chart of Accounts
 on the Toolbar.
 -
Or, click the following sequence:
View from the Menu Bar; and then Chart of Accounts.
Keyboard shortcut: [ALT] [v] [c] -
Or, use the keyboard shortcut: [CTRL + c]
-
Advanced Method (from another NDS Module):
-
Click General Ledger from the Menu Bar.
-
Click Reporting.
-
Click Chart of Accounts.
Tip: Or, use the keyboard shortcut: [ALT] [g] [r] [c].
Note: To activate the General Ledger menu in another module, the G/L Application Control must be set up for the module during installation.
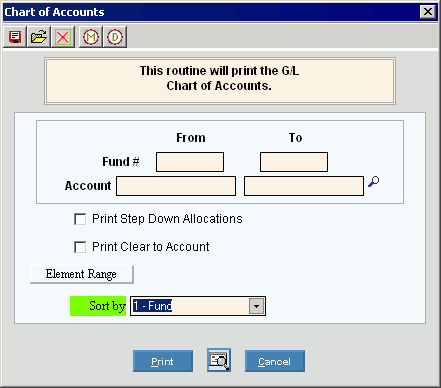
Chart of Accounts - Header Info. Window Example:

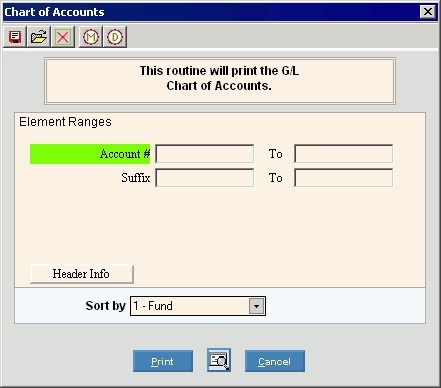
Chart of Accounts - Element Range Window Example:

Choosing the selections at the prompt window, click More.
|
Chart of Accounts Report Prompt Options Tip: To see more information about a field, click the hyperlink for the field name. | |
|
Header Information | |
|
Fund # Range |
To limit the report to a range of Funds, enter the From and To Fund values, inclusive. (4.0 numeric) Tip: Leave blank to select all values. |
|
Account Range |
To limit the report to a range of Account Numbers, enter the From and To Account values, inclusive. (format varies) Tips:
|
|
Print Step-Down Allocations |
To specify if you want to print the Step-Down Accounts: |
|
Print Clear to Account |
To specify if you want to print the Clear To Account Numbers:
|
|
|
To enter ranges of Account Elements (described below), click Element Range. |
|
To specify how to sort the report, click one of the following options in the drop-down list: | |
|
|
To begin printing to the Windows® default printer, click Print, or press [ENTER]. Keyboard shortcut: [ALT + p] |
|
|
To print to the Print View screen, click here. |
|
|
To escape from the print routine, click Cancel. Keyboard shortcut: [ALT + c] |
|
Element Range Tip: This prompt displays a list of the Elements defined for the Account Number. The list of elements varies according to the settings for each facility. You can select accounts to print on the report by entering ranges of Elements. | |
|
Element Ranges |
To select accounts by Element to be included in the report, enter the from and to values (inclusive) for each applicable Element. (format varies) |
|
|
To display the Header Information (described above), click Header Info. |
Report Sample(s), click More.


