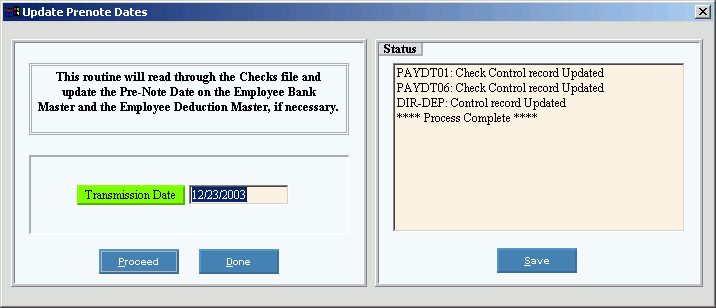
To see directions for opening Update Prenote Dates, click More.
To open the program, choose one of the methods below:
-
Click Payroll from the Menu Bar, and next click Daily Work; then click Direct Deposit. Click Update Prenote Dates.
-
Or, click the Update Prenote Dates button
 from the Direct
Deposit Export Control Panel.
 -
Or, use the keyboard shortcut: [ALT] [p] [d] [d] [u].
At the prompt window, choose the selections. To see the prompt options, click More.
Example:

|
Update Prenote Dates Prompt Options Tip: To see more information about a field, click the hyperlink for the field name. | |
|
Enter the Direct Deposit Transmission Date, which contains the date you plan to transmit the direct deposit file to the bank. (MM/DD/CCYY - Slashes are optional.) Note: The Transmission Date, usually today's date, must be a predetermined number of lead daysbefore the Direct Deposit Effective Date, so the bank has enough lead time to process the transactions. The DD-Days Table controls the number of lead days required (usually two). | |
|
Status |
Displays messages that report the status of the update process. |
|
|
To start the process, click Proceed, or press [ENTER] if the button is in focus. You will then see the status messages in the Status area. Keyboard shortcut: [ALT + p] |
|
|
When you see the Process Complete message in the Status area, you can click Done (or press [ENTER] if the button is in focus) to close the program. Note: You may want to click Save before clicking Done, to back up the status messages. Keyboard shortcut: [ALT + d] |
|
|
You can archive the messages in the Status area by saving them to a text file, as described below.
|


