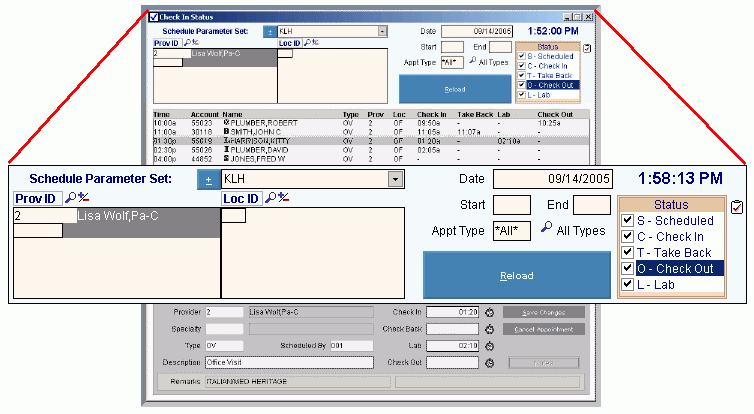
Scheduling - Check In Status Window Parameters Area
Use the Check In Status Window Parameters Area in Scheduling to maintain the parameters which control or limit the display of scheduled appointments in the Appointment List Area. You can specify the date, times of day, types of appointments and statuses. The scheduled appointments display in the list according to the parameters you enter. The table following the window example describes the Parameters Area for the Check In Status Window.
Tip: For more information about working with data in fields, see Data Entry Guidelines.
Directions:
To display the Parameters Area in the Check In Status Window:
Click the following sequence: View Menu from the Menu Bar; Check In Status.
Or, use the keyboard shortcut: [ALT] [v] [c].
Tip: You do not have to open Scheduling to display the Check In Status Window.
Scheduling - Check In Status Window Parameters Area Example:
|
Scheduling - Check In Status Window Parameters Area Prompts Tip: To see more information about a field, click the hyperlink for the field name. |
|
|
|
The Parameter Set Name identifies a predefined set of parameters that you can maintain for your convenience. Entry Options:
Tip: You can manually maintain the parameters without using a predefined Parameter Set. |
|
To specify one or more providers to include in the Appointment List, enter the Scheduling Provider Code and click Plus/Minus Notes:
|
|
|
To specify one or more locations to include in the Appointment List, enter the Scheduling Location Code and click Plus/Minus Notes:
|
|
|
Enter the date to display scheduled appointments for. (mmddccyy - slashes and century optional) Required |
|
|
To specify the beginning time for the appointments to be included in the Appointment List, enter the Start Time, if applicable. (hh:mm, military time) Example: Enter 9:00 for 9:00 am Note: To include all appointments for the date, leave Start Time and End blank. |
|
|
To specify the ending time for the appointments to be included in the Appointments List, enter the ending time, if applicable. (hh:mm, military time) Example End Time: Enter 13:00 for 1:00 pm Note: To include all appointments for the date, leave Start Time and End blank. |
|
|
To limit the display of Appointment Types in the Appointment List, enter the Appointment Type ID, Category ID, or Set ID. (up to 6 characters) Note: To include all Appointment Types leave this field blank. (* All * displays in place of the blank.) Tips:
|
|
|
|
To display the scheduled appointments specified by the parameters entered, click Reload. Keyboard shortcut: [ALT + r] |
|
Current Time |
Displays the current time. |
|
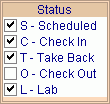
To limit the display of appointments to one or more specific statuses, click the desired status codes in the Status box. Tip: To select all statuses, click the Clipboard |
|
![]()