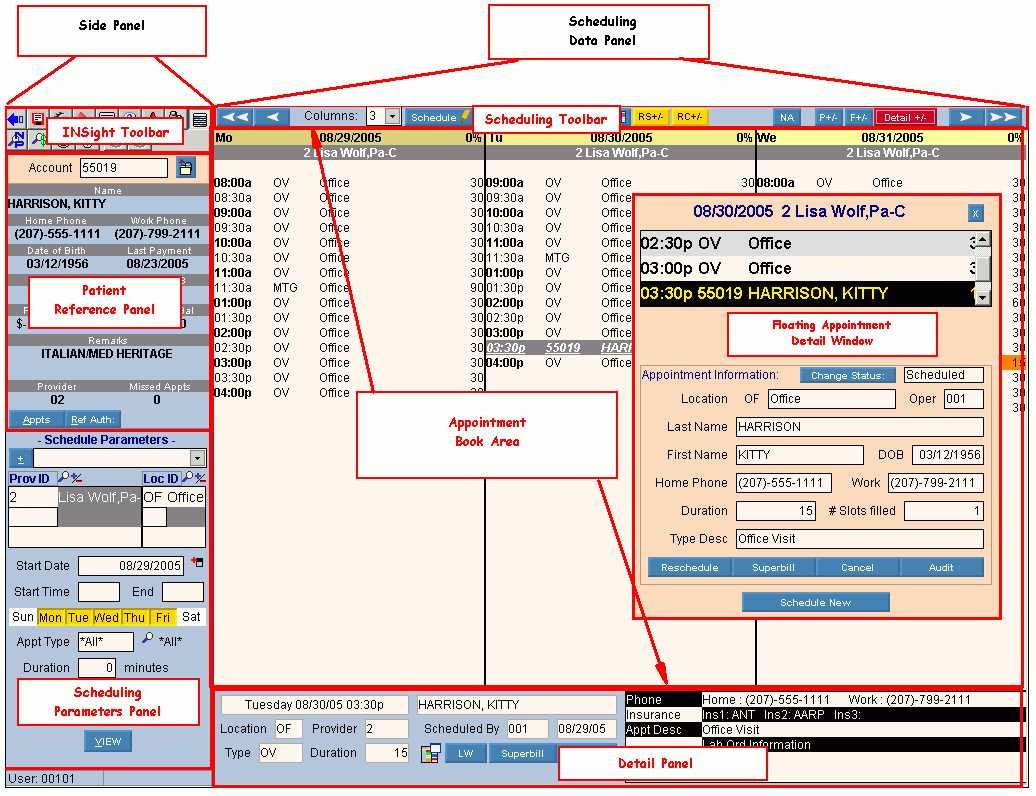
Scheduling Window - Overview
The Scheduling Window, also called the Scheduling Data Panel, makes up the right side of the INSight window, when you are in Scheduling. The table following the window example describes the major areas within the Scheduling Window.
Tip: To fill the entire INSight window with the Scheduling Window, click Shrink Menu ![]() on the INSight Toolbar.
on the INSight Toolbar.
Directions:
To display the Scheduling Window, open Scheduling.
Scheduling Window Example:
Tip: To see detailed information, the cursor becomes a ![]() hand when you position the cursor over a field or section. Click once to display the associated topic.
hand when you position the cursor over a field or section. Click once to display the associated topic.
|
Scheduling Window Areas Tip: To see more information about a field, click the hyperlink for the field name. Note: This topic describes the basic areas within the Scheduling Window. However, you can launch other windows from the Scheduling Window. For more information about the other windows, see the Scheduling Overview. |
|
|
Contains the buttons to control the schedule display and to perform certain scheduling functions. |
|
|
Displays columns for each day, for each provider, with the unreserved and reserved appointment time slots available in the schedule. |
|
|
Tip: The following areas all share the same space in the Detail Panel at the bottom of the Scheduling Window. |
|
|
Displays additional information about the time slot currently highlighted in the schedule. Tip: The layout of the Appointment Detail Area varies, depending on whether the time slot is reserved or not. |
|
|
Displays a list of recalls for the patient and lets you schedule an appointment for a specific recall, if applicable. Tip: The Recalls List Area is not shown in the example. |
|
|
Displays a list of appointments waiting to be rescheduled. Tip: The Reschedule Appointments List Area is not shown in the example. |
|
![]()