Create Customer Location Step 5 Window
Use the Create Customer Location Step 5 Window to enter owner information for the location.
Tip: For general information about using wizards, see the Wizard - Introduction.
To display the Create Customer Location Step 5 window:
1. From the Inquiry, click Tools and then, click Wizards.
2. In the Create section, click Customer.
3. To navigate
to the step that you want to maintain click Next
![]() or click Back
or click Back ![]() until
the data that you want to maintain displays in the Data Entry Panel.
until
the data that you want to maintain displays in the Data Entry Panel.
Create Customer Location Step 5 Window Example:
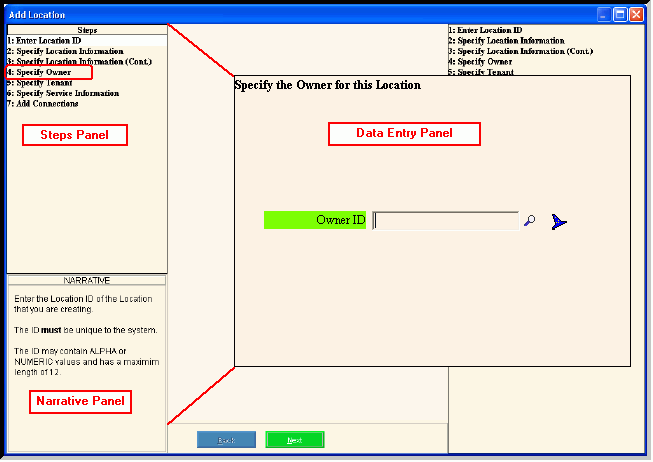
Data Entry Panel - Create Customer Location Step 5 Prompts
|
|
To accept the displayed Customer ID as the Owner ID, press [TAB]. Or, enter another Customer ID for the Owner ID. (up to 12 characters) Required Notes:
|
|
|
To complete the entries and continue to the next window, click Next. Keyboard shortcut: [ALT + n] For directions to the next step, click here. |
|
To return to the previous window for re-entry, click Back. Keyboard shortcut: [ALT + b] For directions to the previous window, click here. |
|
To complete the customer location entries and continue to the service connection entries, click Finish or press [Enter]. Keyboard shortcut: [ALT + s] Tip: For directions to the Create Customer Service Connection Step 1 Window, click here. |
![]()