Lien Reversal
Use these instructions to reverse a lien that was posted to an account. This is a 2-step process where you will reverse the lien from the account and then add the amount back to the account in the appropriate ageing bucket.
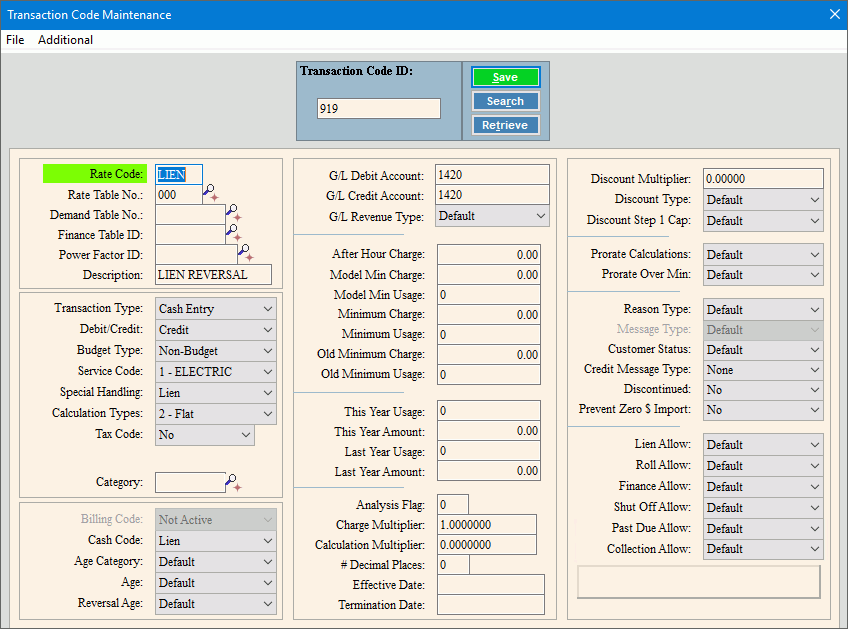
Use Transaction Code Maintenance to create a Transaction Code to handle lien reversal transactions.

Set up the transaction code as follows:
Rate Code: LIEN
Description: LIEN REVERSAL
Transaction Type: Cash Entry
Debit/Credit: Credit
Special Handling: Lien
Calculation Type: 2-Flat
Cash Code: : Lien
Age Category: Select the appropriate aging bucket.
G/L Debit Acct: Enter G/L account to debit.
G/L Credit Acct: Enter the G/L account to credit.
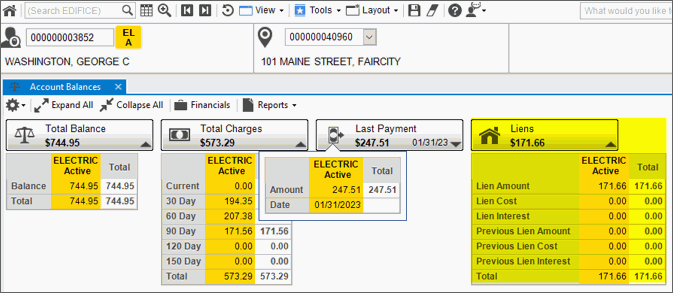
Use the Account Balances view of the Inquiry to see the account's lien balance(s). Lien balances are a separate category as shown below.
From the Inquiry, click View and then click Account Balances View.
Inquiry - Account Balances View with Liens Example:
Click Cash
Receipts Entry ![]() from the Toolbar. The following screen displays. Notice the
lien balance displays under lien total.
from the Toolbar. The following screen displays. Notice the
lien balance displays under lien total.
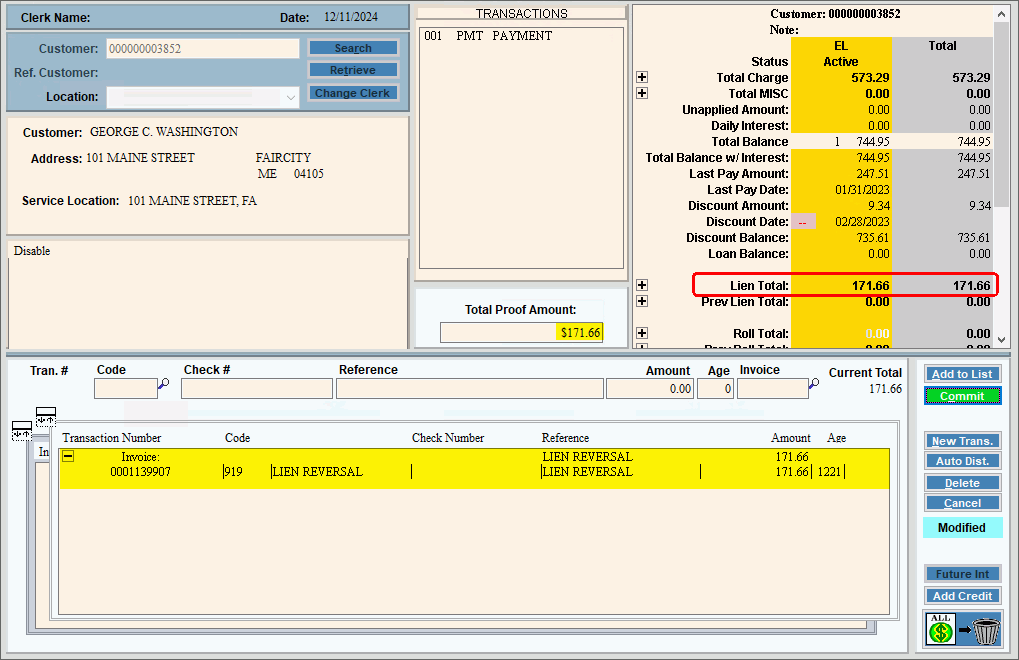
To enter the lien reversal:
1. Enter the lien amount to reverse as the Total Proof Amount.
2. Enter the transaction code for the lien reversal. In this example it is 919.
3. Enter a description of LIEN REVERSAL to make it easy to track.
4. Enter the amount of the lien to reverse.
5. For the Age, enter the current lien month and the current lien year. The lien month and year can be found in the Liens Parameter Maintenance.
6. Click Add to List and then click Commit to complete the entry.
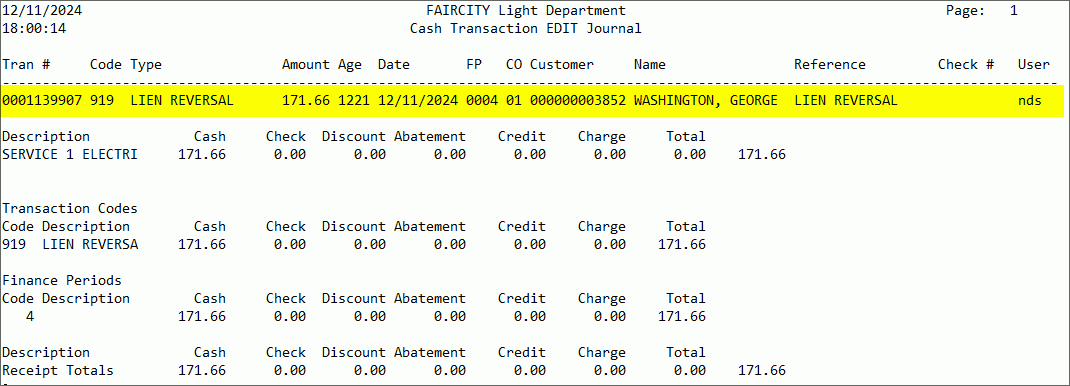
Use the Cash Receipts Journal to prove your work and provide an audit trail.
From the Cash Explorer, select Journal and then select Cash. Make your selections.
Run the Cash Receipts Post to finalize the reversal of the lien amount from the account.
From the Cash Explorer, select Post and then select Cash.
Confirm the date and click Proceed.
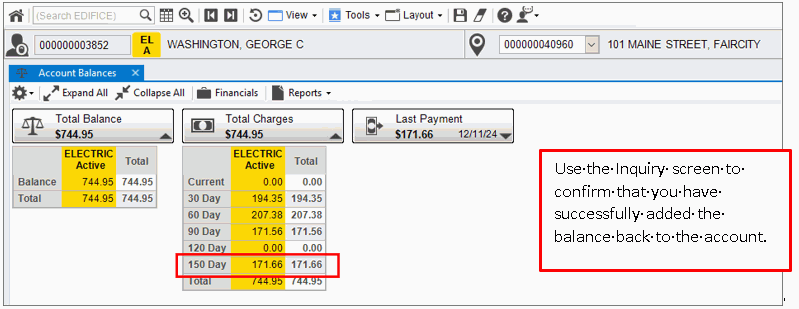
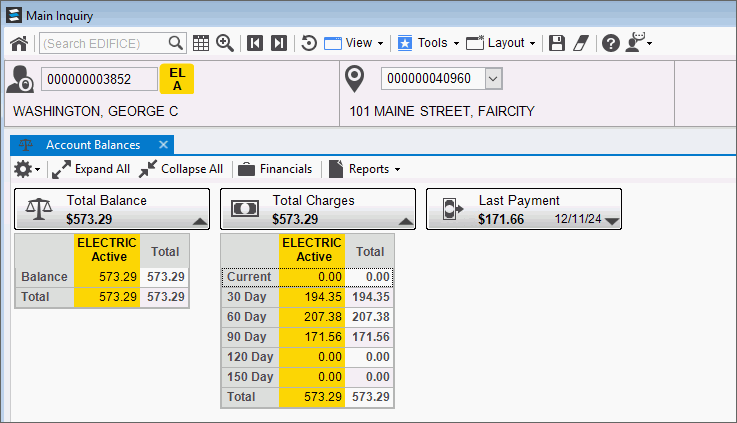
Go to the Inquiry, load the account and open the Account Balances view. You should no longer see the lien amount under the liens column.
The following steps outline how to add the amount of the lien back to the account’s balance and in the appropriate ageing bucket.
Another transaction code must be set up to add the lien amount back to the account balances.
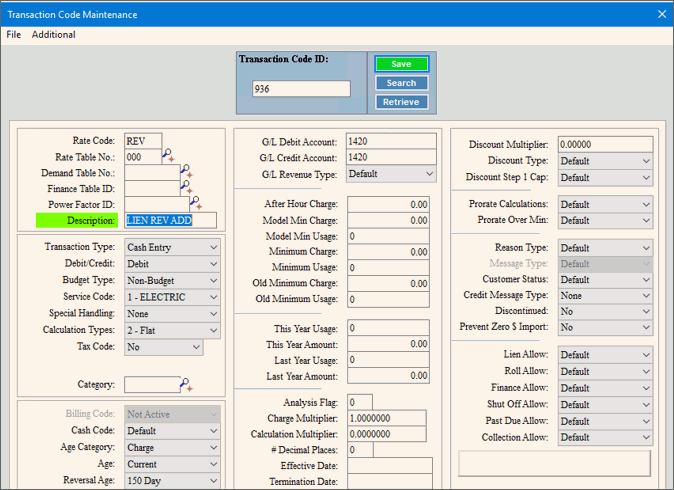
The transaction code should be created with these settings:
Rate Code: REV
Description: LIEN REV ADD
Transaction Type: Cash Entry
Debit/Credit: Debit
Special Handling: None
Calculation Type: 2-Flat
Cash Code: : Default
Age Category: Charge
G/L Debit Acct: Enter G/L account to debit.
G/L Credit Acct: Enter the G/L account to credit.
Go back to Cash Receipts Entry and add the lien amount back to the account balance in the aging bucket that it was before it was moved to lien.

To add the amount back to the account and place it in the appropriate ageing bucket:
1. Enter the amount as a negative amount in the Total Proof Amount.
2. Enter the transaction code for adding the amount back to account. In this example it is 936.
3. Enter a description of ADD BALANCE BACK to make it easy to track.
4. Enter the amount to add back to the account.
5. Enter the appropriate aging bucket as the age. In this example we added it back to the 150-day bucket.
6. Click Add to List and then click Commit to complete the entry.
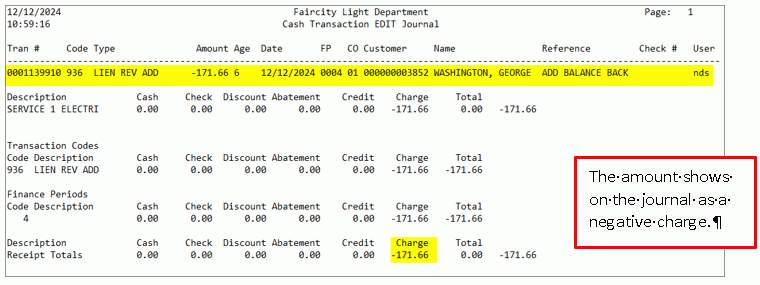
Run the Cash Journal again to verify the amount is being added back to the account. A copy of the journal is saved to report history for a complete audit trail.
Run the Cash Receipts Post one more time to update the account for the amount to add back.
After the post is completed, review the account balance from the Account Balances view of the Inquiry to confirm that the account balance is correct.
