Rolls Write Off Print Transaction Journal Instructions
Use the Rolls Write Off Print Transaction Journal to list the rolls write off transactions created during the Rolls Write Off Generate Transactions routine. The journal lists all customers whose delinquent balances will be written off during this write off phase of the rolls process and includes the write off details and write off totals. Use this journal to review and approve the customer accounts to be affected.
Tips:
If you find that transactions need to be edited or removed, use Transaction Entry to make the changes. Be sure to print an updated journal if you make any changes.
For information about the timing and sequence of the write off tasks, see the Rolls Process.
For more information about running reports, see Print View.
For more information about the buttons on the toolbar, see the Reporting Toolbar.
To open:
1. Click Processes from the Menu.
2. Click Rolls.
3. Click Write Off.
3. Click Print
Transaction Journal.
Or, use the keyboard
shortcut: [ALT] [p] [r] [w]
[p].
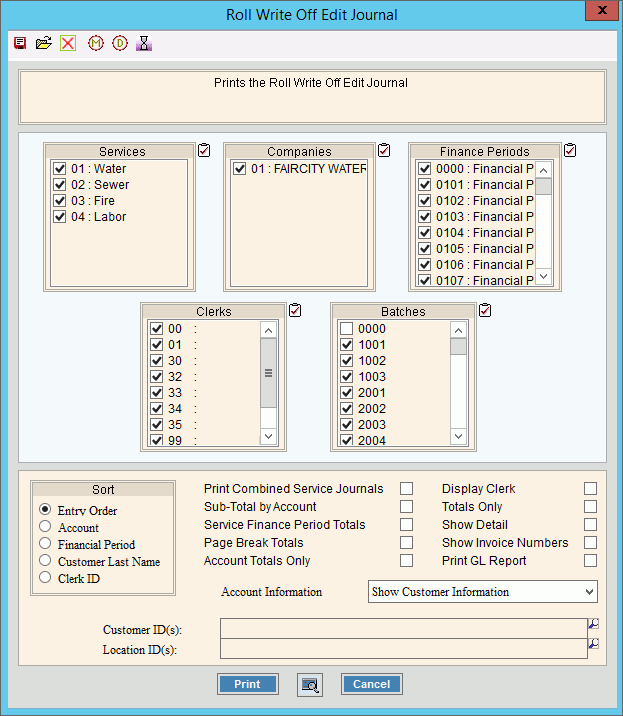
Rolls Write Off Print Transaction Journal Window Example:

Rolls Write Off Print Transaction Journal Prompt Options
|
|
To select the services to print, click to check the appropriate services listed. Tip:
To quickly select or de-select
all services listed,
click Check All |
|
To select the companies to print, click to check the appropriate companies listed. Tip:
To quickly select or de-select all
companies listed, click Check
All |
|
To select the finance periods to print, click to check the appropriate finance periods listed. Tip:
To quickly select or de-select all
finance periods listed, click Check
All |
|
To select the clerks to print, click to check the appropriate clerk IDs listed. Tip:
To quickly select or de-select all
clerk IDs listed, click Check
All |
|
To select the batches to print, click to check the appropriate batch IDs listed. Tip:
To quickly select or de-select all
batch IDs listed, click Check
All |
|
Sort |
To choose a sort option, click to select the appropriate button. Sort Options:
|
Print Combined Service Journals? |
To combine
and list together all service payments for each customer on the
journal, select this box. |
Sub-Total by Account |
To print the subtotals for each customer,
select this box. |
Service Finance Period Totals |
To print totals for each finance
period at the end of the report, select this box. |
Page Break Totals |
To print totals each time the report
goes to a new page, select this box. |
Account Totals Only |
To include account totals only, check this box. |
Display Clerk |
To list the clerk ID on the journal,
select this box. |
Totals Only |
To report totals only, check this box. |
Show Detail |
To include detail on the journal, check this box. |
Show Invoice Numbers |
To include invoice numbers on the journal, check this box. |
Print GL Report |
To include the GL report on the journal, check this box. |
Account Information |
Choose whether to include customer information, location information or both on the journal. |
To print selected accounts, enter the customer IDs followed by a comma (,). (up to 12 characters) Tip: To build a list of customers:
|
|
To print selected accounts, enter the location IDs followed by a comma (,). (up to 12 characters) Tip: To build a list of locations:
|
|
|
To begin printing, click Print, or press [ENTER]. Keyboard shortcut: [ALT + p] Or, to print to the screen, click Print View.
Or, to
escape from the print routine, click Cancel
Keyboard shortcut: [ALT + c] |