Service Connection Line Mapping Information Wizard
Use the Service Connection Line Mapping Information Wizard to maintain line items for connections, linking line items to connections. Special conditions for the line item can be maintained as well.
Tip: For general information about using wizards, see the Wizard - Introduction.
TS Note: To enable the wizard, add edit_connection_line_mapping_info to the inquiry_edit group in nds.wizard_groups of the Wizard_Data model.
To open Service Connection Line Mapping Information Wizard:
Go to Enhanced Inquiry --> Tools --> Wizards --> Service Connection Line Mapping.
Or, click
File Maintenance from the
Menu. Then click
Wizard Maintenance,
Service Connection and
then Line Mapping Information.
Tip: Or, use the keyboard
shortcut: [ALT] [y] [m]
[w] [s] [l].
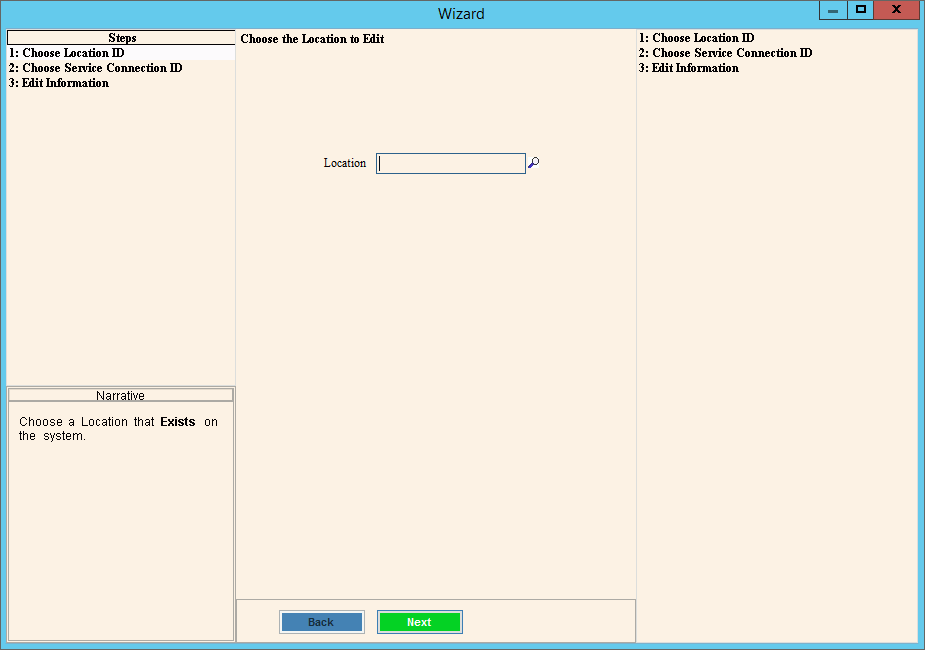
Service Connection Line Mapping Information Wizard Window Example:

Service Connection Line Mapping Information Wizard
|
|
Location |
At
the Choose Location Step, enter the Location
in the Data
Entry Panel. To advance to the next step, simply
press [ENTER]. |
Service Connection |
At the Choose Service Connection step, from the drop-down list select a service connection associated with the location. Then, press [ENTER] to advance to the next step. |
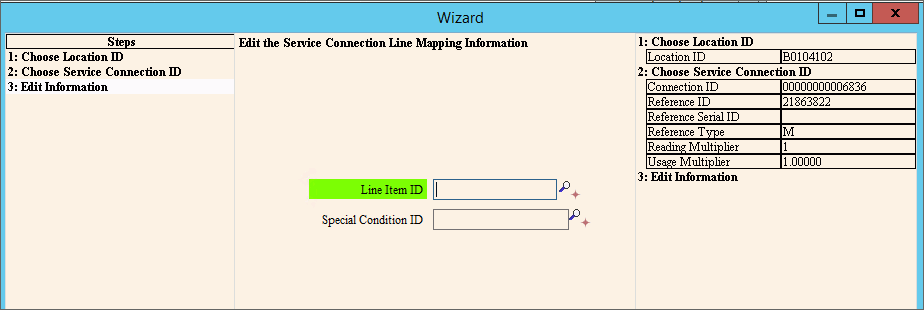
The Edit Information step displays: 
|
|
Line Item ID |
At
the Edit Information step, enter the defined line item
for the service connection or click Search
|
Special Condition ID |
Enter
a special condition to associate with the line item, if applicable.
Or click Search |
|
To
finish entry and save the changes, click Finish
|
Field Details by Panel |
|
The upper left panel lists each step that you can maintain. Each step corresponds to a specific group of fields displayed in the Data Entry Panel. |
|
The lower left panel provides tips and notes for entering the data. |
|
The center panel displays the fields for you to maintain and contains different fields for each step. Tip: The step currently displayed in the Data Entry Panel is highlighted in the Steps Panel. Steps:
|
|
The right panel displays the data you have entered so far for each step. |
|