 .
.Permanent Invoicing Procedure
Follow the steps listed below to enter and process permanent invoices:
Tip: For more information, click the appropriate link for details.
1. Enter invoices during Permanent Invoice Entry.
2. Run the Change Invoice Dates routine to globally change the invoice and due dates for all permanent invoices.
3. After all invoice dates are changed, run the Permanent Invoice Journal to proof the entered transactions before finalizing the invoice process by running the Invoice Post.
4. Make
any necessary corrections to invoice transactions.
Note: If
you make corrections to invoice transactions, reprint the Invoice Journal
for a complete audit trail.
From Permanent Invoice Entry, enter the
invoice number to edit or delete.
Tip: You
can find the invoice number on the invoice journal. Or,
to search for the invoice, click Search
to the left of invoice number in Invoice Entry.
To edit an invoice detail line:
a. Click Detail
 .
.
b. Edit the invoice information.
c. Then, click Done
 to complete the edits.
To completely remove an invoice transaction:
a. After recalling the invoice, click
Delete  .
.
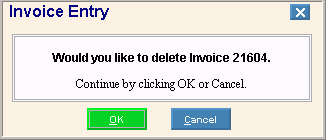
b. The following window displays:

c. Click OK to continue. The invoice information is deleted and the cursor returns to Batch Code for the next invoice entry.
5. When
all invoice transactions have been entered and approved, run the Invoice Post to update the appropriate
files with the invoicing information.
Note: Maintain
the Posting Summary
printout for a complete audit trail.
To correct an open invoice that is incorrect you will enter a negative
prepaid invoice during Invoice Entry and then post it through. This
means the original invoice will still be in the Open Invoice file, but
the negative prepaid invoice will cancel the invoice balance and the vendor
net balance will be 0.
Note: An
invoice transaction is an invoice that has been entered but has not posted
to the Open Invoice file during the Permanent Invoice Post. An
open invoice is an invoice in the Open Invoice file that has been entered
and posted during the Permanent Invoice Post.
To reverse an open invoice by entering a negative prepaid:
1. Select Invoice Entry and enter the batch code.
2. Enter the same vendor number.
3. Assign a new invoice number.
4. Enter the same invoice date.
5. Enter a negative (-) invoice amount.
6. Enter the check number.
7. Enter P for the status.
8. Enter the detail lines.
9. To complete the entries, click Done  .
.
10. Print the Invoice Journal and run the Invoice Post.