Opening Permanent Invoice Entry, click More.
1. Click Fund Accounting from the Menu Bar.
2. Click Daily Work.
3. Click Permanent Invoicing.
4. Click
Invoice Entry.
Tip: Or,
use the keyboard shortcut:
[ALT]
[u] [d] [i] [e].
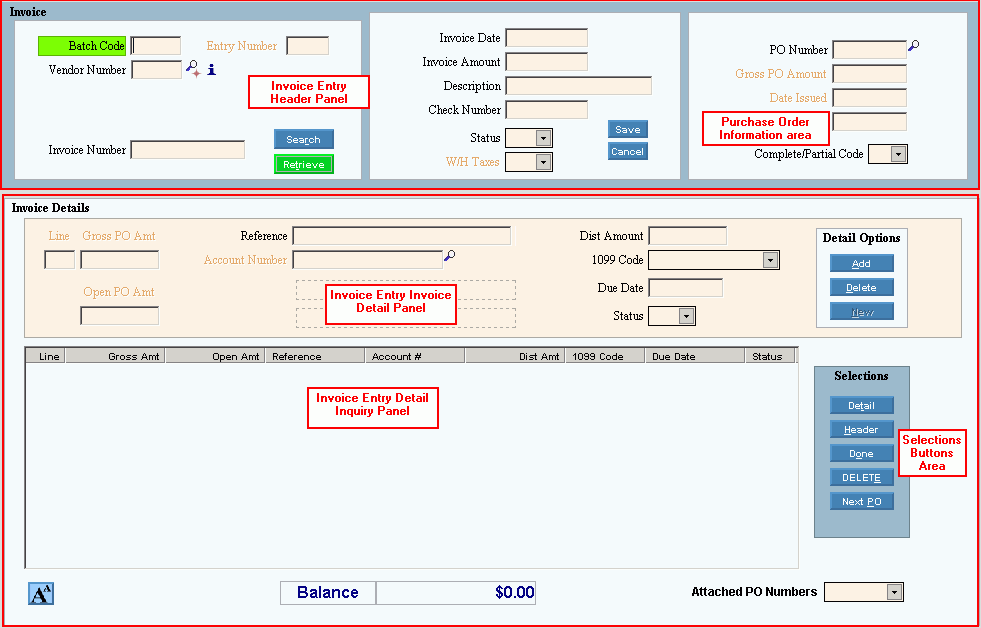
Permanent Invoice Entry Example:
Tip:
To see
detailed instructions for each section or field name in the examples below,
the cursor becomes a hand  when you position the cursor
over the field or section. Click
once to display the associated topic.

Creating a New Invoice, click More.
 CAUTION: To
avoid losing data, you must save new or changed records.
To create a new invoice enter the following:
1. Enter the invoice header information including:
a. Batch Code
d. Press [ENTER].
e. Invoice Date
g. Description
h. Status
i. Click
Save  to complete
the invoice header information.
2. Enter the invoice line details including:
a. Reference
e. Click
Add  to complete
the invoice detail line.
3. Continue
adding invoice detail lines until all invoice details are entered and
the balance is 0. Then,
click Done  .
.
Editing an Existing Invoice, click More.
 CAUTION: To
avoid losing data, you must click Done complete your entries.
1. To
display the invoice to be deleted, enter the Invoice Number
and click Retrieve  ,
or press [ENTER].
Note: The
invoice number is listed on the invoice
journal. If
you can not find the invoice number, click Search
to look for the invoice number.
2. To
edit, click Detail  .
.
3. Edit the appropriate fields.
4. Click
Done to complete
the edits.
Deleting an Existing Invoice, click More.
1. To
display the invoice to be deleted, enter the Invoice Number
and click Retrieve  ,
or press [ENTER].
Note: The
invoice number is listed on the invoice
journal. If
you can not find the invoice number, click Search  to
see a list of invoices.
2. From the Selections panel, click Delete.
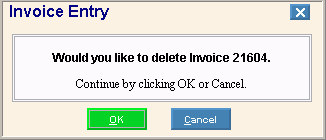
3. At the Delete invoice prompt, click OK to delete the record, or click Cancel to escape from the delete prompt.
Example:

Note: After you click OK, the invoice is deleted, the window clears and the cursor returns to Batch Code for the next entry.
Understanding the field values for the following areas, click the section name in the table below: