Move Requested to Approved Instructions
Use the Move Requested To Approved routine to copy the Manager Requested amounts to the Approved field for each budget master. In addition, a copy of the original amount remains in the Manager Requested field. Once this routine is complete, you can make any changes needed by using Budget Maintenance.
Notes:
Because the fields Department Requested and Manager Requested are user-defined, the field names in the software may not match the documentation. You can globally change the field names during Budget Request Table Maintenance.
Generally the Move Requested To Approved is step 8 in the budgeting process. For more information on the timing and sequence of budgeting tasks, see Budgeting Procedure.
For more information about running reports, see Print View.
Directions:
To see directions for...
Opening the Move Requested To Approved Routine, click More.
1. Click Fund Accounting from the Menu Bar.
2. Click Budgeting.
3. Click
Move Requested To Approved.
Tip: Or,
use the keyboard shortcut:
[ALT]
[u] [b] [p].
Move Requested To Approved Window Example:
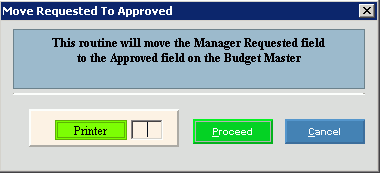
Choosing the Selections at the Prompt Window, click More.
Move Requested To Approved Prompts Tip: To see more information about a field, click the hyperlink for the field name. | |
Printer |
Displays the default printer number. For more information, see Printing Options. |
To run the routine and generate the report, click Proceed, or press [ENTER]. Keyboard shortcut: [ALT + p] | |
Important: The Move requested To Approved printout displays information pertaining to the various phases of the process to guide you. The report displays Done to alert you when the routine is complete. | |
To escape from the routine:
|
Report Sample(s), click More.