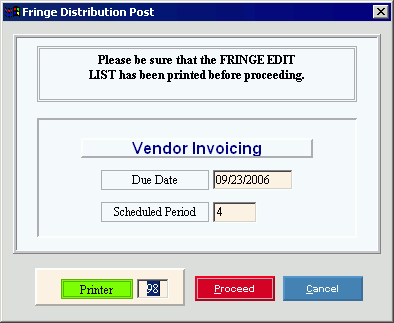
Fringe Distribution Post Instructions
Use the Fringe Distribution Post routine to generate the data for the Vendor Invoices and Checks system from the fringe distributions. Fringes are automatically distributed by the Payroll Post and the Retirement Fringe Post. Or, you can manually distribute fringes using Employee Fringe Maintenance.
Notes:
IMPORTANT: If there are employees with Department Numbers missing from the Auto Fringe Distribution cross-reference, the Payroll Post loads Department Number 99999999, which prints on the Fringe Distribution Edit List. You must correct all 99999999 Department Numbers in Employee Fringe Maintenance before running the Fringe Distribution Post. Then to prevent future problems, you should correct Auto Fringe Distribution Maintenance before the next payroll run, if applicable.
Run the Fringe Distribution Edit List before running the Fringe Distribution Post.
For more information, see the following topics:
To see an example of the report, click Fringe Distribution Post Report Sample.
Directions:
To open click Payroll from the Menu. Then, click Other Payroll Work, click Fringe Distribution and click Fringe Distribution Post.
Tip: Or, use the keyboard shortcut: [ALT] [p] [o] [f] [p].
Fringe Distribution Post Window Example:
Fringe Distribution Post Options
|
|
Enter the Vendor Due Date to be used for the transactions generated for the Vendor Invoices and Checks. (mmddccyy - slashes and century optional) |
|
Select the Scheduled Period Number. (1 through 6) |
|
Printer |
Displays the default printer number. For more information, see Printing Options. |
|
To run the routine and generate the report, click Proceed, or press [ENTER]. Keyboard shortcut: [ALT + p] To escape from the routine, click Cancel Or, click Close
|


 .
.