Opening the PR A/P Print Checks, click More.
-
Click Payroll from the Menu Bar.
-
Click Vendor Invoices and Checks.
-
Click Payroll A/P.
-
Click PR A/P Print Checks.
Or, use the keyboard shortcut: [ALT] [p] [v] [p] [k].
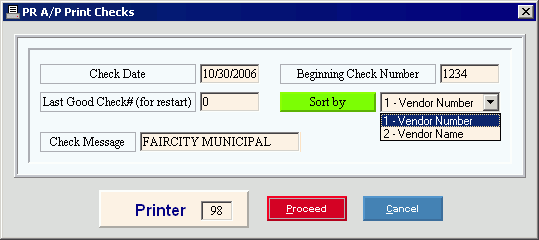
PR A/P Print Checks Window Example:

Choosing the selections at the prompt window, click More.
|
PR A/P Print Checks Prompt Options |
|
|
Check Date |
Enter the date to print on the checks. (MM/DD/YYYY, century and slashes not required) |
|
Beginning Check Number |
Enter the Check Number to print on the first check. (8.0 numeric) Required Tip: If this is a restart, enter the Check Number for the restart point. Example: Your original Check Number was 4025 and the printer jammed on Check Number 4075, which was physically torn up. When you restart, enter 4075 as the Beginning Check Number. You will then enter 4074 in the next field (as the last good check that printed). |
|
Last Good Check # (for restart) |
If your check run aborted unexpectedly, perhaps during a printer jam, you can restart it. Enter the last good Check Number that printed. (8.0 numeric) Tip: When you run a restart, make sure that all your other options are the same as the original print run. Example: If your printer jammed on Check Number 4075, enter 4074 during the restart to indicate it was the last good check to print. The reprint will start with Check Number 4075. |
|
Sort By |
Click one of the following sort options in the drop-down list:
|
|
Check Message |
Enter an optional text message to print above the Check Date at the top of all checks. (up to 30 characters) Tip: To expand the width of the field so you can see the entire 30 characters at once, point to the right field border. When the pointer changes into a horizontal double-headed arrow |
|
Printer |
Displays the default printer number. For more information, see Printing Options. |
|
|
To generate the report, click Proceed, or press [ENTER]. You will then be prompted with the option to align the form. Keyboard shortcut: [ALT + p] |
|
|
To escape from the print routine, click Cancel, or press [ENTER]. Keyboard shortcut: [ALT + c] |
Aligning the forms, click More.
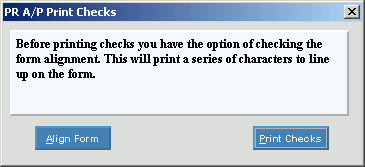
Note: When you click Proceed at the initial PR A/P Print Checks prompt, you will next see the forms alignment prompt window.
Example:

Steps:
-
To print a test pattern for lining up the forms on the printer, click Align Form as many times as necessary.
-
When alignment is correct, click Print Checks to start printing the checks.
-
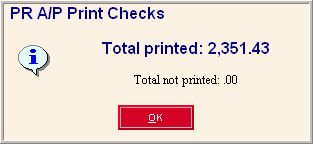
At the completion prompt, click OK.
Example:

Report Sample(s), click More.