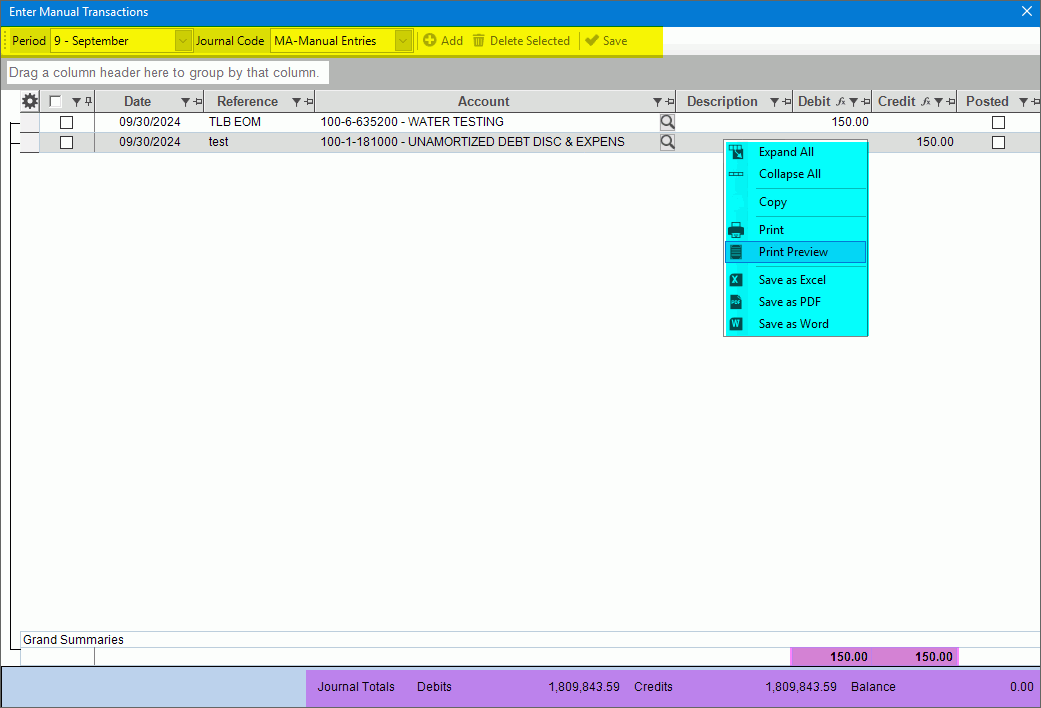
Enter Manual Transactions
Use the Enter Manual Transactions routine to enter manual journal entries and reversing journal entries for the General Ledger. Manual journal entries are also known as adjusting entries, and do not originate from other software applications.
Also called: Manual Entry
Tips:
The Enter Manual Transactions program allows you to make corrections to previous periods, even if they have already been closed. If required, you can open a period, enter the adjustment, and then close a period again without the danger of duplicating journal entries. NDS recommends caution when adjusting previous periods.
You can not edit or delete journal entry transactions that have already been posted.
To enter adjusting entries for a closed year, use Year-End Adjusting Entries Maintenance.
For more information about working with data in fields, see the Data Entry Guidelines.
Directions:
To open:
1. Click Daily Work from the menu.
2. Click Enter
Manual Transactions.
Tip: Or, use the keyboard
shortcut: [ALT] [a] [m].
Note: You may also be able to access the General Ledger menu
while in another INVISION application. To activate the General
Ledger menu in another module, the G/L
Application Control must be set up for the application during installation.

Enter Manual Transactions Prompts
|
|
To specify the Period to use for posting the journal entry transactions, select the Period in the drop-down list. Required Note: If the Period Open Option, which is set during Period Descriptions Maintenance, specifies that the period is not open, then you will see the following message:
Either correct the specified Period, or change the Period Open Option. |
|
Click a Journal Code in the drop-down list. (predefined)
Required |
|
Entering a Manual Entry |
To
create a new journal entry with the associated debit and credit
entries: 1. Select the Period in the drop-down list. 2. Enter the Entry Date. 3. Enter the Reference (required). 4.
Enter the Account Number or enter [Ctrl + f] or click Search
5. Enter a Description if desired. 6. If the entry is a debit amount enter the Amount in the Debit column. If the entry is a credit, enter the journal Amount in the Credit column. 7. To complete the line, press [Tab]. 8.
Continue entering the debit and credit entries until the
debit and credit amounts balance and the journal balance is zero
(0.00). Then, click Save
9.
When you have finished making entries, click X
|
Enter a date, which becomes the Posting Date for the journal entries. (mmddccyy - century and slashes optional) Required Notes:
|
|
Enter a reference to uniquely identify the journal entry. All transactions for this journal entry will share the same reference. (up to 20 characters) Required Examples: You can develop your own system of reference identifiers, such as the operator's initials, a bank account number, a journal entry number, or any other unique numbering system. Tips:
|
|
Enter the Account Number for the transaction. (format varies) Required Tips:
|
|
The Account Description displays for your reference. (up to 30 characters) |
|
Enter an optional description for each credit or debit entry. (up to 30 characters) Example: To correct wrong account #. Tip: You can see the description on the General Journal Listing and the General Journal Report. |
|
If the entry is a debit amount enter the amount in the Debit column. If the entry is a credit, enter the journal amount in the Credit column.. (12.2 numeric) Note: Always enter the amount as a positive number. To create a negative transaction, simply select the opposite Debit/Credit Option. |
|
|
To indicate
that you have completed the journal entry by entering all of the
associated credit and debit entries, click Save
Note: If the debit and credit amounts do not balance out so that the Journal Balance is zero (0.00), you will see the following warning:
Options:
|
Journal Balance |
Displays the sum of the debit and credit amounts according to your selection:
Note: The Journal Balance for all journal entries should be zero (0.00). However, in some cases the displayed entries may legitimately be out of balance (not zero). For example, if you select a single transaction to change or delete, the Entry Total appears out of balance. |
|
To close
the Enter Manual Transactions window, click Close
|
Editing a Manual Entry |
Only entries for journal codes MA-Manual Entry or RE-Reversing Entry, which have not been posted can be edited. To change entries for an unposted journal entry: 1. Click the field to change and make the changes following the directions for entering above. 2. Click Save
3. Repeat for other lines within the journal entry. 4. When the debits and
credits balance to zero and the Journal Balance is 0.00, the entries
are complete. Click Close
|
Deleting a Manual Entry |
Only entries for journal codes, MA-Manual Entry or RE-Reversing Entry, which have not been posted can be deleted. To delete an unposted journal entries: 1. Check the box for the entry to delete. Or to
select all entries, check the heading 2. Press [Delete] or
click Delete Selected
|