Cash Batch Table Maintenance
Use Cash Batch Table Maintenance to maintain information about batches. Batches are unique identifiers that can be used to group customer calls or cash receipt transactions together for reconciliation on journals and posting routines. You can also add a proof total to a cash batch for reconciling the payments you are entering. Cash batches are optional and they work in a similar way as billing batches but they have separate batch IDs from billing batches.
To open:
1. Click Daily Work from the Menu.
2. Click File Maintenance.
3. Click Table Maintenance.
4. Click Cash
Batch Table.
Tip: Or, use the keyboard
shortcut: [ALT] [y] [m] [t].
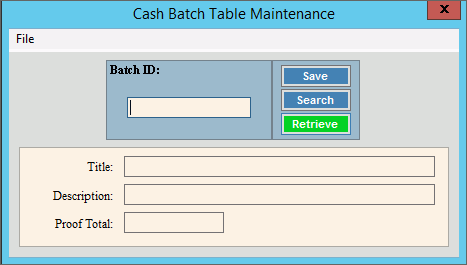
Cash Batch Table Maintenance Window Example:

Cash Batch Table Maintenance Prompts
|
|
To create
a new batch, enter a unique Batch
ID (up to 10 characters) and click Retrieve
Or, to view a batch table, enter the batch ID. Or, to find a batch table, click Search. From the Search list you can select the batch to change or delete. Keyboard shortcut: [ALT + r] |
|
|
To update the new or changed information, click Save or press [ENTER]. Keyboard shortcut: [ALT + s] |
To avoid losing data, you must save new or changed records. |
|
Enter the title of the batch table. (up to 20 characters) |
|
Enter the full description associated with the batch table. (up to 40 characters) |
|
Enter an optional proof total, if desired. This can be used when you are entering a batch of payments to make sure you have entered all payments correctly. Although the proof total is not required, you can use the proof amount to reconcile your entries. |
|
Editing a Batch Table |
1. Enter the batch
ID to change and click Retrieve
2. Position the pointer to the information that you want to change. 3. Enter the data changes. 4. To complete the edit
process, click Save
|
Deleting a Batch Table |
1.
Enter the batch ID
to change and click Retrieve
2. Click File
from the Menu,
and next click Delete. 3. At the Delete prompt,
click Proceed to delete
the record, or click Cancel
to escape from the delete routine.
|