EDIFICE Inquiry - Cash Explorer View
The Cash Explorer offers a convenient way to view, manage and process all types of cash transactions from a single screen. Types of transactions that can be processed include cash receipts, cash adjustments, ACH receipts, roll transactions, unapplied distributions, next day receipts and transactions created during the cash import routines. You can choose to view the status of all cash batches at once. Or, if you are looking for specific transactions you can easily limit the types of transactions to view by selecting the types of transactions to display. You can also filter the transactions by batches, clerk, account and balances or any other column. And, you can see both transaction summary and detail information. You have flexibility to add or change the columns of information that display, providing an easy way to look at just the information that you want.
The Cash Explorer has functions for entering, editing and removing transactions from the appropriate transaction file. There is also a journal for proofing your work and a posting function for updating the accounts with the transactions. In addition, the Cash Explorer also offers a batch control where the batch dollar amount is compared to the dollar amount of the entered transactions for the batch.
Notes:
The entry, journal and post functions are the same as those found on the traditional menus for the type of transaction that you are processing. The Cash Explorer does not replace the menu selections, but offers another way to process cash transactions.
You can see which customers have a payment plan by choosing to display the In Payment Plan field as a column.
From the EDIFICE Inquiry, click Tools and then click Cash Explorer.
EDIFICE Inquiry - Cash Explorer View Example:
EDIFICE Inquiry - Cash Explorer View Prompts
|
|
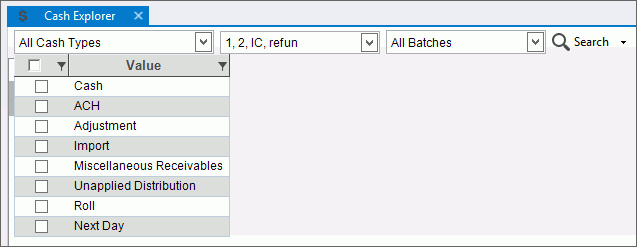
Create a List of Cash TransactionsTo start, select the desired parameters for creating a list of transactions.
|
|
Parameters |
Choose the following options:
|
|
To create a list of transactions, click Search. Note: To look for accounts that have transactions in multiple journals, click the search drop-down and then, click Load Accounts Present in Multiple Journals.
|
View and Organize TransactionsThe transactions
display in a list. Transaction details can be seen by clicking
the Plus The list of transactions can be sorted and filtered so that you only see the desired ones. The grid can be viewed: By Account and By Transaction.
Tips:
|
|
Sort List |
To sort, simply click the desired column heading. To sort in descending order, click the column heading a second time. |
Filters |
To
limit the transactions to those that meet certain criteria, click
Filter
To select the choices to use as criteria, click to check the desired box or boxes and then, click OK. Note: Advanced filtering options are available by clicking Text Filters. |
Process TransactionsTransactions can be processed in the Cash Explorer. You can enter cash transactions, print journals and post. All functions can be done by batch, which allows you to keep your work separate. Note: The entry, journal and post functions are the same as those found on the traditional menus for the type of transaction that you are processing. The Explorer does not replace the menu selections, but offers another way to process cash transactions.
|
|
|
To edit a transaction:
1. Double-click the desired transaction line and the appropriate Cash Entry screen opens with the transaction information loaded. 2. Edit the proof amount, if appropriate. 3. From the Transaction Detail List, click to highlight the desired cash transaction detail line to change. 4. Click the field that you want to change, by pressing [TAB] or clicking the field. 5. Enter the data changes. 6. Click Add
to List 7. To complete the edit
process, click Commit |
|
To remove the selected transactions, click to highlight the desired transaction and then, click Delete. The Delete prompt displays.
To delete, click Proceed. The transaction is removed from the appropriate Cash file and from the Explorer. |
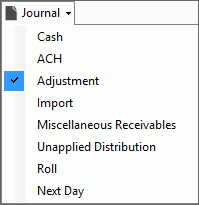
To generate the journal, click Journal and then, from the drop-down list select the type of journal to generate.
The journal screen displays for you to choose the options for generating the journal. |
|
To update the accounts and history with the transactions, click Post. Then, from the drop-down list select the type of transactions to post. The posting screen displays where you can choose the posting options. |
|
|
To enter cash transactions, click Quick Cash. The Quick Cash screen displays.
1. From the Customer
Entry Area, enter a customer ID. 2. Confirm the quick cash transaction amount or enter the amount, if applicable. 3. If the payment is made by check, enter the check number. 4. Enter a payment reference, if applicable. 5. To generate the payment transactions, click Auto Dist. or press [ENTER]. 6. Verify the payment details displayed in the list panel and if correct, click OK to commit the payments. 7. To print a receipt, click Print.
|
|
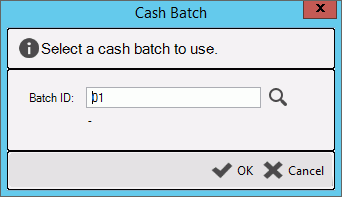
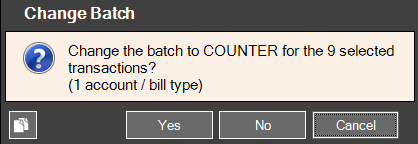
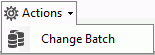
To
add or change the batch ID for a transaction, click to check the
selection box
After clicking OK, the number of transactions to change displays. Click Yes to confirm and click No to cancel.
|
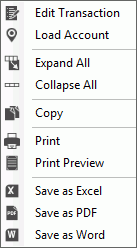
Cash Explorer View Right-click FunctionsTo see additional options, right-click. Below is an example.
|
|
|
These functions can be handy for further manipulating or formatting the data or sending copies to coworkers. In addition, Print and Print Preview functions are available.
|


 on the line.
 next to the desired column heading. The available filter
choices display. Here is an example of clerk filters.
next to the desired column heading. The available filter
choices display. Here is an example of clerk filters.


 in the first column for the desired transaction. Then, click