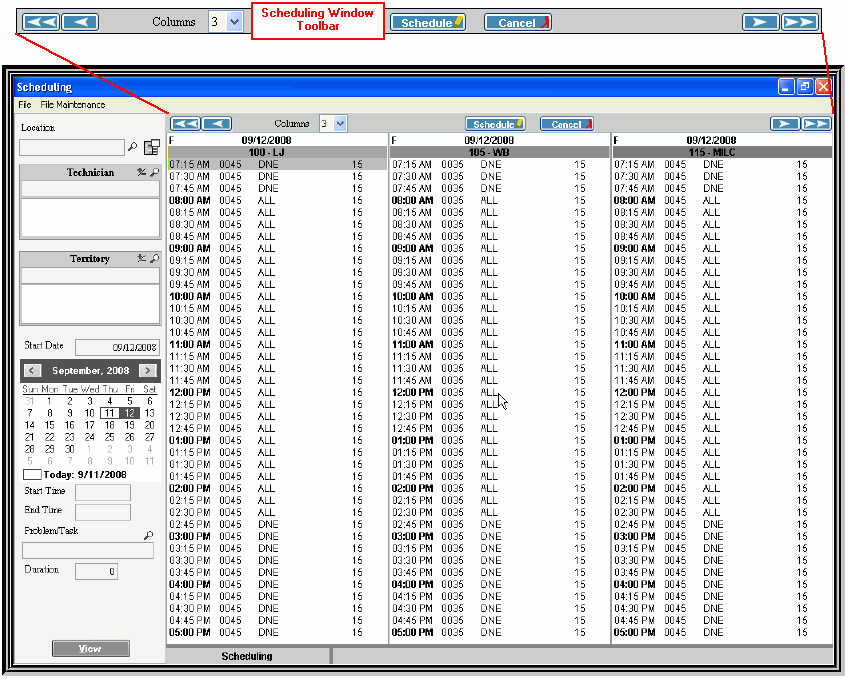
Scheduling Window - Toolbar
Use the Toolbar in Scheduling to control the display of information within Scheduling and to perform certain scheduling functions. The table following the window example describes the Toolbar for the Scheduling Window.
To display the Scheduling Toolbar, open Scheduling.
Scheduling Window - Toolbar Example:
|
Scheduling Window - Toolbar Prompts Tip: To see more information about a field, click the hyperlink for the field name. |
|
|
|
Directions:
|
|
|
To specify how many columns to display in the current Appointment Book Area, click a choice in the drop-down list. |
|
|
To schedule an appointment in the Schedule Appointment Window:
Tip: For more information, see the Schedule Appointment Window. |
|
|
To cancel an appointment in the Appointment Cancel Window, click to highlight the desired appointment time and click Cancel. Tip: For more information, see the Appointment Cancel Window. |
![]()