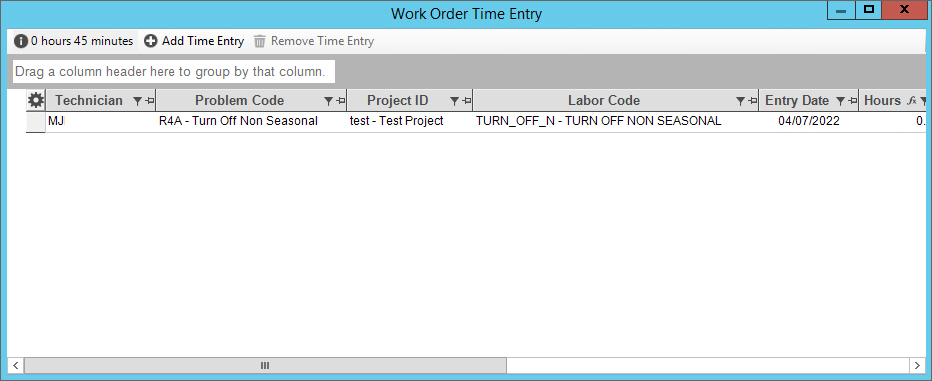
Work Order Time Entry
Use Time Entry to enter and maintain time for work done. Time can be maintained for work orders or for work that is not related to a work order. Time is also automatically generated from mobile work orders and mobile events.
Note: There is setup required for using the Time Entry function.
To open Time Entry from Work Order Entry or from the Service Management view, click Add Time Entry. The following window displays.
Work Order Entry Time Entry Example:
Time Entry Prompts |
|
Time Entry |
The following functions are available in Time Entry:
|
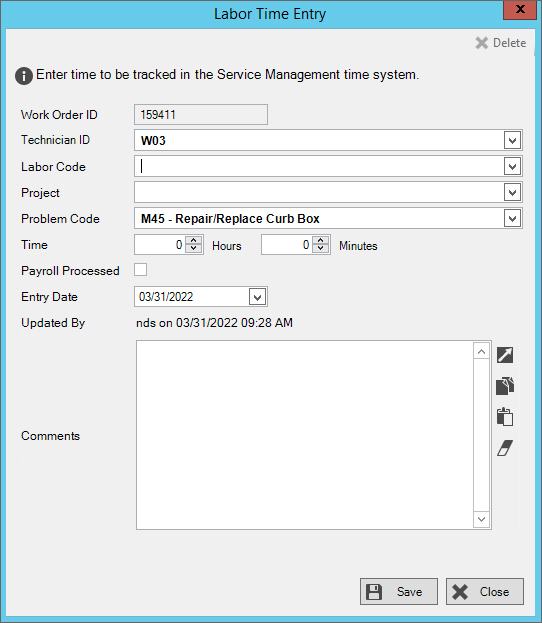
Adding Time for LaborTo add time, click Add Time
Entry
|
|
Displays from the work order if there is one associated with the labor. |
|
Displays the technician that was assigned to the work order, but this can be changed and a technician can be added if needed. |
|
To select the labor code, click a choice in the drop-down list. |
|
To specify the project to be associated with the labor, click a choice in the drop-down list. |
|
Displays the problem code associated with the work order, if applicable. This can be edited and a new problem code can be selected. |
|
Time |
Enter the minutes and hours for the amount of time for the labor or use the arrows to select the hour and minutes. |
Payroll Processed |
Note: This field is reserved for future use. |
Entry Date |
The system date displays, but can be changed to the appropriate date. Note: The user name, date and time of the labor entry is recorded and displays. |
Comments |
Comments about the labor entry can be added: The following tools are available:
|
|
To complete the entries, click Save. Or, to cancel the entries, click Cancel. |
 .
. 
 - To expand the
window for easier viewing click
- To expand the
window for easier viewing click  - Easily copy a
large block of text by highlighting the desired text and then
clicking
- Easily copy a
large block of text by highlighting the desired text and then
clicking  - Easily paste a block of text from another
source to the notes by clicking
- Easily paste a block of text from another
source to the notes by clicking  - Re-displays the notes from the last time they were saved
and clears all changes made since last save.
- Re-displays the notes from the last time they were saved
and clears all changes made since last save. -
Removes all notes currently displayed.
-
Removes all notes currently displayed. 