Customer Balance Transfer Wizard
Use the Balance Transfer Wizard to transfer all or part of a balance from one customer to another. The Balance Transfer Wizard simplifies the task of moving a partial or total customer balance to another customer. Using this wizard you can specify the customer to receive the transfer balance amount and can include interest amounts in the transfer. As part of the balance transfer wizard you will go through the steps of generating an audit journal and posting the transfer transactions to the appropriate customers accounts and to history.
Notes:
If you escape from or close the wizard before you have completed the transfer process, all transfer transactions are deleted.
When the Balance Transfer is complete, you can view and verify the transfer transactions during the Customer Inquiry - Balances Panel and the Transaction Summary Panel.
1. Set the Balance Transfer options under the wizard tab of Application Options Maintenance.
a. Select Yes for Balance Transfer Activated.
b. Enter the same code for book ID and trans rate code. In this example BALX is used.
c. Click Apply and then, click Ok.
d. Exit the Utility Billing application and restart the application to make the change take effect.
2. Define a Billing
Run Code to use during the Balance Transfer Wizard.
Note: The information
on the billing run will not be used when creating the balance transfer,
but it must exist in order to be able to enter a balance transfer transaction.
a. Enter the same value for the billing run ID as was entered for the book ID and trans rate code on the Application Options and click Retrieve. In this example it is BALX.
b. Enter Balance Transfer for the description.
c. Click Save.
3. Create Transaction
Codes for handling customer balance transfers and assign the Rate Code of BALX.
Note: To transfer a credit
balance, you will need to use a separate transaction code. For this
situation, create a credit balance transfer
transaction code using the same settings as the balance transfer
transaction code with the exception of the debit/credit field which should
be set to Debit.
a. Assign a Transaction code ID.
b. Set the rate code field to match the book ID and the transfer rate code on the application options as well as the billing run ID on the billing run table. In this example BALX is entered.
c. Enter BALANCE TRANSFER for the description.
d. For the Transaction Type, select Billing Entry.
e. For Debit/Credit, select Credit.
f. For Calculation Types, select 3-Enter Charge.
g. For Billing Code, select Miscellaneous Receivables.
h. Click Save to complete your entries.
To begin:
1. Click View
from the menu and then click
Balance Transfer.
Tip: Or, use the keyboard
shortcut: [ALT] [v] [t].
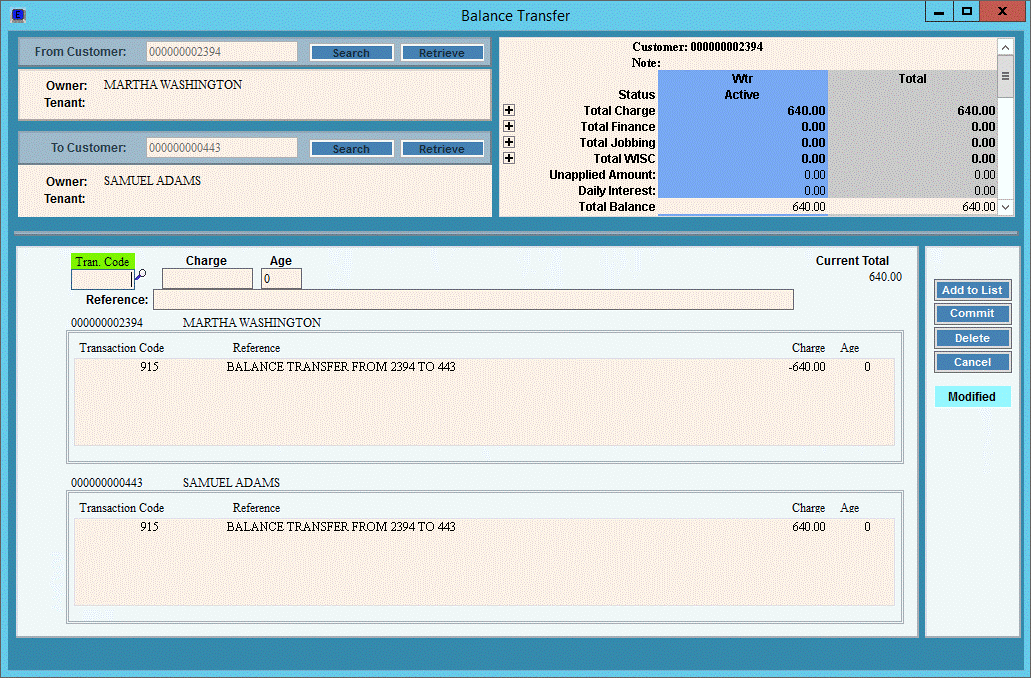
Balance Transfer Wizard Window Example:

2. Enter the From
Customer ID account and the balance for the customer
will display on the right.
Or, to Search for a customer,
click Search ![]() .
.
3. Enter the To Customer ID. Note that the To customer balances will not display here.
4. Enter the balance transfer detail:
a. Enter the transaction code for the balance transfer. For details, see the set up steps above.
b. Enter the dollar amount that you want to transfer from the customer's balance.
c. Select the customer aging balance from which the balance should be taken. Or, enter zero to use the default.
d. Enter a reference, if applicable.
5. Click Add
to List ![]() .
.
6. Click Commit
![]() to finish the entries.
to finish the entries.
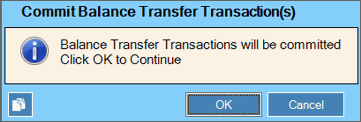
7. After clicking commit, the
following prompt displays. Click OK
![]() to continue.
to continue.

8. After the transaction is committed, the balance transfer journal opens. Select the options for printing the journal.
9. Review the transactions on the journal and confirm that the transfer amounts are correct.
10. Close journal window and the Post window displays.
11. You must post the transactions to complete the process. To post choose the services, companies and books.
12. Enter the update date and click Proceed.
13. When the post is complete, the posting
summary prints. The post summary amounts should be zero as the transfer
process should not affect the General Ledger accounts. Make sure the summary
shows Post Complete. Click
Close ![]() to close
the window.
to close
the window.
Keyboard shortcut: [ALT + s]
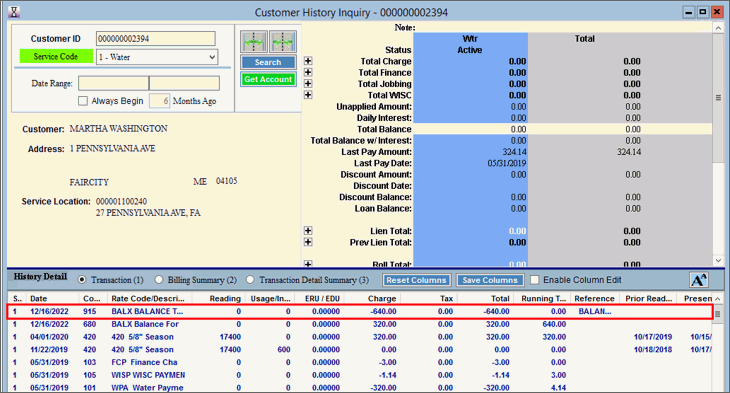
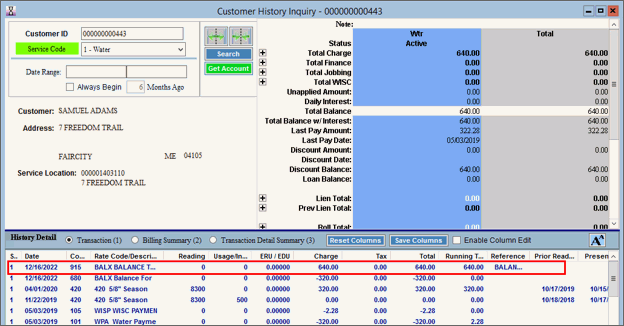
14. You can check your results by going to the Customer Inquiry or the Customer History and viewing the balance changes and associated transactions as shown below.
Customer History for the From Customer Transfer

Customer History for the To Customer Transfer
