Opening the Create Step-Down Allocation routine, click More.
-
Basic Method (from the G/L Module):
-
Click Daily Work from the Menu Bar.
-
Click Create Step-Down Allocations.
Tip: Or, use the keyboard shortcut: [ALT] [a] [c].
-
Advanced Method (from another NDS Module):
-
Click General Ledger from the Menu Bar.
-
Click Daily Work.
-
Click Create Step-Down Allocations.
Tip: Or, use the keyboard shortcut: [ALT] [g] [a] [c].
Note: To activate the General Ledger menu in another module, the G/L Application Control must be set up for the module during installation.
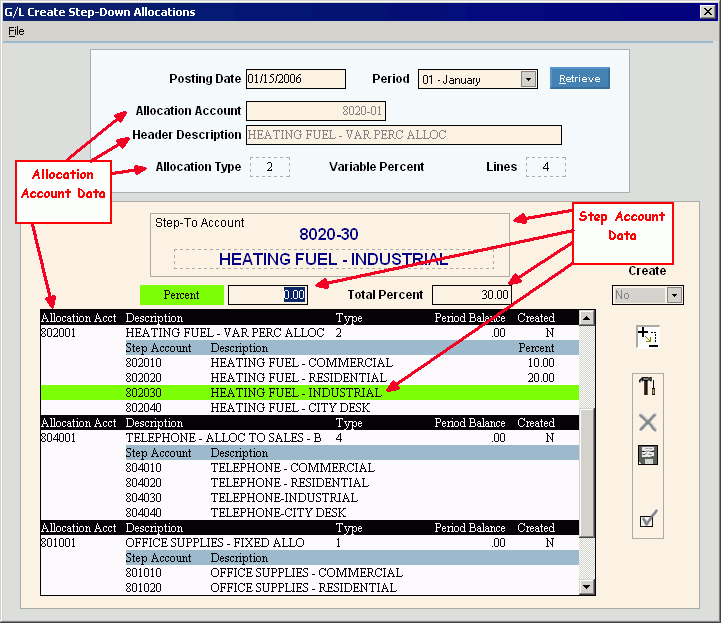
Create Step-Down Allocations Window Example:

Creating Allocation journal entry transactions for a period, click More.
Note: To create the journal entries for a Allocation Account:
-
Specify the Posting Date and Period.
-
To see the existing Allocation Accounts, click Retrieve
 .
. -
Enter data for the Step Accounts:
If the Allocation Type is 2 (Variable Percent) or 3 (Variable Amount), update the percent or amount fields for the Step Accounts:
Tip: Skip this step for Types 1 (Fixed Percent) & 4 (Based on Another Account).
-
Click to highlight the Step Account for the appropriate Allocation Account in the Account List.
-
Change the percent or dollar amount.
-
Click Save.
-
Repeat for all Step Accounts with variables.
-
Create the journal entries for the allocations:
-
Click to highlight the Allocation Account in the Allocation List.
-
In the Created field drop-down list, click Y(es).
-
To create the journal entry transactions for the Allocation Account, click Save.
-
Repeat for all Allocation Accounts that you want to process at this time.
|
Create Step-Down Allocations Window Options Tip: To see more information about a field, click the hyperlink for the field name. | |
|
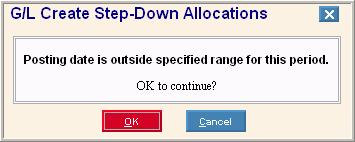
To accept the system date as the Posting Date, press [TAB]. Or, you can enter a different Posting Date. (mmddccyy - century and slashes optional) Tip: If the Posting Date is outside the Closing Date for the Period, you will see the following message:
If the entered date is correct, click OK. Or, to enter a different date, click Cancel. | |
|
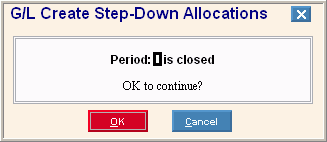
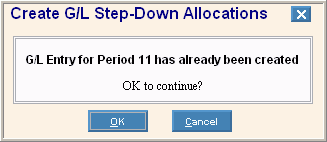
To specify the Period for the allocation journal entry transactions, click one of the Periods in the drop-down list. (predefined) Tips:
| |
|
|
To display the existing Allocation Accounts, click Retrieve, or press [ENTER]. Keyboard shortcut: [ALT + t] |
|
Allocation Account Prompts Tip: Allocation Accounts are also referred to as Allocation Accounts. | |
|
Displays the Allocation Account Number for the highlighted row. Tip: To select an Allocation Account, click to highlight the appropriate row in the Allocation List. | |
|
Displays the Step-Down Header Description for the Allocation Account Number in the highlighted row. | |
|
Displays the number and description of the Allocation Type for the highlighted Allocation Number. (predefined) | |
|
Lines |
Displays the number of Step Accounts associated with the highlighted Allocation Account. |
|
Step Account Prompts | |
|
Step-To Account |
Displays the Step Account Number and Account Description for the highlighted Step Account row. Tip: To select a Step Account Number, click to highlight the appropriate row in the Allocation List. |
|
Displays the fixed Allocation Percent defined for the highlighted Step Account. Note: This field appears only for Allocation Type 1 - Fixed Percent accounts. | |
|
Enter the variable Allocation Percent for the highlighted Step Account. Note: This field appears only for Allocation Type 2 - Variable Percent accounts. | |
|
Total Percent |
Displays the Total Allocation Percent for the Step Accounts associated with an Allocation Account. Notes:
|
|
Enter the variable Allocation Amount for the highlighted Step Account. Note: This field appears only for Allocation Type 3 - Variable Amount accounts. | |
|
Total Amount |
Displays the Total Allocation Amount for the Step Accounts associated with an Allocation Account. Tip: The Total Amount usually is the same as the Period Balance listed for the Allocation Account in the Allocation List. Note: This field appears only for Allocation Type 3 - Variable Amount accounts. |
|
Based on Another Account |
Displays the Base Account Number and Account Description for the highlighted Step Account. Note: This field appears only for Allocation Type 4 - Based on Another Account accounts. |
|
Create |
To create the journal entry transactions for the highlighted Allocation Account, click Y(es) in the drop-down list. Options:
Tip: This field is disabled when a Step Account is highlighted. |
|
Allocation List | |
|
Allocation List |
Allocation Account Row: Each Allocation Account Row includes the following fields:
Step Account Row: There can be several Step Accounts listed under each associated Allocation Account. Each Step Account Row contains the following fields:
|
|
Icons | |
|
|
To display or hide the Step Accounts that are displayed in the Allocation List, click to toggle the Expand/Collapse icon. |
|
|
The New icon is not active in this program. |
|
|
The Delete icon is not active in this program. |
|
|
Click Save...
Notes:
|
|
|
To escape from the routine:
|


