Opening Import Control Maintenance, click More.
-
Click Utilities from the Menu Bar.
-
Click Imports Menu.
-
Click Import Control.
Tip: Or, use the keyboard shortcut: [ALT] [t] [i] [c].
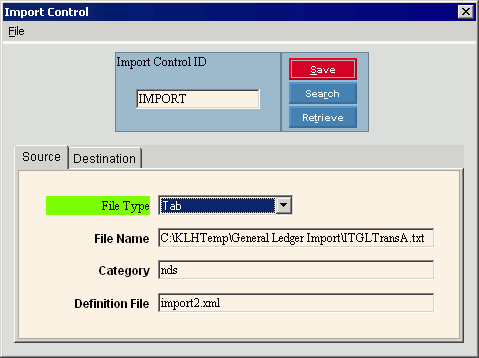
Import Control Maintenance - Source Tab Example:

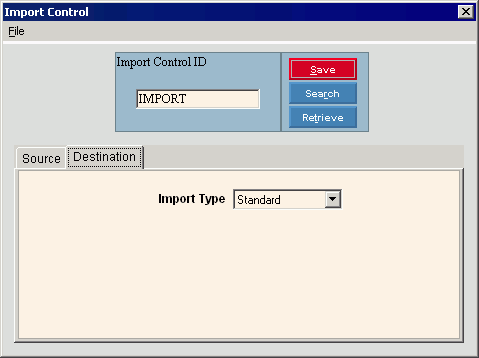
Import Control Maintenance - Destination Tab Example:

Creating a new Import Control Record, click More.
To create a new record choose one of these methods:
-
Enter the new Import Control ID and click Retrieve
 ,
or press [ENTER].
Keyboard shortcut: [ALT + t] -
Or, enter the new Import Control ID and click File from the Menu Bar; next click New.
Keyboard shortcut: [ALT] [f] [n]
Tip: To
indicate that you are building a new import control record, New  displays near the Import Control ID. Default
entries display and the first field is highlighted
to let you know you can begin entering information.
|
Import Control Maintenance Prompts Tip: To see more information about a field, click the hyperlink for the field name. | |
|
Enter the Import Control ID. (up to 20 characters) Required | |
|
|
To update the new or changed information, click Save or press [ENTER]. Keyboard shortcut: [ALT + s] |
|
To avoid losing data, you must save new or changed records. | |
|
|
To view all of the existing Import Control Records, click Search. From the Search list you can select the record to change or delete. Keyboard shortcut: [ALT + r] |
|
|
To display an existing Import Control Record, enter the Import Control ID and click Retrieve, or press [ENTER]. Keyboard shortcut: [ALT + t] |
|
Source Tab | |
|
To specify the type of file, click one of the options in the drop-down list. (predefined) | |
|
Enter the path and file name for the input file. (up to 80 characters) Tip: The path can be overridden during the Journal Import routine. | |
|
Enter the Import Category. (up to 30 characters) Note: For General Ledger, the Category is always nds (lower case) unless otherwise specified by NDS Technical Support. | |
|
Enter the name of the Import Definition File, which is an XML file that defines the layout of the fields in the import file. (up to 30 characters) Note: For General Ledger, the Definition File is always import2.xml unless otherwise specified by NDS Technical Support. | |
|
Destination Tab | |
|
To specify the Import Destination Type, click one of the options in the drop-down list. (predefined) Note: For General Ledger, the Import Type is always Standard unless otherwise specified by NDS Technical Support. | |
Editing an existing Import Control Record, click More.
 CAUTION: To
avoid losing data, you must save new or changed records.
-
To display the record to be changed, enter the Import Control ID and click Retrieve
 , or press [ENTER].
Keyboard shortcut: [ALT + t]
Tip: If you do not know the Import Control ID, you can click Search to see a list of Import Control Records.
 -
To position the pointer to the information that you want to change, press [TAB] or click the field using the mouse.
-
Enter the data changes.
-
To complete the edit process, click Save
 , or press [ENTER].
Keyboard shortcut: [ALT + s]
Deleting an existing Import Control Record, click More.
-
To display the record to be deleted, enter the Import Control ID and click Retrieve
 , or press [ENTER].
Keyboard shortcut: [ALT + t]
Tip: If you do not know the Import Control ID, you can click Search to see a list of Import Control Records.
-
Click File from the Menu Bar, and next click Delete.
Keyboard shortcut: [ALT] [f] [d] -
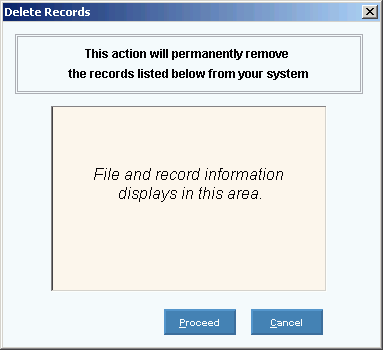
At the Delete Records prompt, click Proceed to delete the record, or click Cancel to escape from the delete routine.
Example:
Note: After you click Proceed, you will see the following message on the Status Bar.
Journal Import File Sample(s), click More.
Journal Import File Sample:
