|
Confirm that the invoice transactions on the PR
A/P Invoice Transaction Journal are correct before running the PR
F/A Invoice Post.
|
PR F/A Invoice Post Instructions
Use the PR F/A Invoice Post process to update Accounts Payable in the Fund Accounting module with the invoice transactions for vendors to be paid. The invoice transactions are originally generated by one of three programs: Payroll Post, Post to Vendor Transaction Files, or Fringe Distribution Post.
For additional information, click More.
Tips:
For more information about running reports, see Print View.
The report is available in the following formats:
132-Column Page Width: Set during System Parameters at the Print tab.
This program is applicable only if you use the Vendor Invoices and Checks feature. The Company Control Option for Create Automatic Vendor/Invoices Checks must be set to 1 - Single Post or 2 - Dual Post.
This program processes invoice transactions for Deductions and Fringes that are coded with a Vendor Payment Method of (I)nvoice.
For more information, refer to the topic Understanding Vendor Invoices and Checks.
For information about the timing for running Payroll Fund Accounting programs, refer to the Payroll Runbook.
|
Confirm that the invoice transactions on the PR
A/P Invoice Transaction Journal are correct before running the PR
F/A Invoice Post.
|
Directions:
To see directions for...
Opening the PR F/A Invoice Post routine, click More.
Click Payroll from the Menu Bar.
Click Vendor Invoices and Checks.
Click Fund Accounting A/P.
Click
PR F/A Invoice Post.
Or, use the keyboard
shortcut: [ALT]
[p] [v] [f] [p].
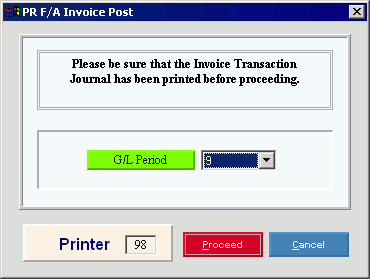
PR F/A Invoice Post Window Example:

Choosing the selections at the prompt window, click More.
|
PR F/A Invoice Post Prompt Options Tip: To see more information about a field, click the hyperlink for the field name. | |
|
In the drop-down list, click the General Ledger Period Number for the posted entries. (1 - 13) | |
|
Printer |
Displays the default printer number. For more information, see Printing Options. |
|
|
To run the routine and generate the report, click Proceed, or press [ENTER]. Keyboard shortcut: [ALT + p] |
|
|
To escape from the routine:
|
Report Sample(s), click More.