Opening Fringe Master Maintenance, click More.
1. Click Payroll from the Menu Bar.
2. Click Miscellaneous File Maintenance.
3. Click Fringe
Master.
Or, use the keyboard
shortcut: [ALT] [p]
[m] [f].
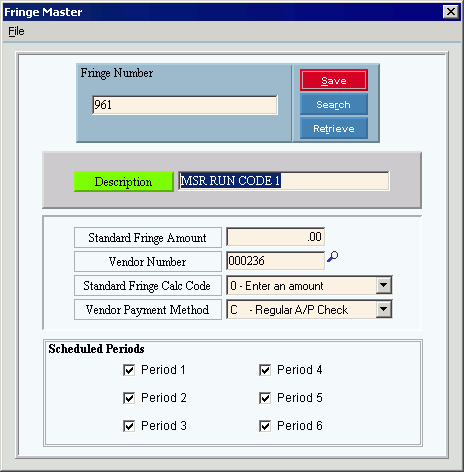
Fringe Master Maintenance Window Example:

Creating a new Fringe, click More.
Fringe Master Maintenance Prompts
|
|
Enter a new or existing Fringe Number. (up to 3 characters) Required To create a new Fringe choose one of these methods:
Tip: To
indicate that you are building a new Fringe Benefit, New Tip: For a list of standard (reserved) Fringe Numbers, see the Standard Fringe Numbers and Deduction Codes topic. |
|
|
To update the new or changed information, click Save or press [ENTER]. Keyboard shortcut: [ALT + s] |
To avoid losing data, you must save new or changed fringe benefits. |
|
|
You can use Search to view all of the existing fringe benefits. From the Search list you can select a fringe to change or delete. Keyboard shortcut: [ALT + r] |
|
To display an existing fringe benefit, enter the Fringe Number and click Retrieve or press [ENTER]. Keyboard shortcut: [ALT + t] |
Enter the fringe benefit description. (up to 25 characters) |
|
Enter the standard Fringe Amount that you want to appear when you add a new fringe benefit to an employee during Employee Fringe Maintenance. You can override this value. (5.2 numeric) Tips:
|
|
Enter the Vendor Number. (up 6 characters) Tip: Always enter a Vendor Number if the Vendor Payment Method is I, C, or CN. |
|
To specify how fringe benefits are calculated, click one of the codes in the drop-down list. Options:
Tip: You can override the code when you assign a fringe to an employee during Employee Fringe Maintenance. |
|
Click one of the Vendor Payment Methods in the drop-down list. Options:
|
|
Specify which of the six Scheduled Periods are applicable to this Fringe Number: |
|
Editing an existing Fringe, click More.
![]() CAUTION:
To avoid losing data, you must save new or changed Fringes.
CAUTION:
To avoid losing data, you must save new or changed Fringes.
1. To display the record
to be changed, enter the Fringe
Number and click Retrieve
![]() or press [ENTER].
or press [ENTER].
Keyboard shortcut: [ALT
+ t]
Tip: If you do not know the Fringe Number, you can
click Search
![]() to see a list
of fringe benefits.
to see a list
of fringe benefits.
2. To position the pointer to the information that you want to change, press [TAB] or click the field using the mouse.
3. Enter the data changes.
4. To complete the edit
process, click Save
![]() or press [ENTER].
or press [ENTER].
Keyboard shortcut: [ALT
+ s]
Deleting an existing Fringe, click More.
1. To display the record
to be deleted, enter the Fringe
Number and click Retrieve
![]() or press [ENTER].
or press [ENTER].
Keyboard shortcut: [ALT
+ t]
Tip: If you do not know the Fringe Number, you can
click Search
![]() to see a list
of Fringes.
to see a list
of Fringes.
2. Click File
from the Menu Bar,
and next click Delete.
Keyboard shortcut: [ALT]
[f] [d]
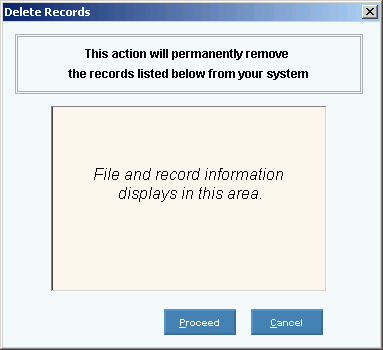
3. At the Delete Records
prompt, click Proceed
to delete the record, or click Cancel
to escape from the delete routine.
Example:

Note: After you click Proceed,
you will see the following message on the Status
Bar.
![]()