Enter Manual Transactions Window Prompts
To create a new journal entry with the associated debit and credit transactions:
1. Select the Period in the drop-down list.
2. Enter the Entry Date or press [TAB] to accept the system date default value.
3.
Click Continue  .
.
4. Enter the Reference (required).
5. Select the Journal Code (MA or RE).
6.
To enter the first transaction, click New
![]() or press [ENTER].
or press [ENTER].
7. Enter the debit and credit transactions.
8.
When the debit and credit amounts balance so that the Journal
Balance is zero (0.00), click Completed
![]() .
.
Tip:
To indicate that you are creating a new journal entry, New ![]() displays near the Period. Default entries display and the
first field is highlighted
to let you know you can begin entering information.
displays near the Period. Default entries display and the
first field is highlighted
to let you know you can begin entering information.
Journal Entry Selection Criteria
To specify which Period to use for posting the journal entry transactions, select the Period in the drop-down list.
Required
Note: If the Period Open Option, which is set during Period Descriptions Maintenance, specifies that the period is not open, then you will see the following message:
![]()
Either correct the specified Period, or change the Period Open Option.
To accept the default system date, press [TAB], or you can enter a different date, which becomes the Posting Date for the journal entry transactions. (mmddccyy - century and slashes optional)
Required
Notes:
If you enter an Entry Number to be maintained, the Posting Date is replaced by that of the Entry Number.
For transactions to older periods, you can still use today's date. Or you can use the date of the source document. It is your choice. General Ledger uses the Period, not the date when posting the transactions.
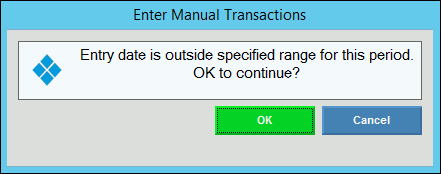
If the Check Closing Date Option is set to Y(es) during Application Option Parameters, and you enter a date that falls after the Period Closing Date, you will see a warning.

To enter the transaction, click OK. Or, to clear the window and start over without entering any transactions, click Cancel.
If you want to change a transaction for an existing journal entry, enter the Entry Number. The program retrieves the transaction and displays it in the Transaction List. (5.0 numeric)
Note: If you change the amount on a single transaction, your journal entry may be out of balance. Be sure to make the changes necessary to bring it back in balance.
Tips:
You can skip this field when adding transactions for a new journal entry.
To Search for a list of unposted MA and RE journal entry transactions for the specified Period, click Search
 .
.
Keyboard shortcut: [CTRL + f]If you enter an invalid Entry Number, you will see the following message;


After entering the selection criteria above, click Continue to enter the journal entries.
Keyboard shortcut: [ALT + c]
Enter a reference to uniquely identify the journal entry. All transactions for this journal entry will share the same reference. (up to 20 characters)
Required
Examples: You can develop your own system of reference identifiers, such as the operator's initials, a bank account number, a journal entry number, or any other unique numbering system.
Tips:
You can see the Reference on the Journal Inquiry, General Journal Listing, and the General Journal Report.
To change the Period or Date, press [CTRL + x] to clear the window.
Click a Journal Code in the drop-down list. (predefined)
MA - Manual Entry
RE - Reversing Entry
Tip: RE entries are reversed the following period by the Create Reversing Entries routine.
Required
Transactions
Enter the Account Number for the transaction. (format varies)
Required
Tips:
To Search for a list of accounts, click Search
 .
.
Keyboard shortcut: [CTRL + f]If you enter an invalid Account Number, the following message displays:

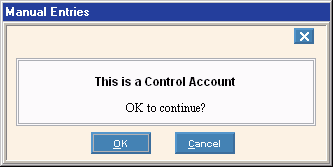
If you enter a Control Account, the following warning displays:

Options:OK - To enter the transaction for a Control Account, click OK or press [ENTER].
Tip: The transaction will appear on the General Journal Exception Report.
Keyboard shortcut: [ALT + o]Cancel - To cancel the transaction and re-enter a different Account Number, click CANCEL.
Keyboard shortcut: [ALT + c]
The Account Description displays for your reference. (up to 30 characters)
Enter an optional Transaction Description for each credit or debit transaction. (up to 30 characters)
Example: To correct wrong account #.
Tip: You can see the Transaction Description on the General Journal Listing and the General Journal Report.
Enter the Transaction Amount for the credit or debit. (12.2 numeric)
Note: Always enter the Transaction Amount as a positive number. To create a negative transaction, simply select the opposite Debit/Credit Option.
Click the Debit/Credit Option in the drop-down list for the Transaction Amount. (predefined)
Tips:
For the first transaction, the Debit/Credit Option defaults to Debit. Then it switches to Credit for the second transaction. The default continues to switch back and forth between Debit and Credit.
Occasionally, account adjustments require that a debit transaction be entered to an account the typically carries a credit balance or vice versa. You can change the Debit/Credit option as required.
![]()
To start the first transaction, click New or press [ENTER].
Tip: Saving a previous transaction automatically sets you up to enter the next transaction, so you do not have to click New after you start the first transaction.
![]()
To delete a transaction:
1. Click to highlight the transaction in the Transaction List.
2. Click Delete
![]() .
.
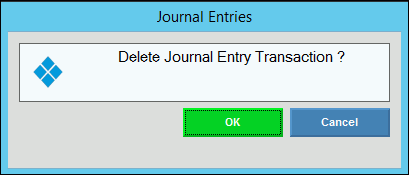
3. The following warning
message displays:

To delete the transaction, click OK or press [ENTER].
Keyboard shortcut: [ALT + o]To return to the window without deleting the transaction, click Cancel.
![]() Warning:
If deleting a transaction causes the debits and credits
to fall out of balance, you should correct the transactions so
that the total Journal Balance is zero (0.00).
Warning:
If deleting a transaction causes the debits and credits
to fall out of balance, you should correct the transactions so
that the total Journal Balance is zero (0.00).
![]()
To save the changed values for a transaction, click Save or press [ENTER].
![]()
To indicate
that you have completed the journal entry by entering all of the
associated credit and debit transactions, click Completed
![]() .
.
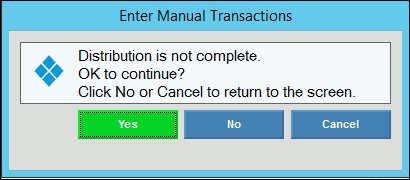
Note: If the debit and credit amounts do not balance out so that the Journal Balance is zero (0.00), you will see the following warning:

Options:
Yes - Allow the unbalanced journal entry. The transactions will appear on the General Journal Exception Report.
Keyboard shortcut: [ALT + y]No - Do not finish the journal entry. Return to the window to finish entering balancing transactions, so the debit and credit amounts add up to zero.
Keyboard shortcut: [ALT + n]Cancel - Same as No.
Keyboard shortcut: [ALT + c]
Total Debit
Displays the sum of the debit Transaction Amounts in the Transaction List, for your reference.
Total Credit
Displays the sum of the credit Transaction Amounts in the Transaction List, for your reference.
Journal Balance
Displays the sum of the debit and credit Transaction Amounts according to your selection:
Journal Totals: Displays the total of all journal entries for the Period.
Entry Totals: Displays the totals only for the journal entry transactions displayed in the Transaction List.
Note: The Journal Balance for all journal entries should be zero (0.00). However, in some cases the displayed entries may legitimately be out of balance (not zero). For example, if you select a single transaction to change or delete, the Entry Total appears out of balance.

or

To change the Journal Balance displayed:
To display the total of all of the journal entries for the Period, click Show Journal Totals.
To display the total of only the displayed journal entry transactions, click Show Entry Totals.
Tip: Only one button displays at a time. They toggle back and forth each time you click one.
Transaction List
The Transaction List includes the line items for the debits and credits that comprise this journal entry. Each row in the Transaction List includes the following fields:
Entry - Entry Number
Code - Journal Code
Account # - Account Number
Description - Transaction Description
Debit - Debit Transaction Amount
Credit - Credit Transaction Amount
Tip: To change a transaction in the list, click to highlight the row, and then make the change.
![]()
To close the Enter Manual Transactions window:
Editing a Manual Entry
![]() CAUTION: To
avoid losing data, you must save new or changed records.
CAUTION: To
avoid losing data, you must save new or changed records.
Tip: You can not edit posted journal entries.
To change existing transactions for an unposted journal entry:
1. Display the transaction to be deleted:
Click to highlight the row in the Transaction List.
Or, to select a previously entered (unposted) transaction:
Click the Period in the drop-down list.
Tip: Entry Date is not required, because the Transaction Date is retrieved.Enter the Entry Number or click Search
 to see
a list of transactions for the Period specified. Double-click
the appropriate transaction to display it in the Transaction
List.
Keyboard shortcut: [CTRL + f].
2. Make the change to the transaction.
3. Click Save
![]() .
.
4. Repeat for other transactions within the journal entry.
5. When the debits and
credits balance to zero so that the Journal Balance is 0.00, click
Completed ![]() .
.
Deleting a Manual Entry
Tip: You can not delete posted journal entries.
To delete an unposted transaction:
1. Display the transaction to be deleted:
Click to highlight the row in the Transaction List.
Or, to select a previously entered (unposted) transaction:
Click the Period in the drop-down list.
Enter the Entry Number or click Search
 to see
a list of transactions for the Period specified. The
program retrieves the transaction and displays it in the Transaction
List.
Keyboard shortcut: [CTRL + f].Click Continue
 .
.
2. Click Delete
![]() .
.
3. You will see the following
warning message:

Delete Options:
OK - Delete the transaction.
Keyboard shortcut: [ALT + y]
Note: You will see the following message on the Status Bar.

Cancel - Do not delete the transaction and return to the window.
Keyboard shortcut: [ALT + n]
![]() Warning: If deleting
a transaction causes the debits and credits to fall out of balance,
you must correct the transactions so that the Journal Balance
is 0.00.
Warning: If deleting
a transaction causes the debits and credits to fall out of balance,
you must correct the transactions so that the Journal Balance
is 0.00.