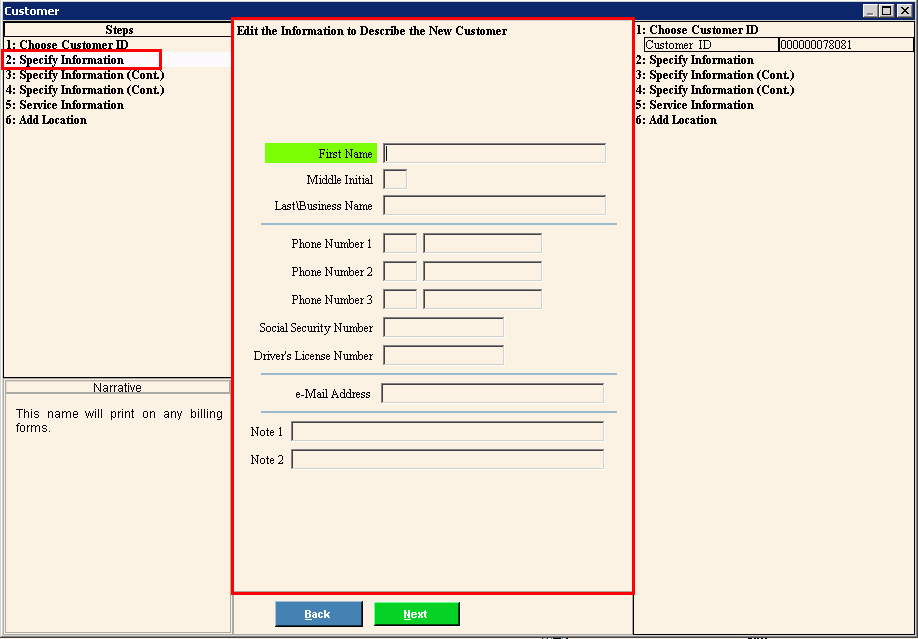
Create Customer Step 2 Window
Use the Create Customer Step 2 window to enter the customer's name, phone numbers, social security number, customer notes and email address, if applicable.
Tip: For general information about using wizards, see the Wizard - Introduction.
To display the Create Customer Step 2 window:
1. From the Enhanced Inquiry, click Tools and then, click Wizards.
2. In the Create section, click Customer.
3. Click ![]() Next.
Next.
Create Customer Step 2 Data Entry Panel Example:

Data Entry Panel - Create Customer Step 2 Prompts
|
|
Enter the customer's first name. (up to 15 characters) |
|
Enter the customer's middle initial. (up to 2 character) |
|
Enter the customer's last name or the complete name of their business. (up to 35 characters) |
|
To
enter the customer primary contact phone number, enter the 3-digit
area code, then press [TAB]. |
|
Enter
a second phone number for the customer, such as a cell phone number
if applicable. |
|
Enter
a third phone number for the customer, such as a work phone number
or backup contact phone number, if applicable. |
|
Enter the customer's social security number. (up to 11 characters) |
|
Enter the customer's driver's license number, if applicable. (up to 20 characters) |
|
Enter the customer's e-mail address, if applicable. (up to 100 characters) |
|
Note 1 and 2 |
Enter 1 - 2 lines of notes pertaining to the customer or their contact information, if applicable. (up to 50 characters) Note: You can view the customer notes during the Customer view of the Inquiry. For more information, see Customer Notes. |
|
To complete the entries and continue to the next window, click Next. Keyboard shortcut: [ALT + n] To continue to the next window, click here. |