Enhanced Import Readings/Create Transactions
Use Enhanced Import Readings/Create Transactions to import a specified meter reading file and create import transactions. This routine uses a meter import ID, import source, account allow meter import setting, as well as, the meter information to generate the customer import transactions. The imported information is checked for errors and problems. The Status window displays the progress of the routine and you can see which books are being imported to ensure that you are importing the proper file.
Import Readings/Create Transactions is a 2-part process.
In part 1, the information is imported. If there are warnings or exceptions, the warnings/errors report can be printed so that items can be researched and billed properly.
If the import phase is successful the second part consists of reviewing the readings and creating import billing transactions. If exceptions are generated, print this as you will need to make sure these accounts are billed properly.
Notes:
There are 2 versions of the Import Readings/Create Transactions. These directions are for the enhanced version. To see directions on the classic version, see Import Readings/Create Transactions.
The Import Readings/Create Transactions process is controlled by the source ID, meter import ID and the meter dates ID.
The meter import settings control certain aspects of the import process:
If the meter import All Connections option is selected, billing transactions are generated for all connections associated with the account including their meters, meter trailers, components and location reference type services. Or, if Imported is selected, then only the reading for the account is billed.
If the meter import Bill Whole Book option is selected, all customers for the given book, even those without a reading will be processed except when the connection read code is set to do not read. The added customers without readings would have only flat rate transactions or default component usages could be attained, if applicable. If you change a customer to a different book and you do not want that customer to be imported, make sure the meter import ID's Bill Whole Book option is not selected.
The zero readings setting on the meter import controls how zero readings are handled during the import process.
For help with resolving any errors during Import Readings/Create Transactions, contact NDS Support at 1-800-649-7754.
Note: To see an example of the report, click Enhanced Import Readings/Create Transactions Exceptions Report Sample.
To open:
From the Export/Import Control panel, click Import
Readings/Create Transactions ![]() .
.
Or, click Daily Work from the Menu,
click Billing, click
Meter Communications, and
then click Import Readings/Create
Transactions.
Or, use the keyboard
shortcut: [ALT] [y [b] [m]
[i].
Import Readings/Create Transactions Window Example:

Import Readings/Create Transactions Prompts |
|
Import Step - Import Settings |
|
The last entered source ID displays and it can be edited. (up to 20 characters) Or, to search for a source ID, click
|
|
The last entered meter import ID displays and it can be edited. (up to 20 characters) Or, to search for a meter import ID,
click |
|
The source file name assigned to the source ID displays. Click Browse
Tip: The type of meter reading transactions for the Meter Import ID displays. The last imported field displays the date and time of the last successful import. |
|
The
last entered meter dates ID for the billing cycle displays. To
confirm that proper meter service dates are entered, click Edit Or, if this is the first time running the import, enter the meter import dates ID. Or, to search for a meter dates ID,
click Meter Service Dates:
|
|
|
To begin the import process, click Import. Keyboard shortcut: [ALT + i] Or, to escape from this routine without
importing readings, click Close
|
Import Completion |
When the import finishes, the message File Import Successful displays. The book numbers that were imported will be listed at the top of the window. Note: If exceptions are found during the import, they will be listed in the warnings/errors area and can be printed by clicking the Print Warnings/errors link. Print this and use it later in the billing process to ensure that all accounts are billed properly. If you need help in resolving these errors, please contact NDS Support at 1-800-649-7754. |
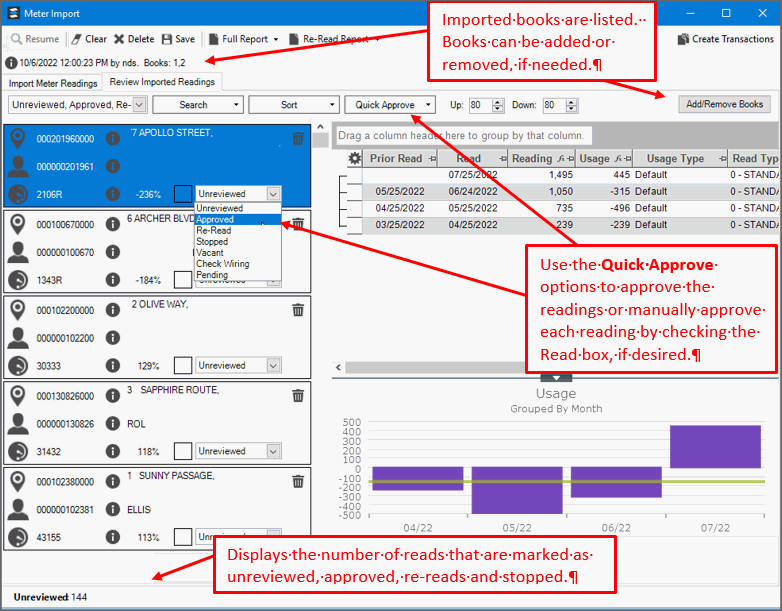
Review Imported Readings StepAfter the readings are imported, click the Review Imported Readings tab. Here you have the option of reviewing, editing and approving the readings before billing transactions are created. To re-arrange the list of readings in the left pane, click Sort. The right pane shows reading history for the highlighted connection and a usage chart. You can use Search to jump to an account or meter.
|
|
|
If a book or books should be added or removed so that you can process them later, click Add/Remove Book and then select the appropriate books from the drop-down list. |
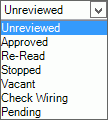
Approve All Readings Options
|
Use Quick Approve options to quickly approve all readings or readings can be reviewed individually:
Note: If the Approve all within Variance option is selected, the Reading Variance is calculated by taking the current usage per day minus historical usage per day and dividing this number by the historical usage per day. Then, multiply result by 100 to display the value as a percentage.
Note: If the number
of current or historical days is < 15 or > 1000 this calculation
is used: |
Managing Individual Readings
|
The following options are available for Individual readings. Please note that variances are not calculated and compared when approving individual readings.
Note:
To search for an individual reading, click Search
|
Edit Readings |
Reading values can be edited. If a value is edited, the usage type is changed from default to manual. Or, to create an estimate reading, select system for usage type. The system will pull in an estimate based on history and the estimation model. Individual readings can be removed
by clicking Trash Click Save
|
|
When ready, click Create Transactions in the upper right corner. Create Transactions will look at each customer's billing setup and create transactions based on their present reading from the import file and several factors on the account such as the transaction profile and multiplier. Another exception report may be generated as the create transactions step completes. Print this, as you will need to make sure the listed accounts are billed properly. |
Additional Functions |
|
|
If
you can't review the entire import at one time, you can click
Save |
|
To print a list of meters that are marked as needing to be re-read, use the Re-read Report. Or, to list the entire import file, use the Full Report. |
![]()
 to
to  .
. .
.


 to save all changes
made to approvals.
to save all changes
made to approvals.


