Customer Add Message Code Message Wizard
Use the Customer Add Message Wizard to add standardized messages to the account. Messages can be a single line or multiple lines. For example, if you are not using the Service Management application to track service calls, you can track customer service calls by assigning a message to the account. You can also designate that the message should be an alert that displays when the account is loaded so that you are quickly notified. You can view the customer messages from Messages view of the Inquiry.
Tip: Customer messages are different than customer notes. Messages are defined messages and notes are free-type notes for a customer.
To open:
From the Messages view of the Inquiry, click Add Message.
Or, from the Wizards view, click Message Code Message.
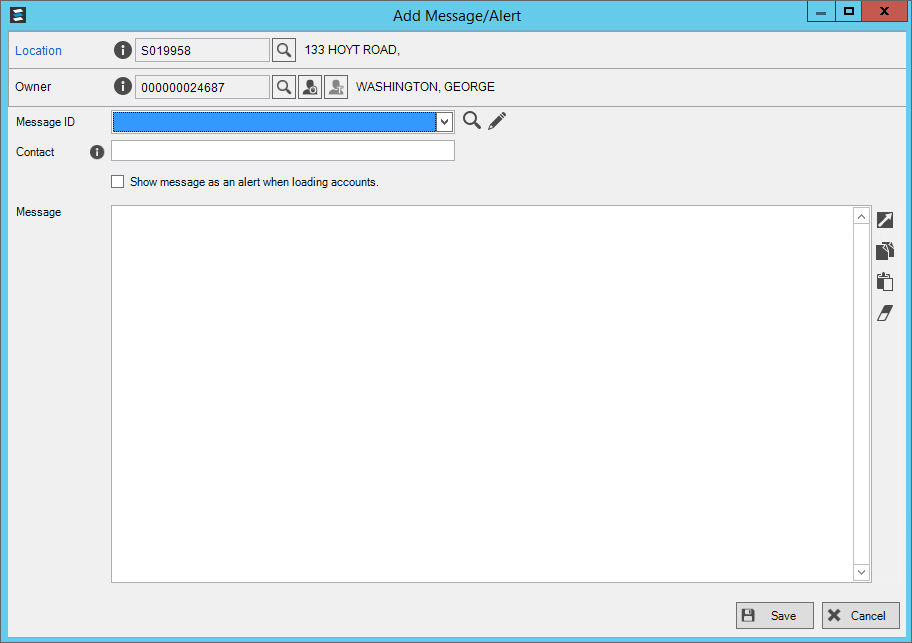
Customer Add Message Wizard Window Example:
Customer Add Message Wizard Prompts |
|
If an account is loaded in the Inquiry, the location and the account that the messages pertain to display. The account is identified as a tenant or an owner. Or, you can enter the location or account
for which to display the messages. To look for a location
or account, click Search |
|
Message ID |
To select
a message, click the desired message in the drop-down list or
click Search To create a new message to add to the
account, click Edit Required |
Contact |
Enter the name of the contact person if there is a person that prompted the interaction. This is optional. |
Show message as an alert when loading accounts |
To show this message as an alert when the account is displayed, click to check this box. To omit this message from the account alerts, leave this box blank. |
Notes |
Notes about any interaction with the account can be added, using the following tools:
|
|
To complete the entries, click Save. Or, to cancel the entries, click Cancel. |
Editing a Customer Message |
|
Deleting a Customer Message |
|
![]()
 .
. .
.  - To expand the
window for easier viewing click
- To expand the
window for easier viewing click  - Easily copy a
large block of text by highlighting the desired text and then
clicking
- Easily copy a
large block of text by highlighting the desired text and then
clicking  - Easily paste a block of text from another
source to the notes by clicking
- Easily paste a block of text from another
source to the notes by clicking  - Re-displays the notes from the last time they were saved
and clears all changes made since last save.
- Re-displays the notes from the last time they were saved
and clears all changes made since last save. -
Removes all notes currently displayed.
-
Removes all notes currently displayed. 